I've been working on a new cabinet design with swappable panels. (I know.) I can't get to the CNC right now, so I'm taking this time to work on some of the individual controls. One of the top games on my list is Assault. And then of course Vindicators goes with it. And then a whole host of dual trigger stick games.
A while back I managed to obtain some real Spy Hunter trigger handles from Bob Roberts. They are identical to the Assault handles with the addition of a thumb button. Perfect for Vindicators and many others. I bought some of those cheap trigger sticks, and set about figuring out how to attach my real handles. I 3D printed some adapters, but I hated it. The sticks felt cheap. They wobbled, the anti-rotation was loose. The hollow 10mm shaft barely allowed for the wires to get through.

These are junk. But, they're cheap...
So, I started doing more research on how the anti-rotation worked in real trigger sticks, like the ones in Assault. Turns out they're of the flexible centering rubber thing variety, and not with a spring. That was all I needed to know. A flexible center could also be used for anti-rotation with a couple of screws. I sent back those junk sticks and got to work.
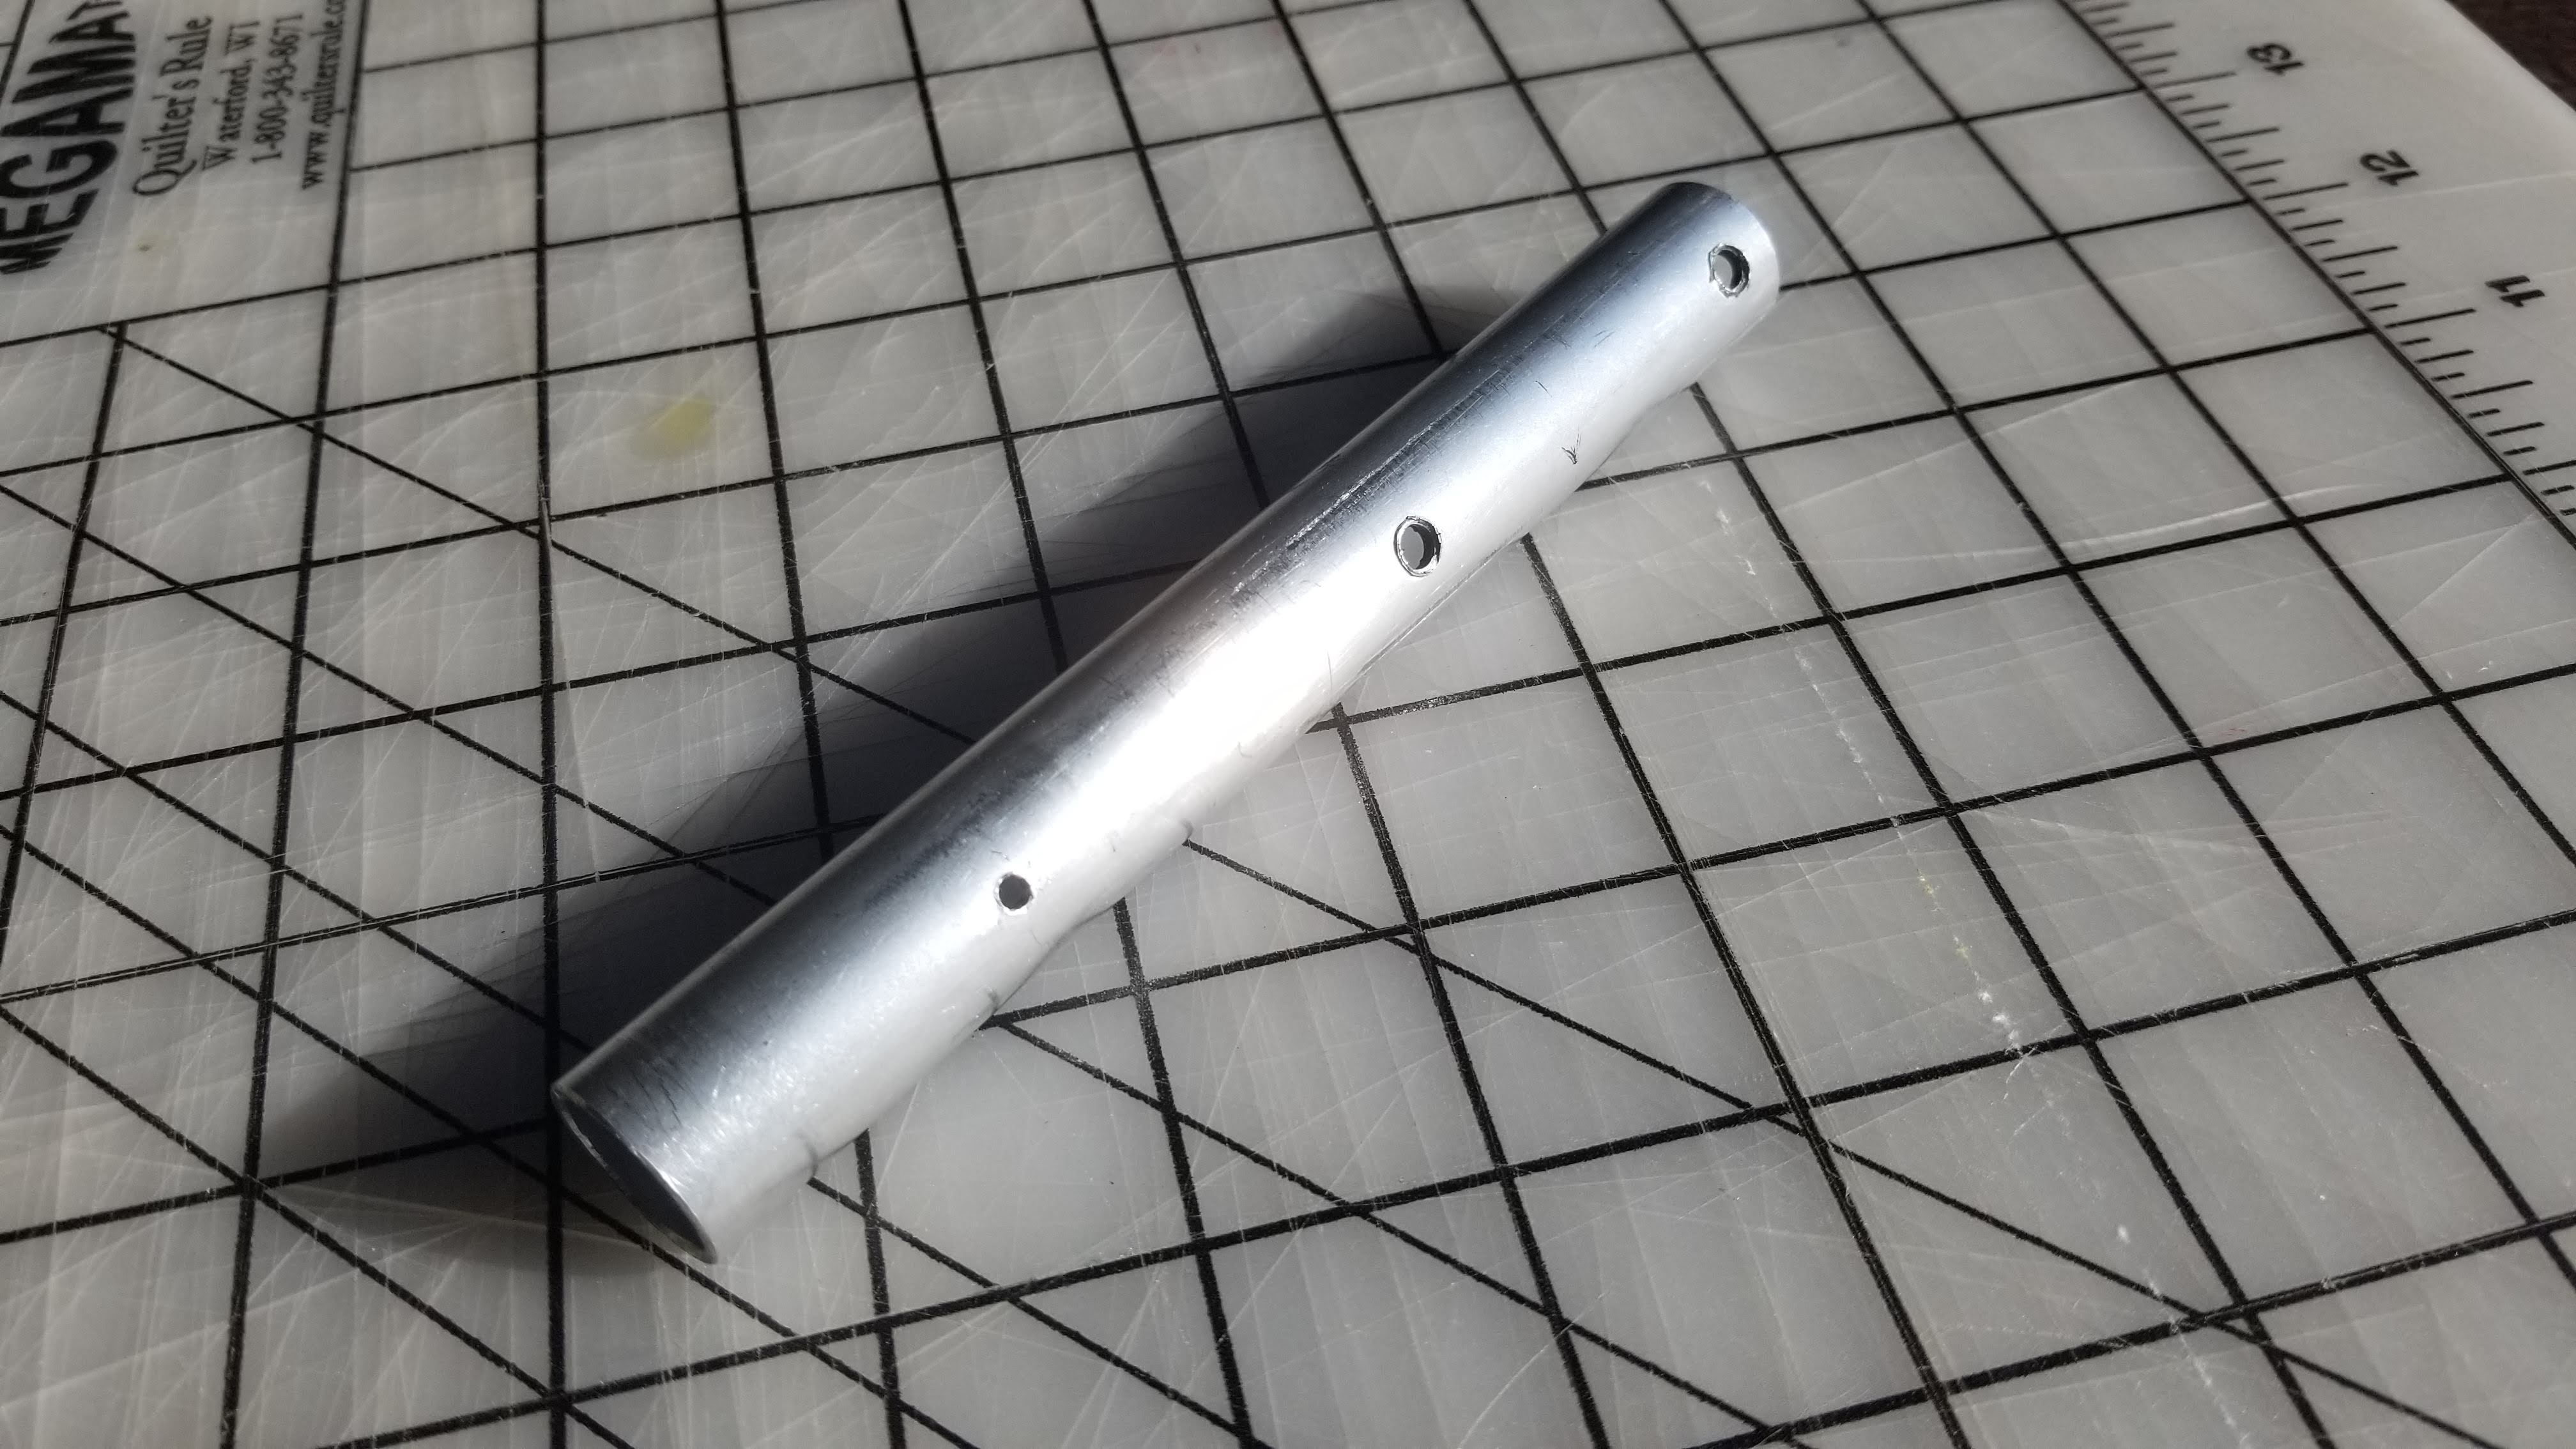
The handles mount on a 19mm (3/4) tube. I ordered some 19mm OD aluminum tube, with a 15mm ID, and another thats 10mm ID. I planned to tap the holes to directly screw the handles in place. If the thin wall wouldnt hold threads, I could go with the thick. Cut the tube to 150mm because Amazon sold it in 300mm lengths and I wanted to get maximum use out of it. The tall handle combined with the short tube meant I had to make sure there would be enough below the panel to actuate the switches.
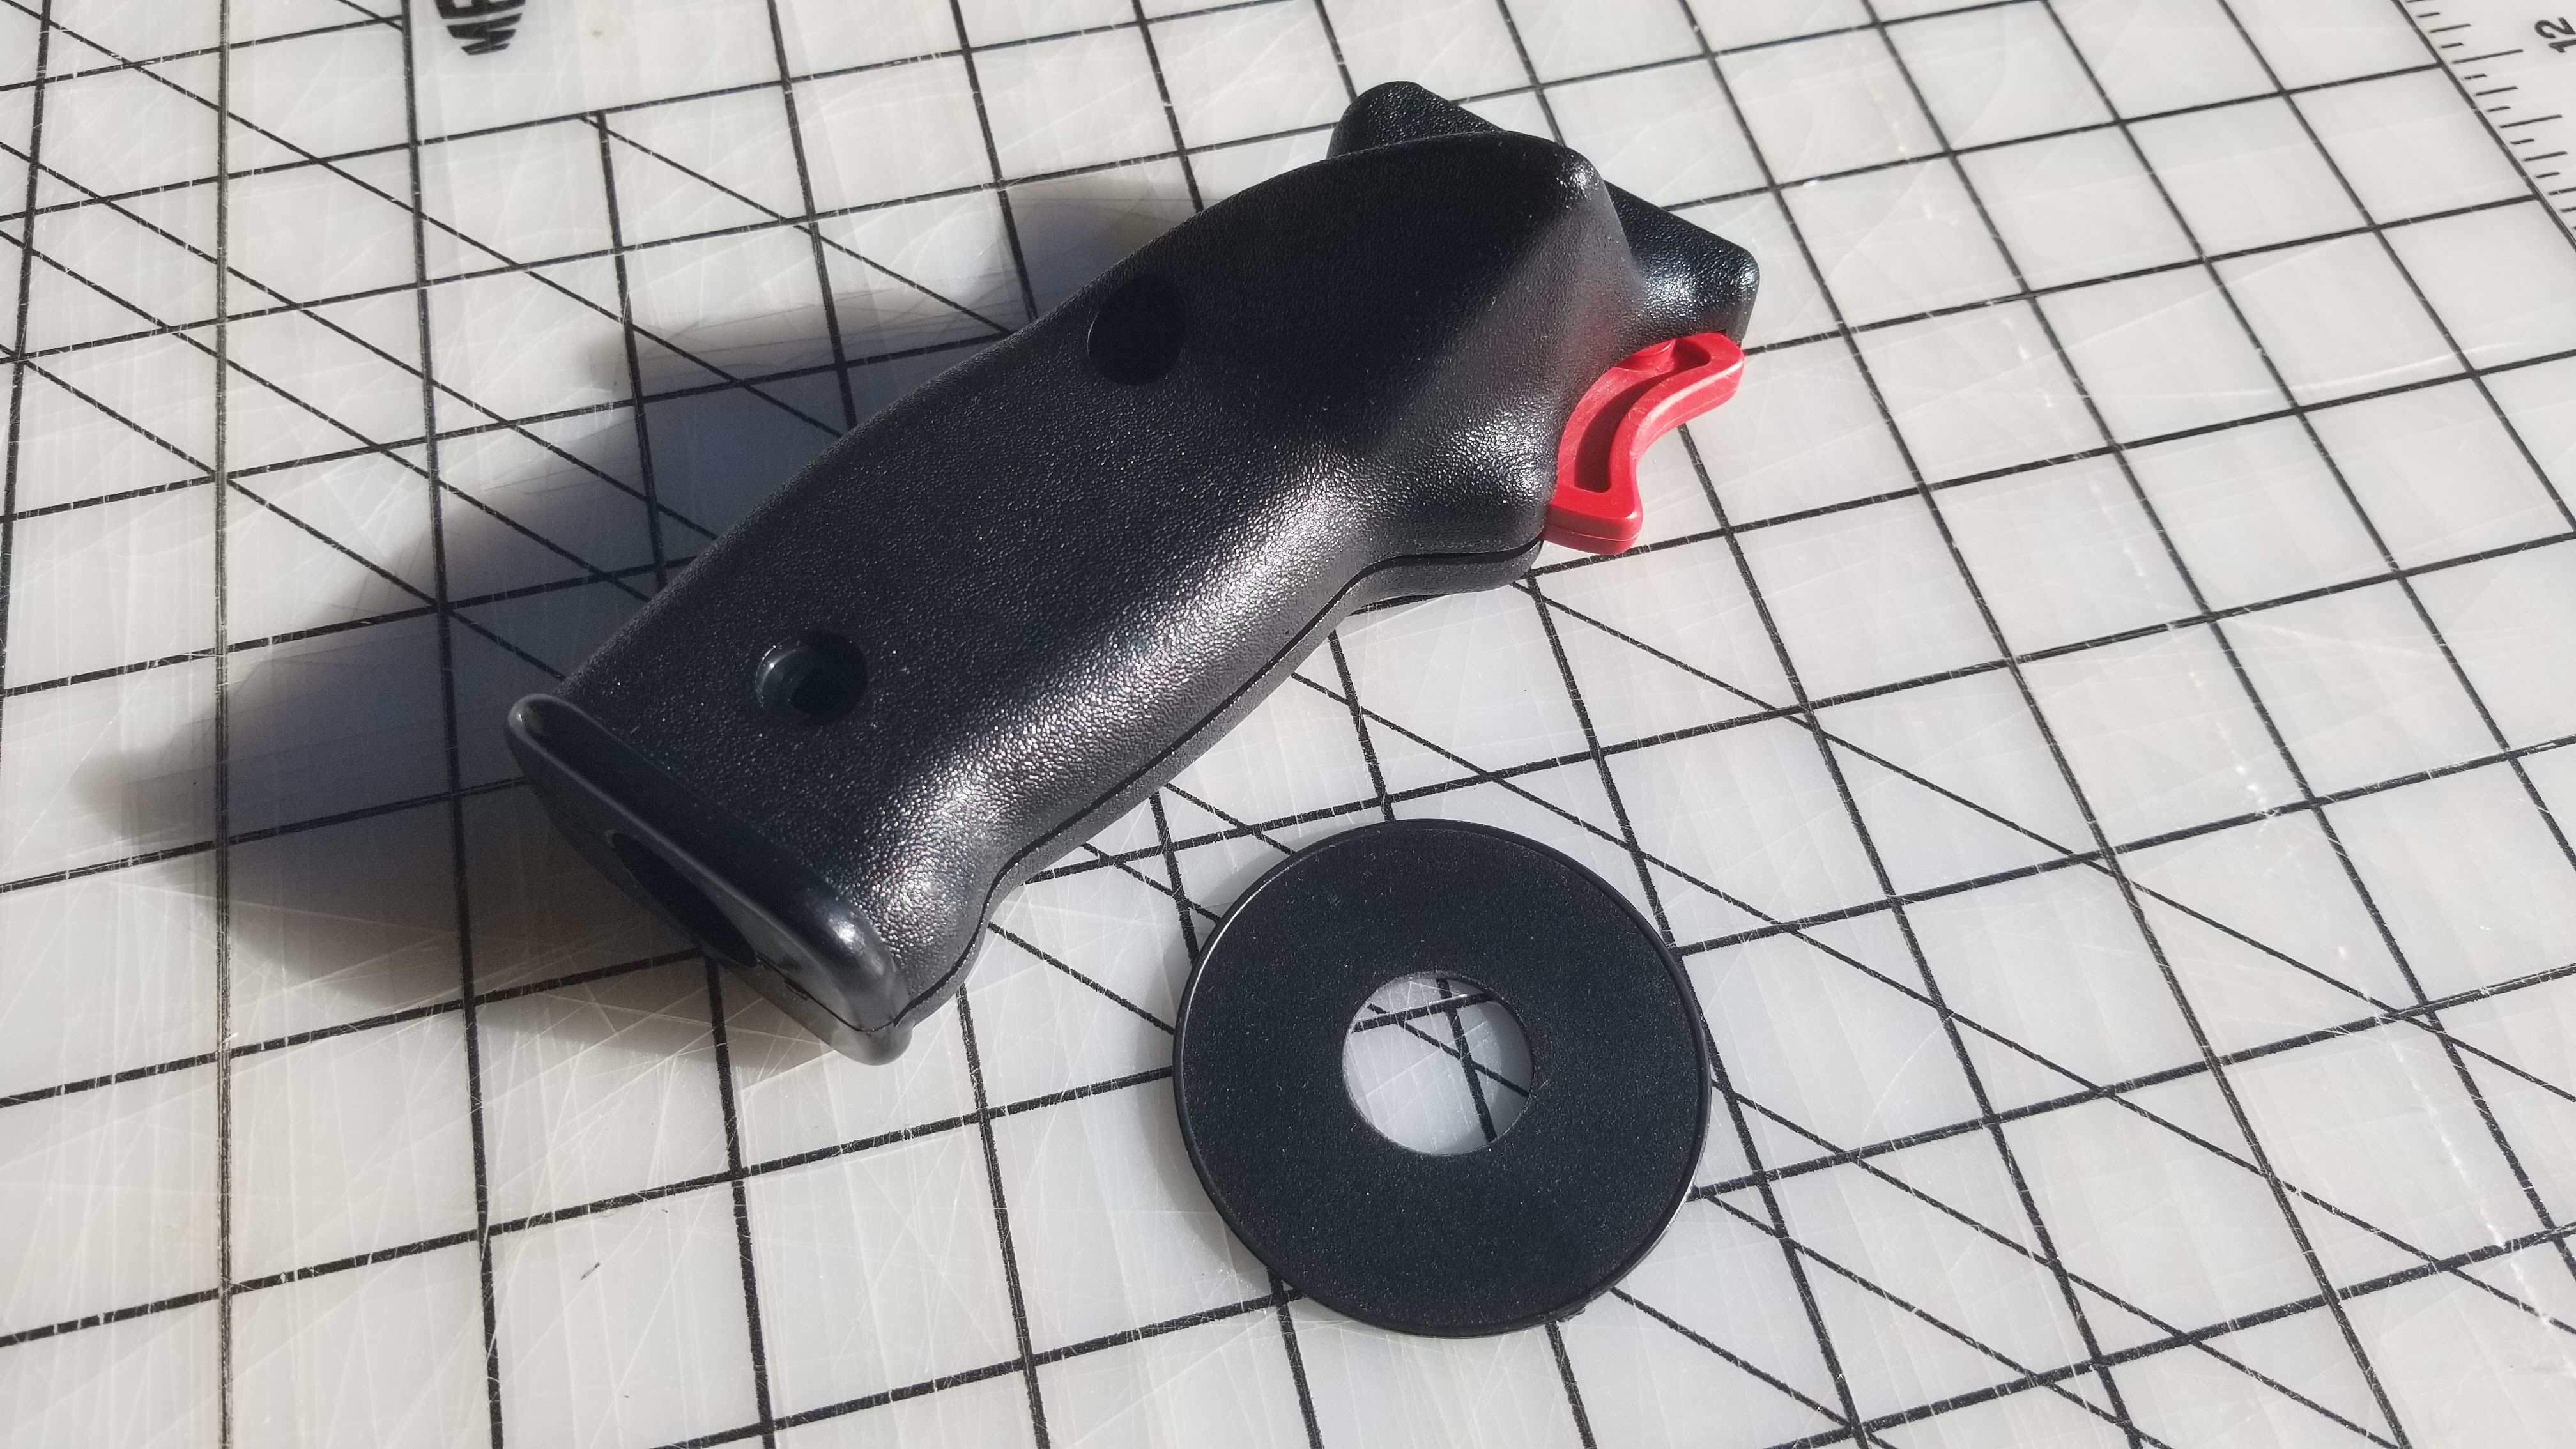
Starting out: I had the genuine handles, and a dust washer from an old stick. (I actually planned to make my own dust washer, but drilling out the old one to 3/4 worked perfectly.
My fighting sticks have 8 degrees of movement. I originally printed a version with 8 degrees, but with the long handles it felt like way too much movement, so I redesigned with 6 degrees. In CAD I visualized the movement as a tapered stick
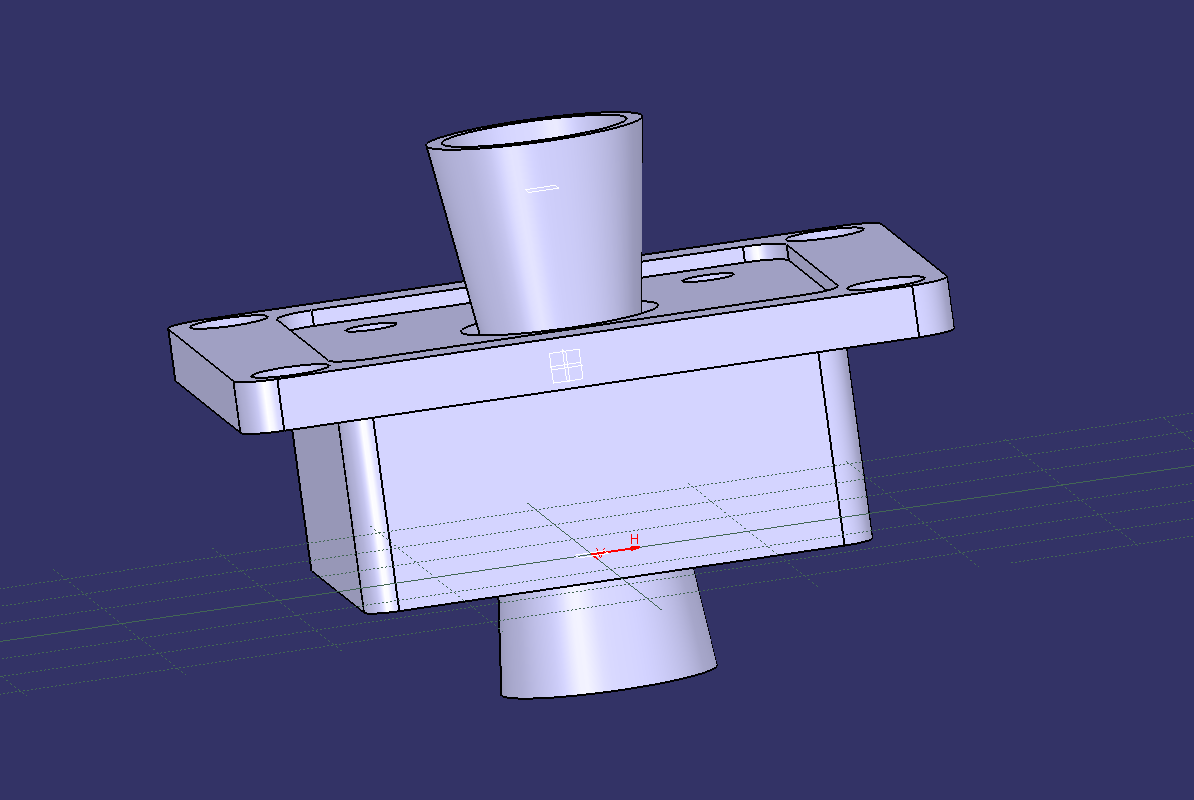
I tested a flexible pivot design, and it worked really well. Seemed a little weak, so I thickened it up and it was just about perfect printed 45% fill in flexible TPE filament. There might be a better cross section for this, but it worked on the first try so why fight it?

I dont like to print with supports if I can help it. So printing in separate pieces was going to be the plan. I sandwiched the flex pivot between the mounting plate and the base. Then I added the restrictor plate from the other side. That works well since Id like the option to swap restrictor plates in the future. Its hard to see, but this is actually an 8-way restrictor plate with indentations that really let you feel straights and the corners. I may just go with a 4-way in the long run, it depends on the list of games I choose for these sticks.


On my IL-Happ sticks the actuator is tapered 8 degrees so its pushing flat on the switches at full throw. I thought about printing a tapered actuator, but decided it was simpler to just use the tube as the actuator. I set the switches at a matching angle so theyre pushed straight at full throw. The layers are sandwiched together with some M3 bolts and embedded nuts.


Gotta remember to put the dust washer on before assembly. I forgot that on the first one. Ill take it apart before mounting. The flex section slides in place and is attached with two M3 bolts. Those bolts and the flex pivot both hold the stick in place, and provide the anti-rotation.

.

Switches are mounted with standard screws, and then handles are installed. The wiring will have to wait until the cabinet is further along. Heres a left and right pair. There will be two sets for proper Vindicators play.


I'm working on some other special controls too. I'll start a post for them when I make a little more progress.


 Home
Home Help
Help Search
 Login
Login Register

 Send this topic
 Print
Print Topic: Assault style trigger stick 3D printed from scratch. (Read 1261 times)


