Fusion 360 definitely has a steeper learning curve but it offers way more than SketchUp. I started with SketchUp and it's super easy to learn. For any newbies I would add that you don't have to learn SketchUp to learn Fusion, they are totally different beasts. But if you're totally new, SketchUp might be a good place to learn concepts.
Ok so I have a few updates.
ArtworkAfter trying a few different ideas I've ended up with the following. Pretty happy with it. Just wanted something that looked fun. As mentioned before this build will be powered by a RPi 3 and I wanted to use a "powered by Pi" type logo. looking around online for ideas I found out there is an official "powered by Pi" logo in the Raspberry foundations style guide. Couldn't get my hands on the official artwork file so I recreated it. Eventually, I did get the Official vector artwork and updated my design. It's on the bottom left of the side art near the button hole.


 Build
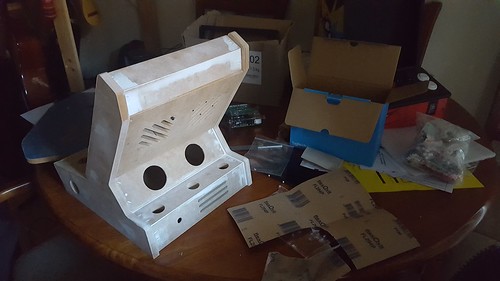
BuildSo I ended up having to fix a few issues. While the wood was cut out via CNC machine, there are still variances in the actual cut out parts. Additionally, I had to cut the miter joints myself using a miter saw. Some of these were uncomfortably small lol, hands got really close to the blade, not much material to secure them while they were been cut. anyway so when I assembled it and started gluing things, they didn't always fit 100% but were very close. doesnt help that I had to assemble it really really quick (had to leave). So I used a sander and a Dremel to fix most things. There were 2 mistake in my design that I over looked, one ill mention later (speakers) and one where I didn't leave enough space for the nut used by the credit button, easy fix for the Dremel.
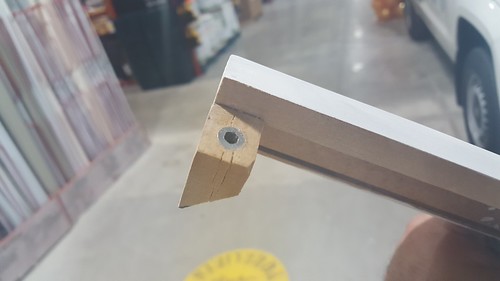
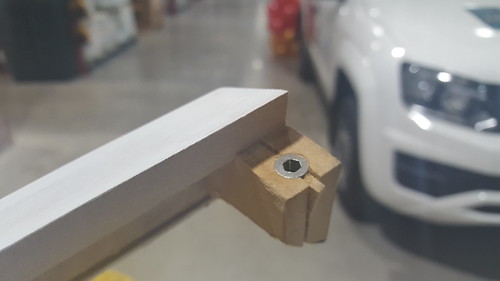
I also cracked the MDF pretty bad on one of the parts when I was adding the screw insert. Took it to the hardware store and spoke to a carpenter and he introduced me to builders bog. Which was basically a redo... after it set I redrilled the piolet holes and added the inserts, this time I had the part in a clamp to help the insert go in without pushing the sides out.
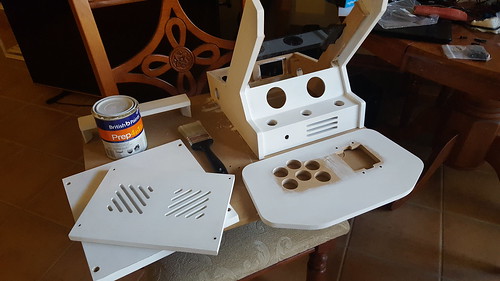
While all this fixing of joints and fittings was going on, I used filler to fix any holes, dips and gaps between parts.
Once that was done I started priming the MDF, especially any exposed edges, sanding in between coats for a total of 3 coats.
 Speakers
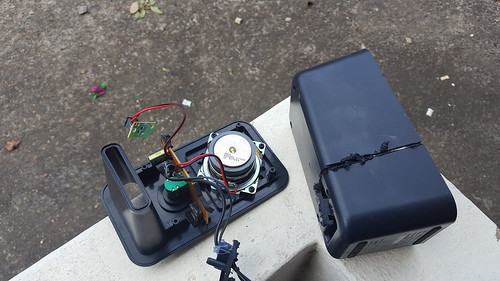
So while I had the Dremel out with a cutting bit, I decided to get the speakers sorted. For this build, I'm using some Logitech Z150 PC speakers because I wanted volume control and a headphone jack. I opened the speakers and the wires were hot glued to the back.

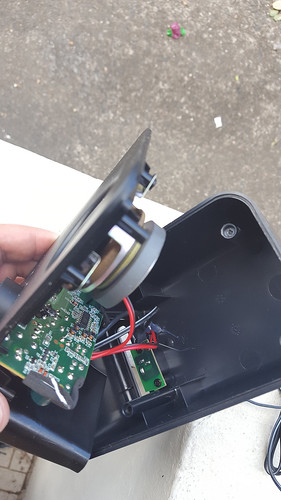
So I cut it out thinking I might be best to try keep the wires intact. Ended up being unnecessary since I will need different lengths once inside the bartop. So I cut the wires. Easy enough to connect them or resolder the correct length wires later.
The next part was to cut out the audio controls to the correct size so they fit into the front panel of my bartop. I measured all the parts including the speakers when I designed this bartop so this wasn't too hard, just took some time. I did a test fit with everything and they fit perfectly in to their respective holes.


So here is where I found another mistake in my design... the audio controls (PCB) clash with the joystick! F#$k!! totally forgot to look into the actual spaces used by the components. Such a silly mistake, I've made other builds where I didn't make this mistake because I modeled the components fully, this one was a lot simpler. Anyway turns out the solutions wasn't ideal but simple enough... flip it upside down! audio controls work exactly the same as before the only real difference was the icons for Aux and headphones are now upside down. Meh, no biggy. I got lucky this time


 Home
Home Help
Help Search
 Login
Login Register

 Send this topic
 Print
Print Topic: Chibi - single player bartop. Raspberry Pi (Read 32600 times)


