Main Restorations Software Audio/Jukebox/MP3 Everything Else Buy/Sell/Trade
Project Announcements Monitor/Video GroovyMAME Merit/JVL Touchscreen Meet Up Retail Vendors
Driving & Racing Woodworking Software Support Forums Consoles Project Arcade Reviews
Automated Projects Artwork Frontend Support Forums Pinball Forum Discussion Old Boards
Raspberry Pi & Dev Board controls.dat Linux Miscellaneous Arcade Wiki Discussion Old Archives
Lightguns Arcade1Up Try the site in https mode Site News

Unread posts | New Replies | Recent posts | Rules | Chatroom | Wiki | File Repository | RSS | Submit news


Author Topic: SAR Search and Rescue Cab Clean-up  (Read 4437 times)

0 Members and 1 Guest are viewing this topic.

64bitmatthew

  • Trade Count: (0)
  • Full Member
  • ***
  • Offline Offline
  • Posts: 26
  • Last login:July 19, 2017, 12:11:04 pm
  • I want to build my own arcade controls!
SAR Search and Rescue Cab Clean-up
« on: May 24, 2017, 11:04:06 am »
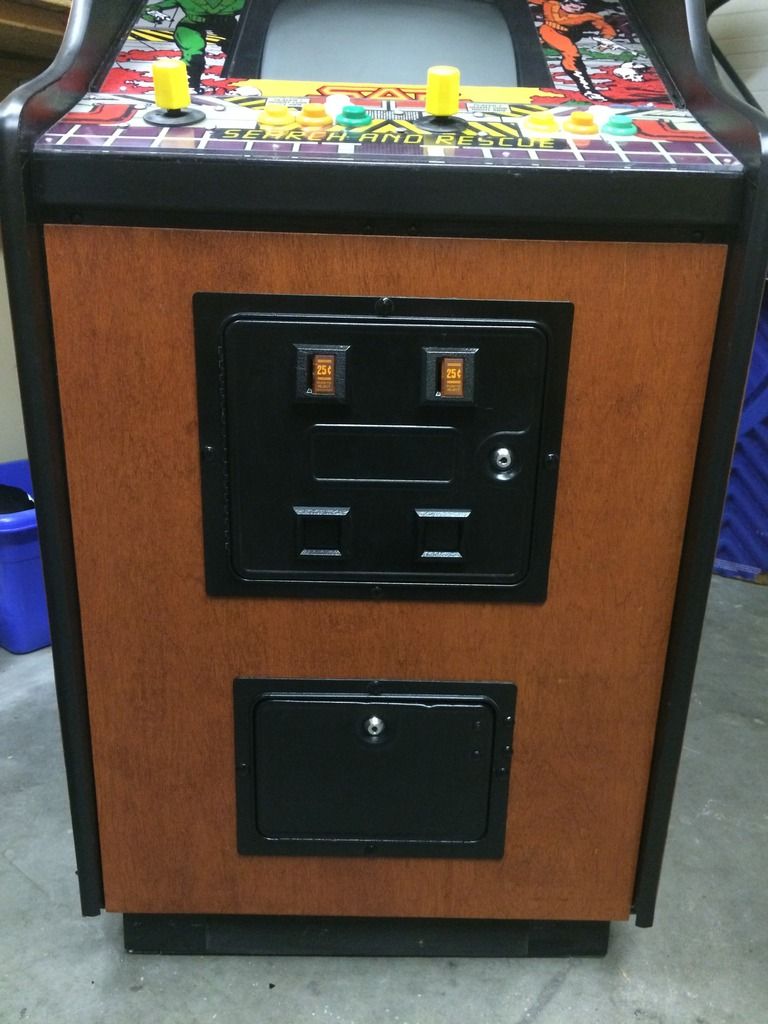
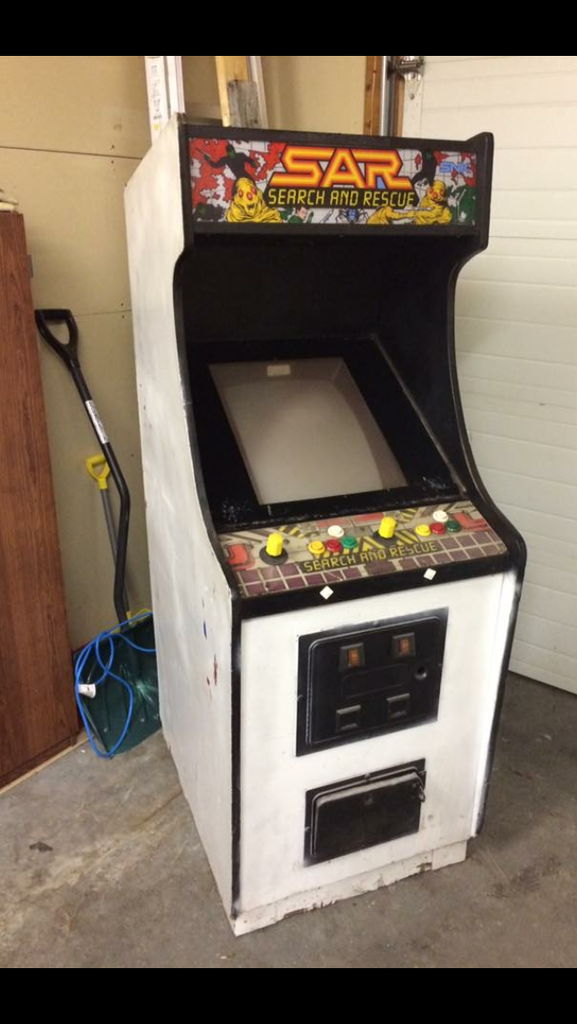
 I recently completed my "clean up" of my sar search and rescue cabinet. Its not a restoration by any means, as its not the original cab, and its not done to look 100% original, but I am happy with how it all cleaned up.  Internally everything works fine and is tidy enough, so this was really just a cosmetics project. It was my first one, so I learned a fair bit, and would maybe do a few things differently next time, but overall am quite happy.

Before:

After:
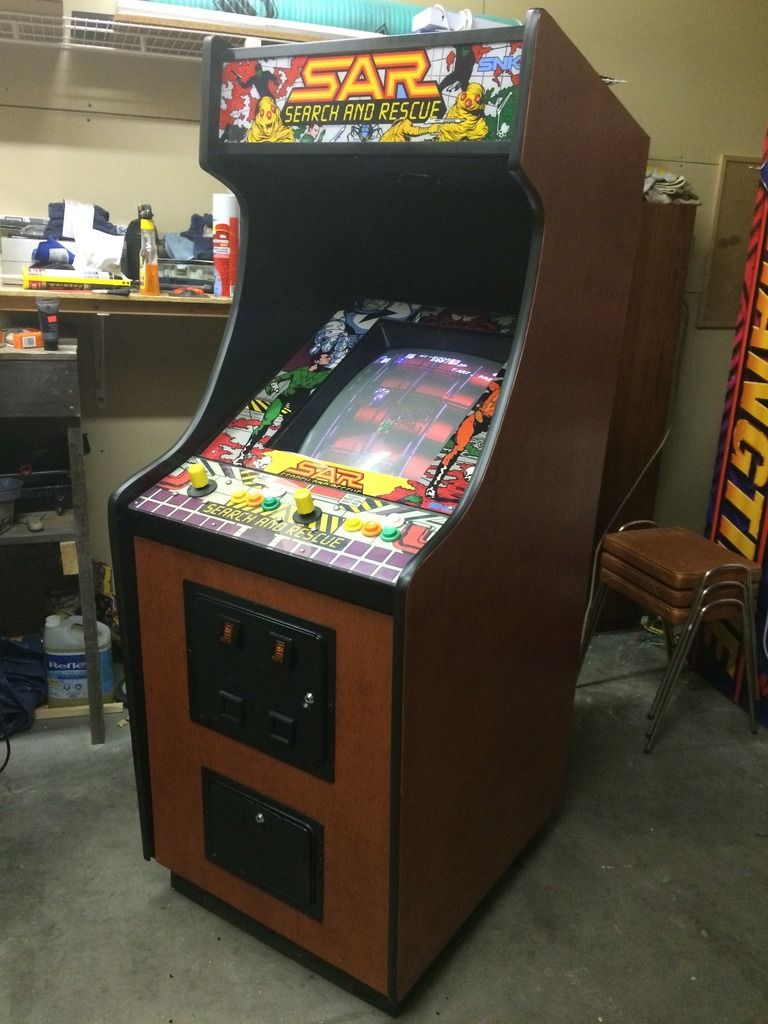

(Just noticed the glare on the marquee in this pic.  The marquee is in great shape, that is just a reflection in this pic)
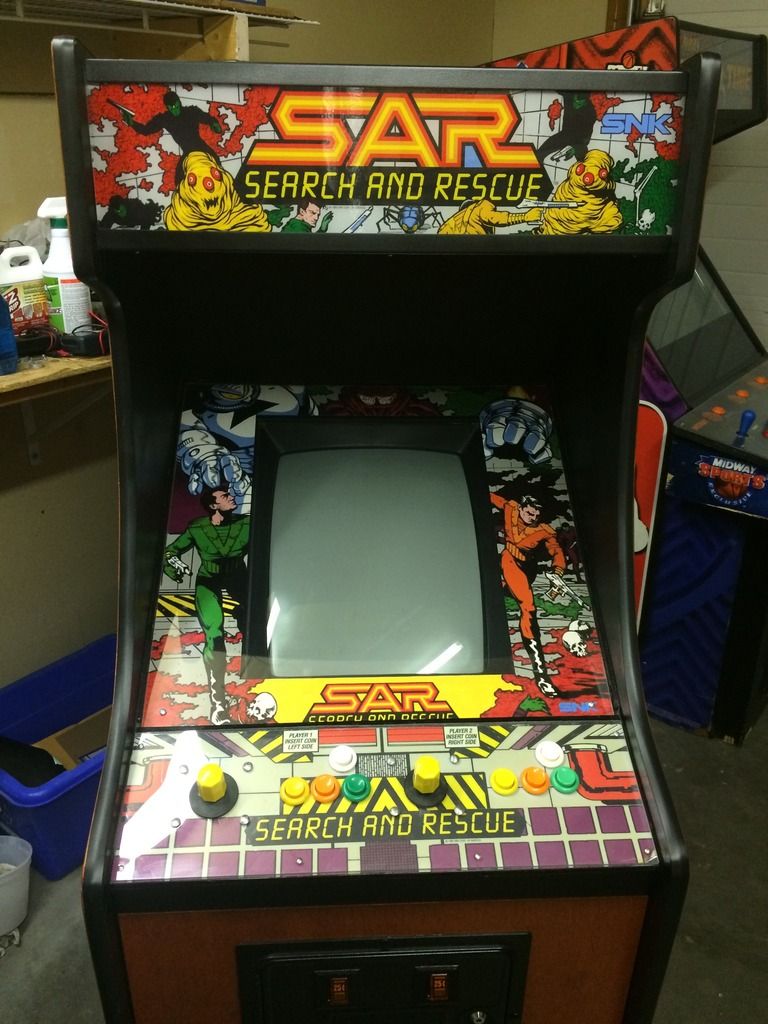


Work done was:
- take off old side art panels, glue on new 1/8th plywood, then stain and clear
- new t-trim, buttons, locks installed
- painted the coin and cash box doors, as well as lots of other areas black
- create new bezel art and plexiglass, as I couldn't find any decent copies out there. found a copy of the original that was roughly a square inch, and blew it up and cleaned it up till it was use-able
- created a new bottom for it, as the old one was rotten
- cut and installed a new plexiglass cover for the control panel
- probably a few other things I'm forgetting, but basically a complete overall cleanup

I bought the cab for $300 Canadian, and put about $150 into it.  So grand total came to $450 Canadian / $334 US.  It was a fun project too that I really enjoyed working on.
« Last Edit: May 24, 2017, 11:05:41 am by 64bitmatthew »

mpwalters

  • Trade Count: (0)
  • Jr. Member
  • **
  • Offline Offline
  • Posts: 7
  • Last login:April 14, 2022, 12:58:10 pm
  • I want to build my own arcade controls!
Re: SAR Search and Rescue Cab Clean-up
« Reply #1 on: May 24, 2017, 11:08:04 am »
 :applaud: Looks much better now.  Was there any clean-up or updates done inside the cab?

wp34

  • Trade Count: (+3)
  • Full Member
  • ***
  • Offline Offline
  • Posts: 4794
  • Last login:April 10, 2022, 09:48:19 pm
Re: SAR Search and Rescue Cab Clean-up
« Reply #2 on: May 24, 2017, 11:45:13 am »
Wow that is an impressive make-over.  Props to you for using real plywood. 

64bitmatthew

  • Trade Count: (0)
  • Full Member
  • ***
  • Offline Offline
  • Posts: 26
  • Last login:July 19, 2017, 12:11:04 pm
  • I want to build my own arcade controls!
Re: SAR Search and Rescue Cab Clean-up
« Reply #3 on: May 24, 2017, 11:52:01 am »
:applaud: Looks much better now.  Was there any clean-up or updates done inside the cab?

Thanks! With everything working on the inside, I decided to concentrate on the exterior first.  Also, the cosmetic stuff seemed easier to tackle, as I haven't worked on an arcade's electric insides too much yet.  I cleaned the interior of the cabinet, and tidied up a bit of the wiring.  I also had to trim some of leaf switch button holders down, as I switched from long to short buttons.  But thats about it so far interior wise.  I have to get around to fixing the marquee light too.  But that shouldn't be too bad.

64bitmatthew

  • Trade Count: (0)
  • Full Member
  • ***
  • Offline Offline
  • Posts: 26
  • Last login:July 19, 2017, 12:11:04 pm
  • I want to build my own arcade controls!
Re: SAR Search and Rescue Cab Clean-up
« Reply #4 on: May 24, 2017, 11:58:03 am »
Wow that is an impressive make-over.  Props to you for using real plywood.

Thanks! I appreciate that.  With the shape of the artwork and side panels that were on it (had some deep gouges, scratches, chunks missing, etc)  I thought it would be easier to just start fresh with plywood.  I was originally going to paint it, but the wood grain looked so nice that I eventually switched to staining.  I'm happy with how the color came out.  I thinking stained wood fits / looks better on older more classic games (80's) as compared to a game from 1990, but it will do fine for my basement.

mourix

  • Trade Count: (0)
  • Full Member
  • ***
  • Offline Offline
  • Posts: 302
  • Last login:Yesterday at 07:14:04 pm
Re: SAR Search and Rescue Cab Clean-up
« Reply #5 on: May 24, 2017, 04:17:28 pm »
Wow, this is as good as they get for a first timer. Once you get the hang of the electric parts, I'm sure there will be some great restoration projects to come along :burgerking:

64bitmatthew

  • Trade Count: (0)
  • Full Member
  • ***
  • Offline Offline
  • Posts: 26
  • Last login:July 19, 2017, 12:11:04 pm
  • I want to build my own arcade controls!
Re: SAR Search and Rescue Cab Clean-up
« Reply #6 on: May 24, 2017, 04:56:42 pm »
Wow, this is as good as they get for a first timer. Once you get the hang of the electric parts, I'm sure there will be some great restoration projects to come along :burgerking:

Thanks Mourix. Also, thanks for your tips/thoughts in my hangtime thread.  It will probably be the next arcade cabinet I fix up, as I have already spent a fair bit of time on it.  I'll save the details for that thread, but in the end I went with an lcd screen.  Its working great now, and I actually like the way it looks on the lcd screen.  But yeah, I don't think I responded to your last comment on there so I wanted to make sure I mentioned I wasn't ignoring your post, just that I got distracted by the sar cab getting it finished up.

64bitmatthew

  • Trade Count: (0)
  • Full Member
  • ***
  • Offline Offline
  • Posts: 26
  • Last login:July 19, 2017, 12:11:04 pm
  • I want to build my own arcade controls!
Re: SAR Search and Rescue Cab Clean-up
« Reply #7 on: May 25, 2017, 10:21:53 am »
I was terrible for taking pictures along the way, but I found a few on my phone, so I thought I would add them to this thread.  Not in any real particular order, and they don't show everything, but better than nothing I guess hahaha.

as it stood originally.  Kinda shows how rough the base was.  It was pretty rotten.


I put on some extra pieces of the 1/8th plywood on the base that I had left over from the sides.  Then I created a new base for it.  Nothing fancy, and by no means original matching, but it wasn't an original sar cabinet anyway so I decided to go with a basic and sturdy design.  I did stain the base plywood too eventually, even though it would rarely if ever get seen.


Here's a pic of the new plywood glued, clamped and weighed down.  I used the original sides that I removed from the cab to trace onto the plywood, then cut it out with a jigsaw, then glued it on.  Once it was dry and fully attached, I used a palm sander with 60 grit then 120 grit sand paper to get the plywood flush with the sides.


Then it was time to stain and clearcoat.  I believe the stain was called gunstock, and it was a nice stain with a fairly rich red color to it.  I only used one coat of stain, as I didn't want it to darken too much and go more brown then red.  I did two coats of clear after, which really seemed to help bring the red out.  These pics show the stain color better then the original pic I posted, but still dont really do the redness of it justice.


64bitmatthew

  • Trade Count: (0)
  • Full Member
  • ***
  • Offline Offline
  • Posts: 26
  • Last login:July 19, 2017, 12:11:04 pm
  • I want to build my own arcade controls!
Re: SAR Search and Rescue Cab Clean-up
« Reply #8 on: May 25, 2017, 10:30:21 am »
Also, in case anyone else with a sar cabinet comes across this thread, I wanted to share the bezel art I created, as there really seems to be nothing out there (unless I just missed it hahaha).  I used an image that was originally about 1 square inch.  It surprisingly  didn't get too pixelated when I blew it up to a big enough size, though it did need some work fixing up.  I just used gimp.  The end result isn't perfect, but its good enough for me.  Along the bottom where I put SAR, there was originally the point explanation section.  When I blew the image up to a use-able size though, it was just to pixelated.  I just replaced it with SAR, though I'm sure someone could fix it up properly if they wanted.  Also, this image is sized to fit a time pilot 84 cabinet, so it would probably need its inner square adjusted to fit other cabs/monitors properly.  But hey, if you can't find any other copy of this image, it might give you a starting point to work with anyway.


Also, here is the side art I found.  I didn't end up using it, but if someone else needs it, here you go:


stigzler

  • Trade Count: (0)
  • Full Member
  • ***
  • Offline Offline
  • Posts: 977
  • Last login:February 11, 2022, 03:01:48 pm
  • It seemed like a good idea at the time....
    • Mago Arcade
Re: SAR Search and Rescue Cab Clean-up
« Reply #9 on: May 28, 2017, 04:59:03 am »
Love it. Dark cherry red stain with the black t-moulding make it look awesome. Kinda Atari 2600

You did well to get usable bezel art from a 1" square image! I know you've aplied your now, but another way to have done this would have been to imported it into Adobe Illustrator or Inkscape and converted the bitmap into vector art. Given it's lineart, this should have converted nicely - then any print would be crisp and clean. Still looks awesome though as a bitmap!

64bitmatthew

  • Trade Count: (0)
  • Full Member
  • ***
  • Offline Offline
  • Posts: 26
  • Last login:July 19, 2017, 12:11:04 pm
  • I want to build my own arcade controls!
Re: SAR Search and Rescue Cab Clean-up
« Reply #10 on: May 29, 2017, 10:12:48 am »
Love it. Dark cherry red stain with the black t-moulding make it look awesome. Kinda Atari 2600

You did well to get usable bezel art from a 1" square image! I know you've aplied your now, but another way to have done this would have been to imported it into Adobe Illustrator or Inkscape and converted the bitmap into vector art. Given it's lineart, this should have converted nicely - then any print would be crisp and clean. Still looks awesome though as a bitmap!

Thanks!
I've never really heard of converting into vector art, as this is the first time I've had to clean/blow up an image this much.  I'll have to research it a bit next time I need more artwork printed/worked on.  Thanks for the heads up!

stigzler

  • Trade Count: (0)
  • Full Member
  • ***
  • Offline Offline
  • Posts: 977
  • Last login:February 11, 2022, 03:01:48 pm
  • It seemed like a good idea at the time....
    • Mago Arcade
Re: SAR Search and Rescue Cab Clean-up
« Reply #11 on: May 29, 2017, 12:52:13 pm »
No probs. It's actually very straightforward. Load a bitmap, select an option, they do the rest for you.