Main Restorations Software Audio/Jukebox/MP3 Everything Else Buy/Sell/Trade
Project Announcements Monitor/Video GroovyMAME Merit/JVL Touchscreen Meet Up Retail Vendors
Driving & Racing Woodworking Software Support Forums Consoles Project Arcade Reviews
Automated Projects Artwork Frontend Support Forums Pinball Forum Discussion Old Boards
Raspberry Pi & Dev Board controls.dat Linux Miscellaneous Arcade Wiki Discussion Old Archives
Lightguns Arcade1Up Try the site in https mode Site News

Unread posts | New Replies | Recent posts | Rules | Chatroom | Wiki | File Repository | RSS | Submit news


Author Topic: First DK Cabinet Build  (Read 41196 times)

0 Members and 1 Guest are viewing this topic.

krangbrain

  • Trade Count: (0)
  • Full Member
  • ***
  • Offline Offline
  • Posts: 120
  • Last login:June 22, 2020, 05:36:57 pm
  • I want to build my own arcade controls!
Re: First DK Cabinet Build
« Reply #200 on: June 02, 2017, 02:42:52 pm »
I don't have experience with drilling or cutting plexi (yet), but could you drill a 1 1/8" hole in a piece of scrap wood, then center that over your 1" hole and open it up with a router using a trim flush bit?

ChanceKJ

  • Trade Count: (0)
  • Full Member
  • ***
  • Offline Offline
  • Posts: 3229
  • Last login:August 07, 2021, 02:52:06 pm
.
« Reply #201 on: June 02, 2017, 03:20:10 pm »
.
« Last Edit: March 19, 2021, 02:28:35 am by ChanceKJ »

mwhitney

  • Trade Count: (0)
  • Full Member
  • ***
  • Offline Offline
  • Posts: 129
  • Last login:December 06, 2017, 10:30:20 pm
  • I want to build my own arcade controls!
    • Michael Whitney - Designer. Maker. Builder.
Re: First DK Cabinet Build
« Reply #202 on: June 02, 2017, 08:25:29 pm »
Thanks guys - I actually ended up getting a step bit and I'm glad I did. Canadian Tire had one on for $17, regular $59 so I grabbed that as well as a 3-pack set of smaller ones to drill out the perimeter holes to accommodate the carriage bolts Wyo so graciously sent me.

The stepped bit made easy work of it and I just worked slowly, drilling one side and then the other to remove any material building up. As the vinyl was affixed already, it wanted to gum up if going to fast. I finished off by cleaning up the edge w/ an Xacto blade.


I had 3 fresh holes I had to make as well that the print ship didn't do. I guess they have a CNC template for these 'stock' CPs but I left some registration marks on the artwork so I'd know where to drill:


Wyo's bolts with the holes enlarged:


For the perimeter holes, I just used the plexi as a template and drilled through the MDF:


Traced the button holes out and went to town:


Fancy bits installed:


Yeah, I pretended to play it...


Now just to wire her up!
« Last Edit: June 02, 2017, 08:45:34 pm by mwhitney »

mwhitney

  • Trade Count: (0)
  • Full Member
  • ***
  • Offline Offline
  • Posts: 129
  • Last login:December 06, 2017, 10:30:20 pm
  • I want to build my own arcade controls!
    • Michael Whitney - Designer. Maker. Builder.
Re: First DK Cabinet Build
« Reply #203 on: June 02, 2017, 08:49:09 pm »
Damn it. I didn't read the instruction card until now:

"When a certain structures have been cleared...."

"Extra jumpman when you gain a certain points..."

WT?! Is this how Nintendo printed it or is this a bastardized version from the interwebs?

NIVO

  • Global Moderator
  • Trade Count: (+1)
  • Full Member
  • *****
  • Offline Offline
  • Posts: 1256
  • Last login:August 08, 2022, 12:32:13 pm
  • danny_galaga is my mail man.
    • N.A.M.E. - arcade cabinet project
Re: First DK Cabinet Build
« Reply #204 on: June 02, 2017, 08:57:07 pm »
as far as I know, that is how it was from the get go. So you have a gen-yoo-wine repro of the original :)

mwhitney

  • Trade Count: (0)
  • Full Member
  • ***
  • Offline Offline
  • Posts: 129
  • Last login:December 06, 2017, 10:30:20 pm
  • I want to build my own arcade controls!
    • Michael Whitney - Designer. Maker. Builder.
Re: First DK Cabinet Build
« Reply #205 on: June 03, 2017, 01:03:45 am »
as far as I know, that is how it was from the get go. So you have a gen-yoo-wine repro of the original :)

Good to know - it doesn't bother me so much now ;).

ChanceKJ

  • Trade Count: (0)
  • Full Member
  • ***
  • Offline Offline
  • Posts: 3229
  • Last login:August 07, 2021, 02:52:06 pm
.
« Reply #206 on: June 03, 2017, 01:12:51 am »
.
« Last Edit: March 19, 2021, 02:28:14 am by ChanceKJ »

mwhitney

  • Trade Count: (0)
  • Full Member
  • ***
  • Offline Offline
  • Posts: 129
  • Last login:December 06, 2017, 10:30:20 pm
  • I want to build my own arcade controls!
    • Michael Whitney - Designer. Maker. Builder.
Re: First DK Cabinet Build
« Reply #207 on: June 03, 2017, 01:35:46 am »
That explains why the button holes were too small. The shop CNCs acrylic using Nintendo CP dimensions.As such, I had to enlarge the three holes that came pre-drilled.

mwhitney

  • Trade Count: (0)
  • Full Member
  • ***
  • Offline Offline
  • Posts: 129
  • Last login:December 06, 2017, 10:30:20 pm
  • I want to build my own arcade controls!
    • Michael Whitney - Designer. Maker. Builder.
Re: First DK Cabinet Build
« Reply #208 on: June 09, 2017, 01:41:26 pm »
UPDATE & QUESTION RE CP

Hey guys. So, shortly after I finished high-5'ing myself for a job well-done on the CP, one of the perimeter carriage bolt holes in the acrylic started spider-legging. F^&k!

I've made arrangements for a new CP to be shipped but I'm now wondering if maybe I should have the artwork printed but NOT attached to the acrylic. This way, if it cracks again, I can just go get a new piece vs ruining the artwork along with it.

Can you see any reason why this is a bad idea? I'm assuming the artwork would be sandwiched tight between the painted MDF and acrylic and would look just as good as being 'stuck'...

'Luckily' I've yet to wire up the XinMo and buttons. I was tempted to try to heat-gun the artwork to try to remove but I think trying to preserve it and keep it from being distorted in the process would be futile.

The only thing I can think is that I may have tightened the bolt nut too much on this one.

Here's a pic of the crack:


ChanceKJ

  • Trade Count: (0)
  • Full Member
  • ***
  • Offline Offline
  • Posts: 3229
  • Last login:August 07, 2021, 02:52:06 pm
.
« Reply #209 on: June 09, 2017, 01:57:44 pm »
.
« Last Edit: March 19, 2021, 02:27:23 am by ChanceKJ »

mwhitney

  • Trade Count: (0)
  • Full Member
  • ***
  • Offline Offline
  • Posts: 129
  • Last login:December 06, 2017, 10:30:20 pm
  • I want to build my own arcade controls!
    • Michael Whitney - Designer. Maker. Builder.
Re: First DK Cabinet Build
« Reply #210 on: June 09, 2017, 08:41:47 pm »
sandwiching the art would be fine, just make sure the art is a matte finish or the glossiness of the art and the plexi will give you an unwanted rippling effect.

Thanks Chance.

PL1

  • Global Moderator
  • Trade Count: (+1)
  • Full Member
  • *****
  • Online Online
  • Posts: 9398
  • Last login:Today at 03:35:20 am
  • Designated spam hunter
Re: First DK Cabinet Build
« Reply #211 on: June 09, 2017, 09:08:05 pm »
sandwiching the art would be fine, just make sure the art is a matte finish or the glossiness of the art and the plexi will give you an unwanted rippling effect.

Related example/info:

What is the best material to print my marqee on if I am sandwiching it between to pieces of perspex? 
I am finding I get like moisture/damp stains when they are all hard pressed together, is there way to avid this?


Hit your marquee with a clear matte finish spray that you can get from any craft store. That's what I do, and it gets rid of that "wet" look.

You just need a light coat, BTW. Too heavy, and you'll get frosting. Just a light dusting so you know it's coated, let it dry, and you're golden.

I need one of you clearcoat guru's to start a thread on your favorite clearcoating products. There are some awesome products, and I too often end up buying the lame ducks.

This is what I use:

http://www.krylon.com/products/low-odor-clear-finish/


I do try to find the low odor version so I can spray it inside. NOTE: The cans are the same for regular and matte. The plastic cover on top will say MATTE in black letters...


Scott

mwhitney

  • Trade Count: (0)
  • Full Member
  • ***
  • Offline Offline
  • Posts: 129
  • Last login:December 06, 2017, 10:30:20 pm
  • I want to build my own arcade controls!
    • Michael Whitney - Designer. Maker. Builder.
Re: First DK Cabinet Build
« Reply #212 on: June 09, 2017, 09:16:03 pm »
Thanks for the tip, Scott.

mwhitney

  • Trade Count: (0)
  • Full Member
  • ***
  • Offline Offline
  • Posts: 129
  • Last login:December 06, 2017, 10:30:20 pm
  • I want to build my own arcade controls!
    • Michael Whitney - Designer. Maker. Builder.
Re: First DK Cabinet Build
« Reply #213 on: June 09, 2017, 09:17:16 pm »
Subwoofer question:

I have this micro amp from RetroActiveArcade.com: http://retroactivearcade.ca/mini-hi-fi-audio-amplifier-12v-for-raspberry-pi-1/

Is it possible to hook up a computer subwoofer to it? I'm thinking of putting a subwoofer inside the cabinet...

Thoughts on this? Possible? Overkill?

Cheers.

Wyo

  • Trade Count: (0)
  • Full Member
  • ***
  • Offline Offline
  • Posts: 408
  • Last login:May 01, 2023, 09:22:42 pm
  • I want to build my own arcade controls!
Re: First DK Cabinet Build
« Reply #214 on: June 09, 2017, 09:50:27 pm »
 :applaud: Beautiful!

Bummer about the spider web crack.  That definitely can happen from over tightening the bolts.  I've done it before myself....and even with my OCD, I've let it go.

However, I learned on the next builds just to snug them down...and not geT them crazy tight to avoid that...plus bowing the plex.

I would definitely reprint the art and make your own plex.  You have all the tools you need now, it's easy. If you need to you can attach the vinyl overlay to some thicker card stock to keep it from being wavy under your plex.

Also, your CP is so perfect, I had to go run and look at some of mine to see how it compares. Haha. Beautiful work.

mwhitney

  • Trade Count: (0)
  • Full Member
  • ***
  • Offline Offline
  • Posts: 129
  • Last login:December 06, 2017, 10:30:20 pm
  • I want to build my own arcade controls!
    • Michael Whitney - Designer. Maker. Builder.
Re: First DK Cabinet Build
« Reply #215 on: June 09, 2017, 10:10:47 pm »
:applaud: Beautiful!

Bummer about the spider web crack.  That definitely can happen from over tightening the bolts.  I've done it before myself....and even with my OCD, I've let it go.

However, I learned on the next builds just to snug them down...and not geT them crazy tight to avoid that...plus bowing the plex.

I would definitely reprint the art and make your own plex.  You have all the tools you need now, it's easy. If you need to you can attach the vinyl overlay to some thicker card stock to keep it from being wavy under your plex.

Also, your CP is so perfect, I had to go run and look at some of mine to see how it compares. Haha. Beautiful work.

Haha - thanks Wyo - I appreciate the compliment. Man, I go down and check it from time to time and think, "It's not that bad, I could probably let it go." but it's like a sliver...

It makes sense to have the CP printed and then just buy a piece of acrylic from a sign shop. Escape Pod cut my bezel to the wrong dimensions and are making good on sending out a new one. If I can get them to throw a new CP in the box, I'll do that. Otherwise, I'll just have it printed locally. I'm pretty eager to button this up and play the thing already!

mwhitney

  • Trade Count: (0)
  • Full Member
  • ***
  • Offline Offline
  • Posts: 129
  • Last login:December 06, 2017, 10:30:20 pm
  • I want to build my own arcade controls!
    • Michael Whitney - Designer. Maker. Builder.
Re: First DK Cabinet Build
« Reply #216 on: June 29, 2017, 01:53:51 am »
Well, it's taken approximately 3 weeks for the replacement bezel to arrive. Escape Pod cut the first one to the wrong size, made good on a replacement, and shipped at N/C.

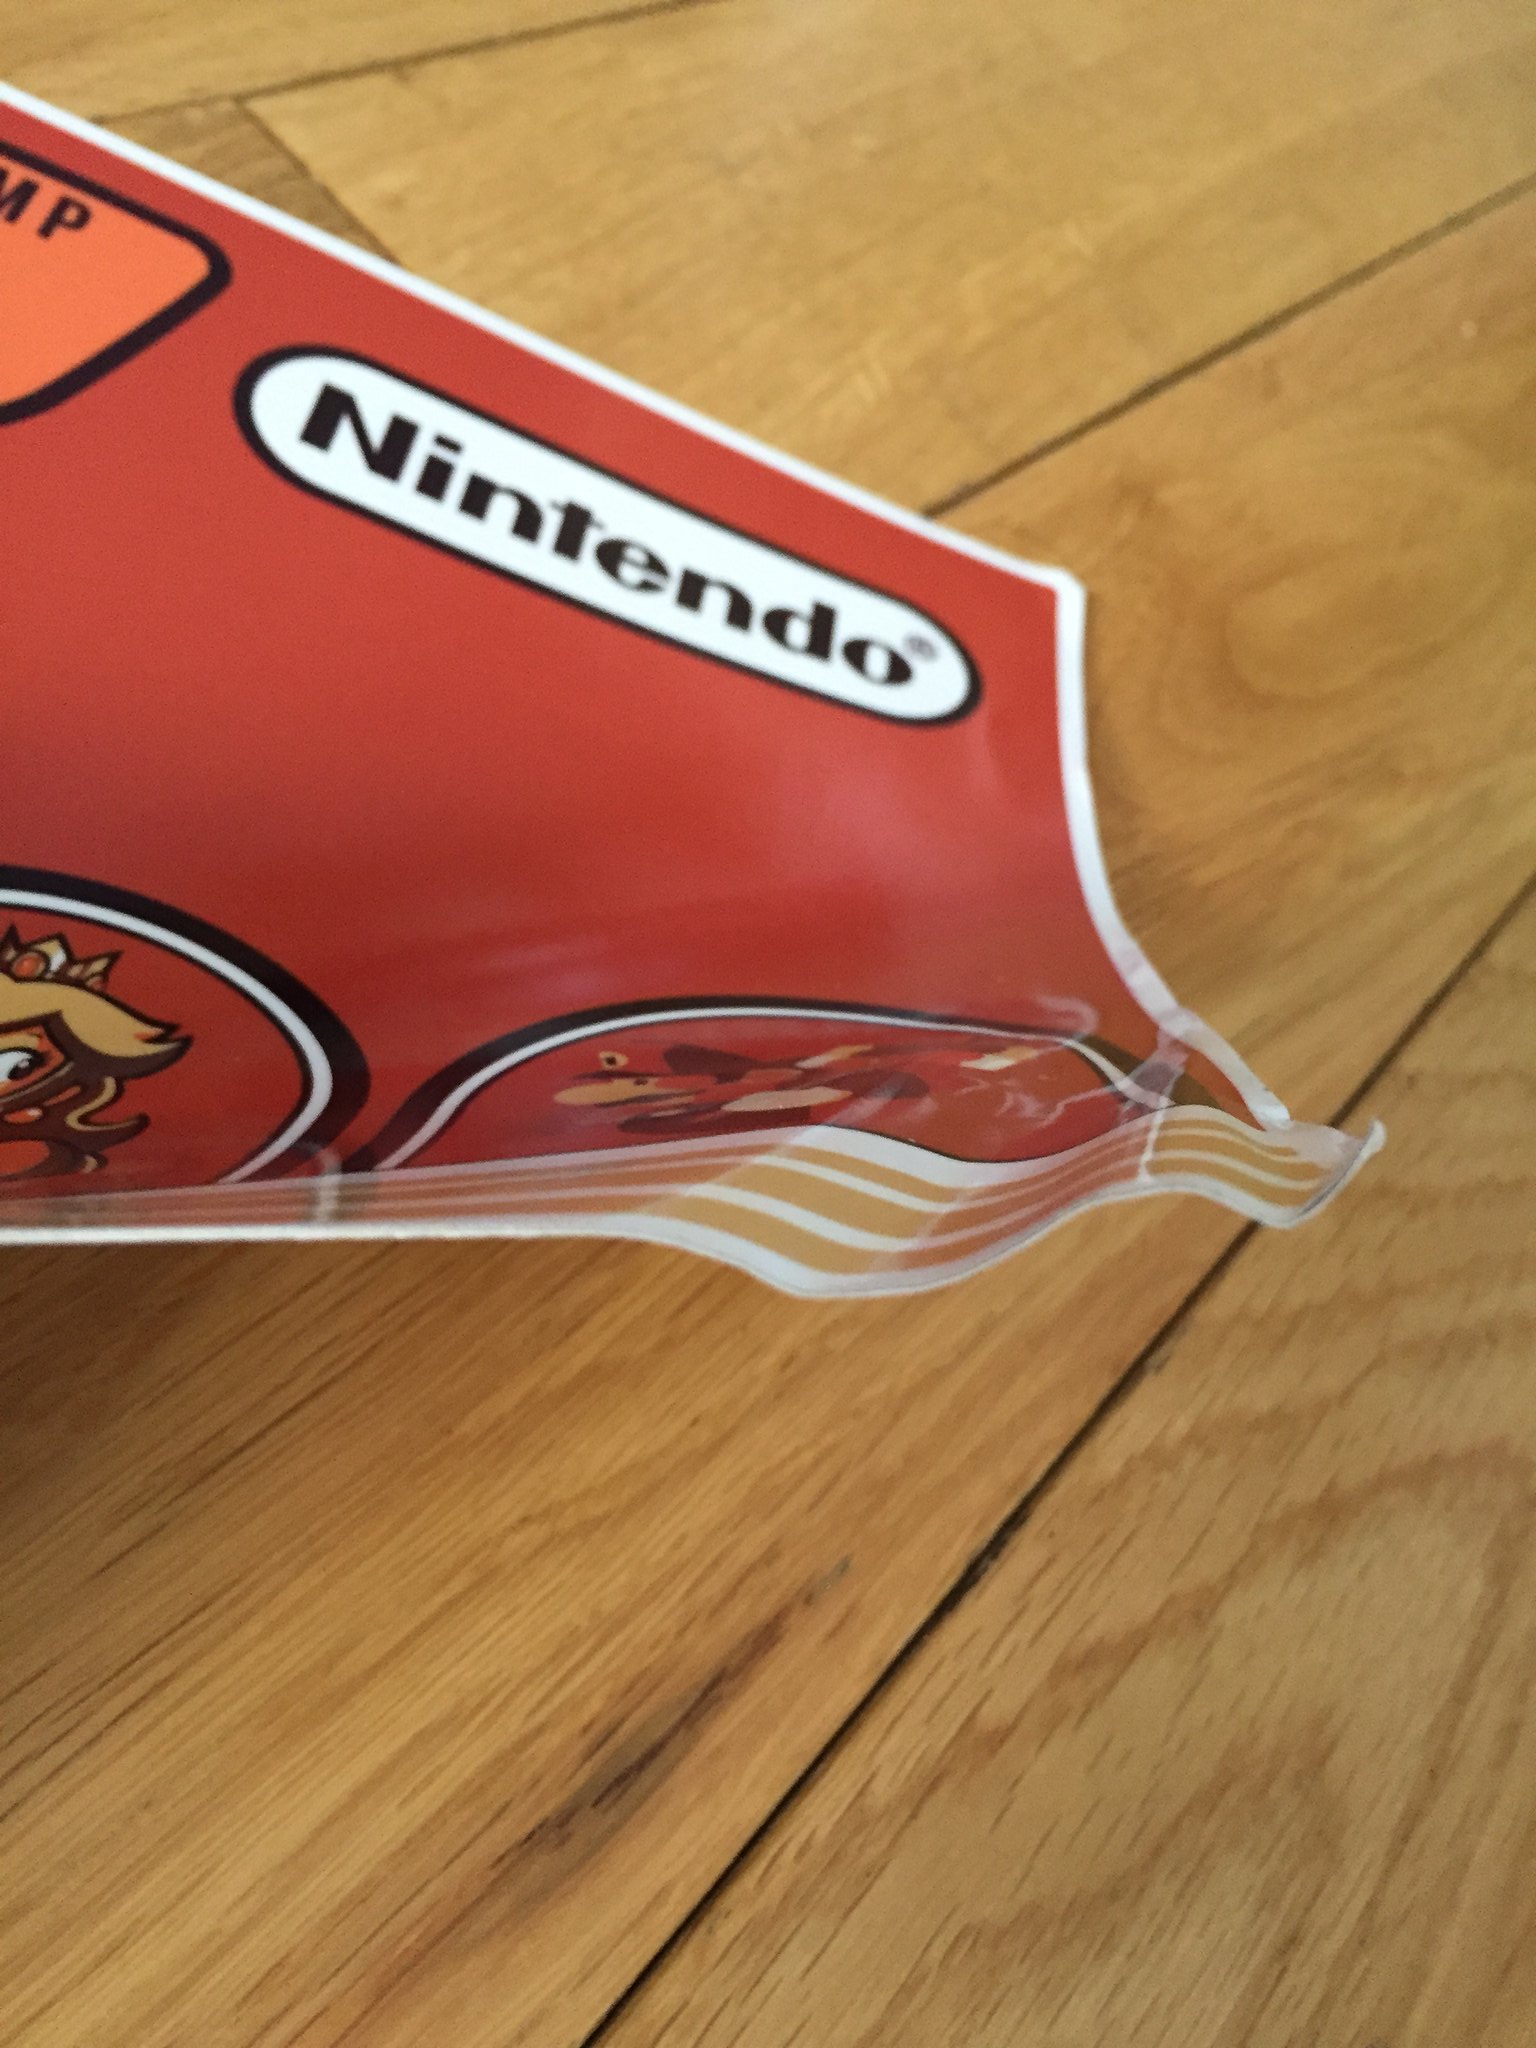
Since the artwork was attached to the plexi, that was ruined as well. I had them include new CP artwork and upon opening the box yesterday, the artwork was just put in the box, free to float around. It's beyond me as to why greater care wasn't taken as it would have been 5 extra minutes to sandwich the artwork between some cardboard or rolled into a shipping tube. :banghead: We'll see if Escape Pod makes good on it - I've requested that they send it via express post so there's no more unnecessary delays.

Anyway - sounds like a rant and I guess it is. Escape Pod, if you're reading through these forums, hopefully you'll redeem yourself. I'm tempted to just have the artwork printed locally at this point and swallow the extra cost.

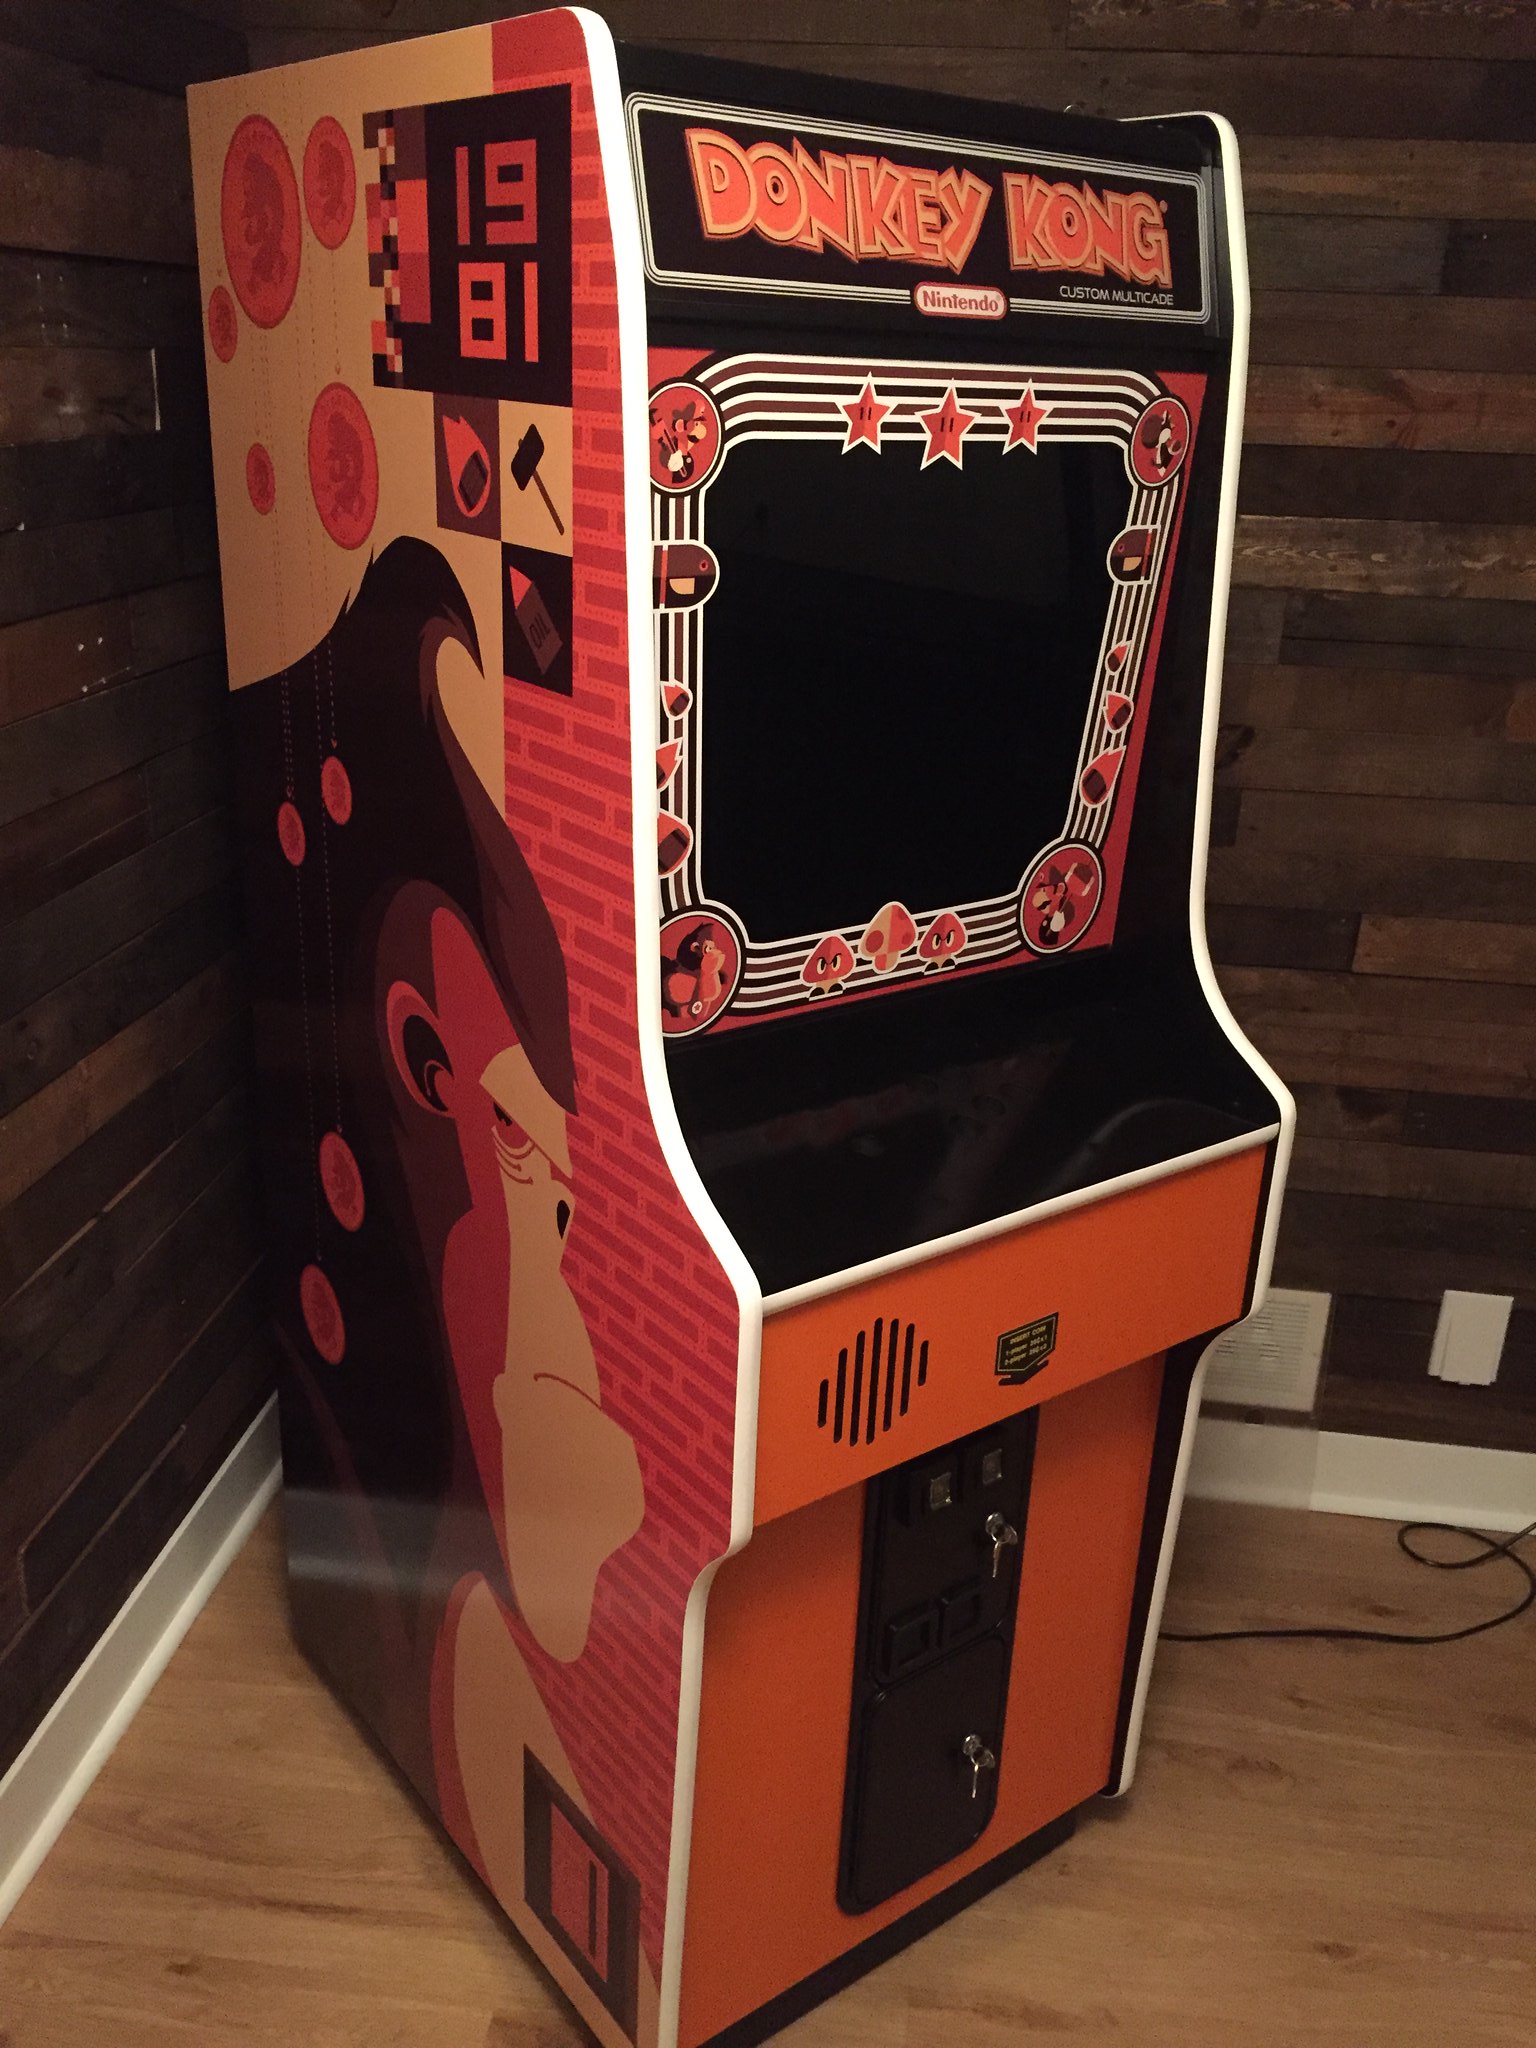
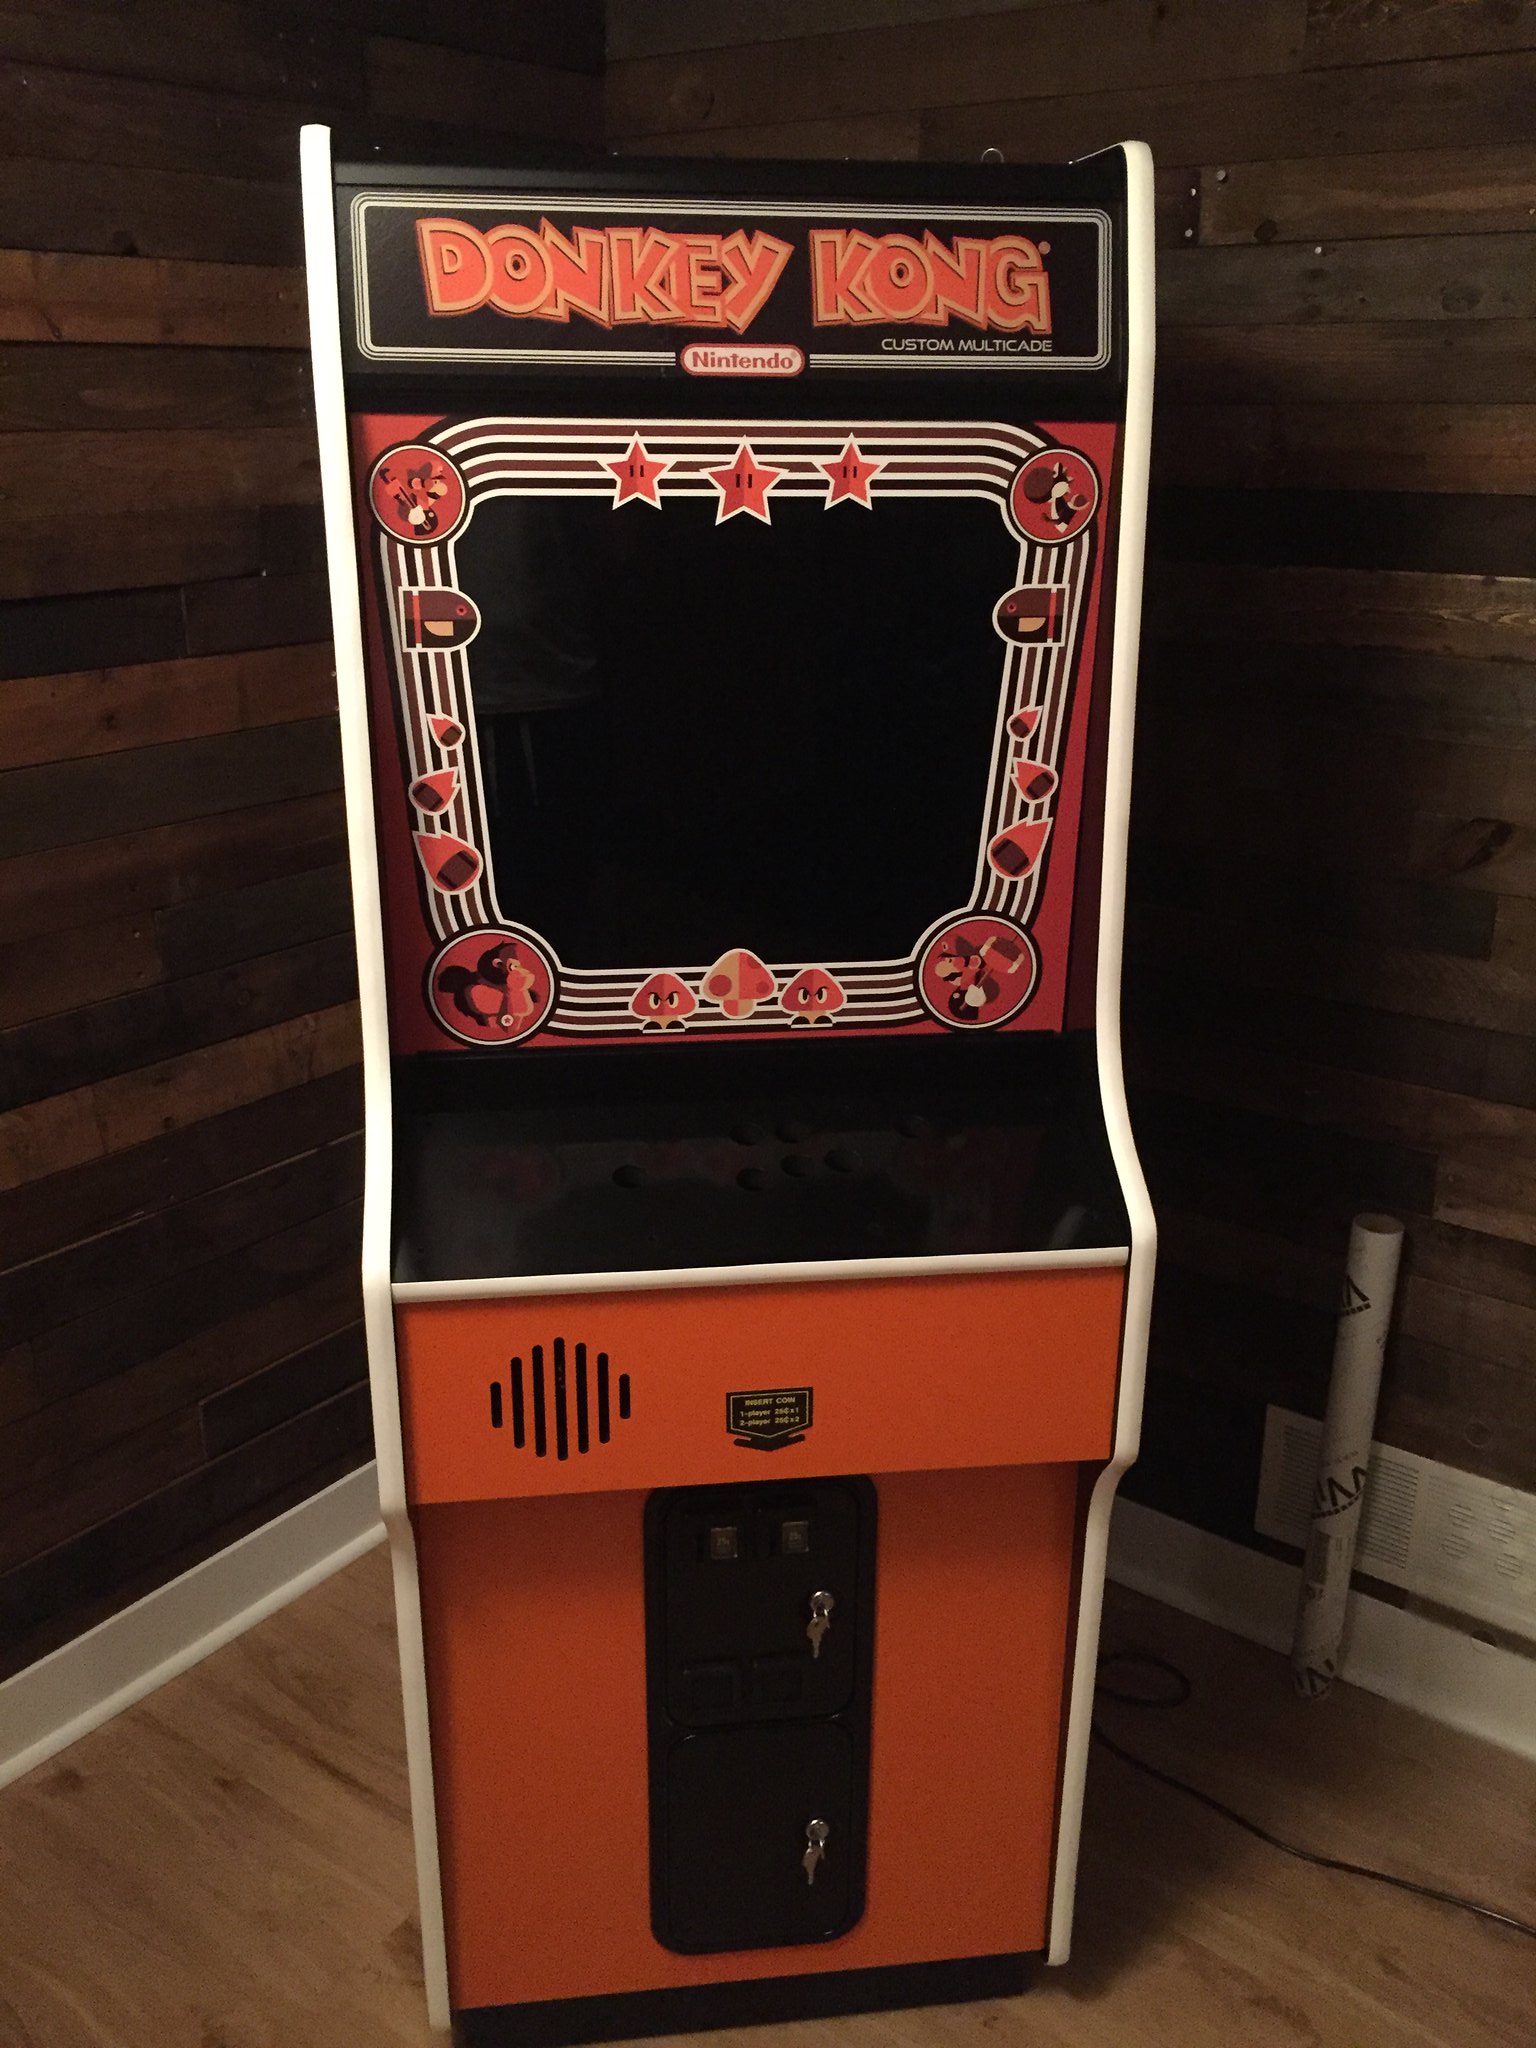
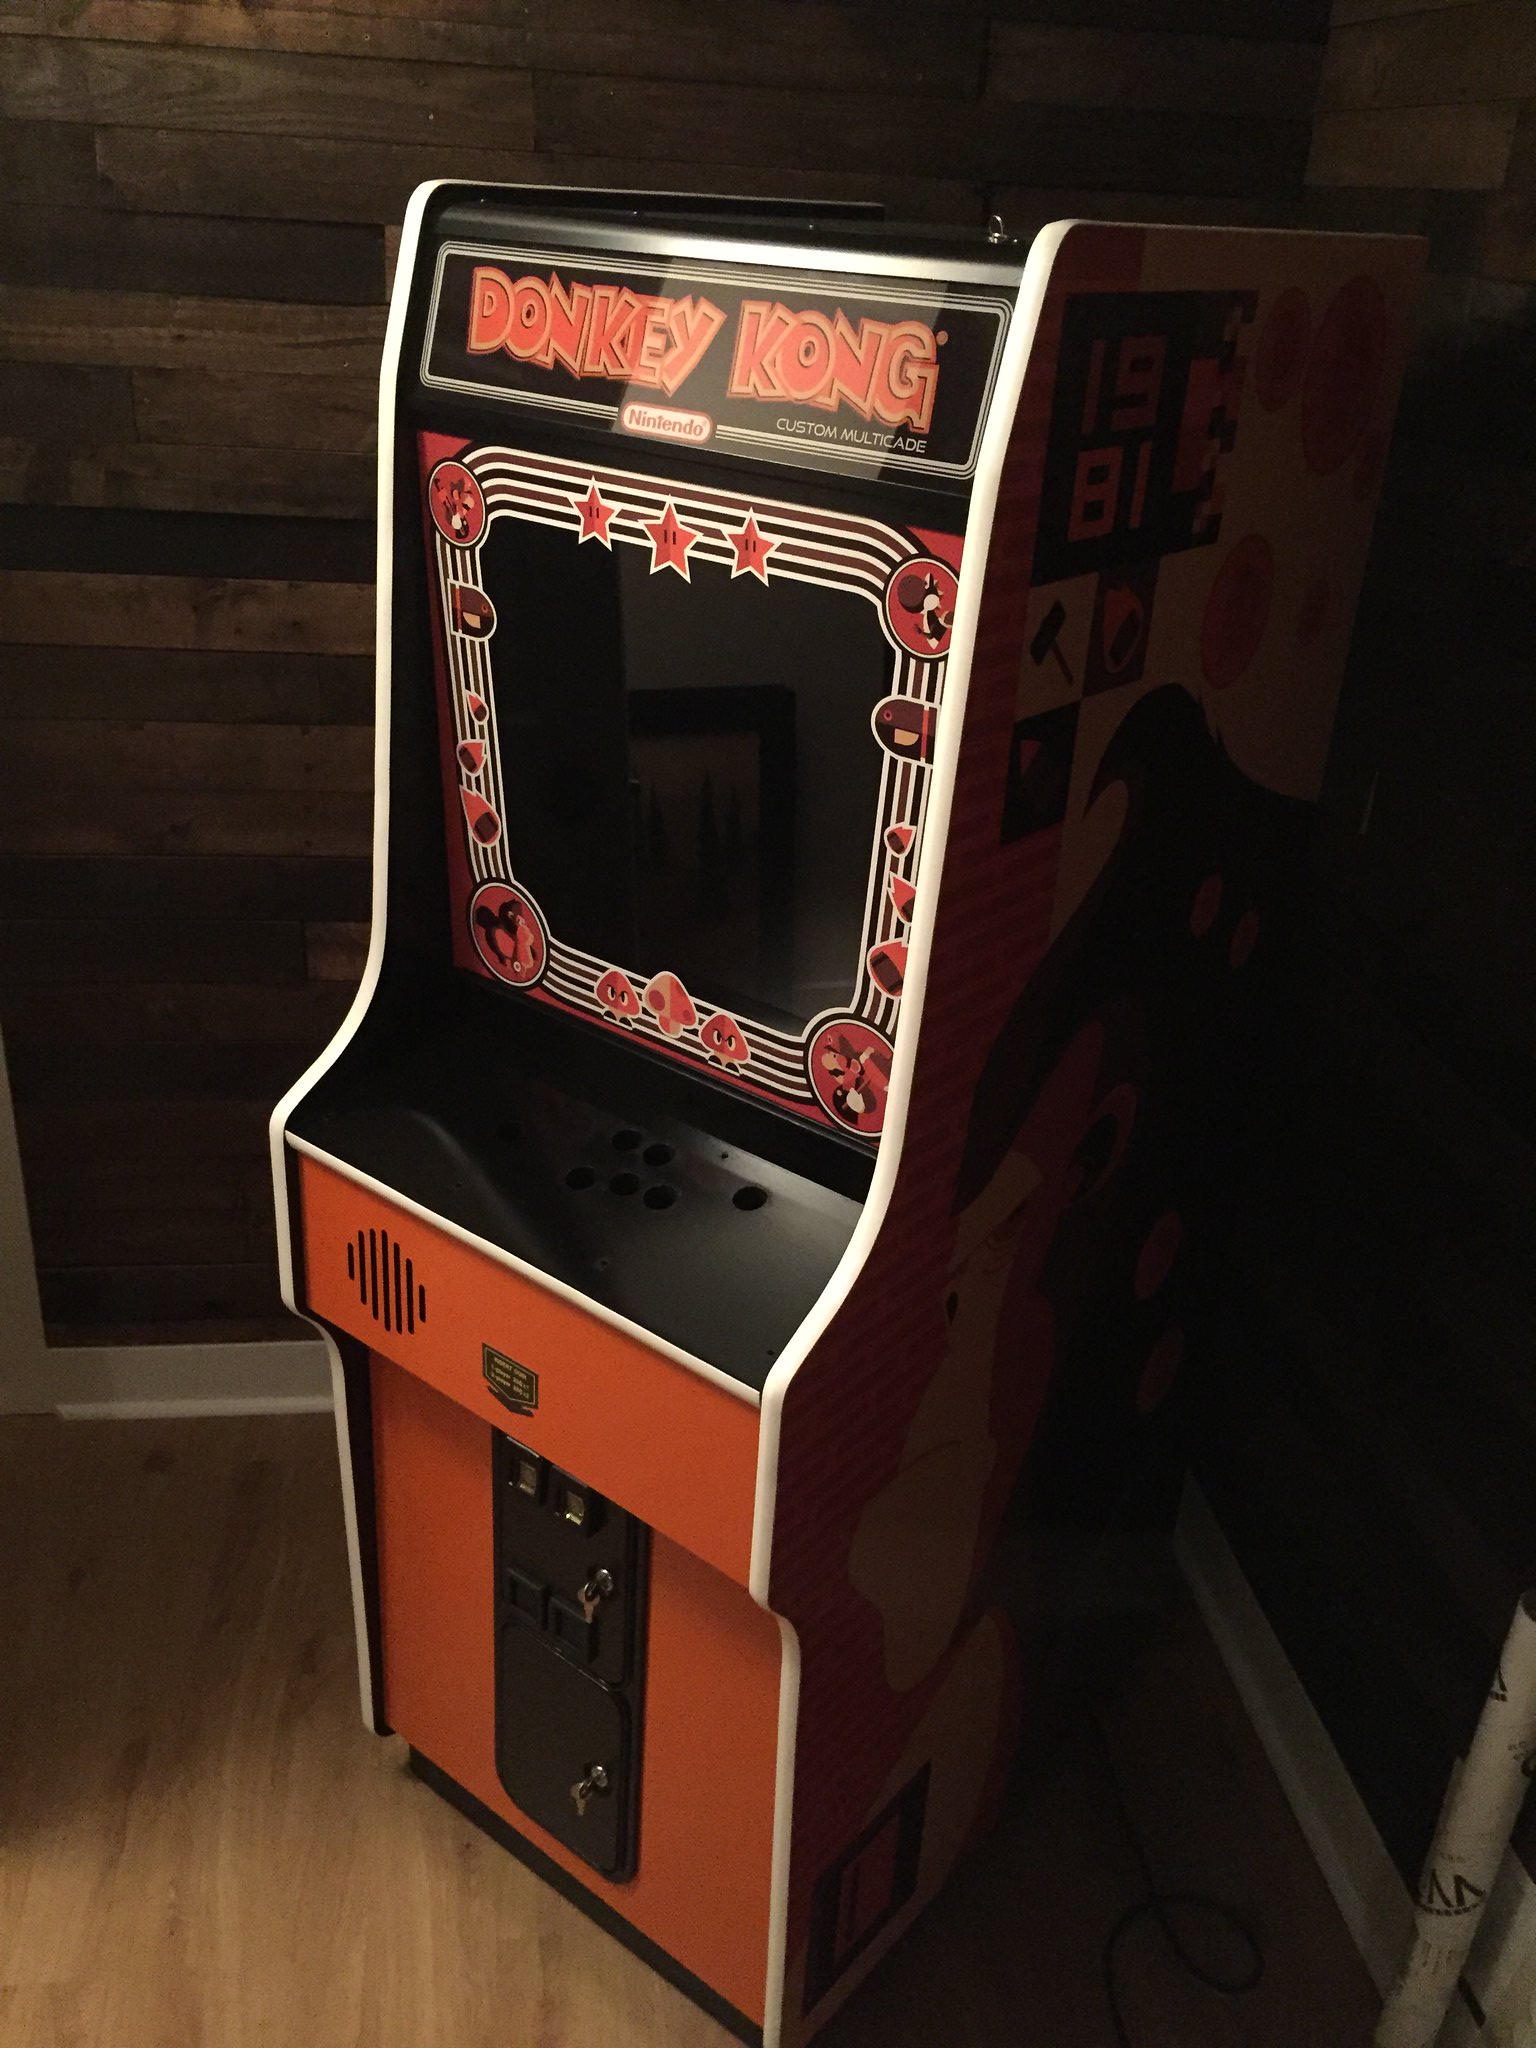
On a positive, the bezel looks great. It was about 1/16" too wide, so I ran it through the bandsaw after taping off the front. Tomorrow I'll throw in the side and top support / retainers and that will button up things up. I had this printed on smoked acrylic and the monitor looks pretty slick all lit up.

On the to-do list: Complete the control panel, wire up the Xin Mo, wire up the coin mech to the Xin-Mo and then finally map the buttons! Playing this thing is long overdue...

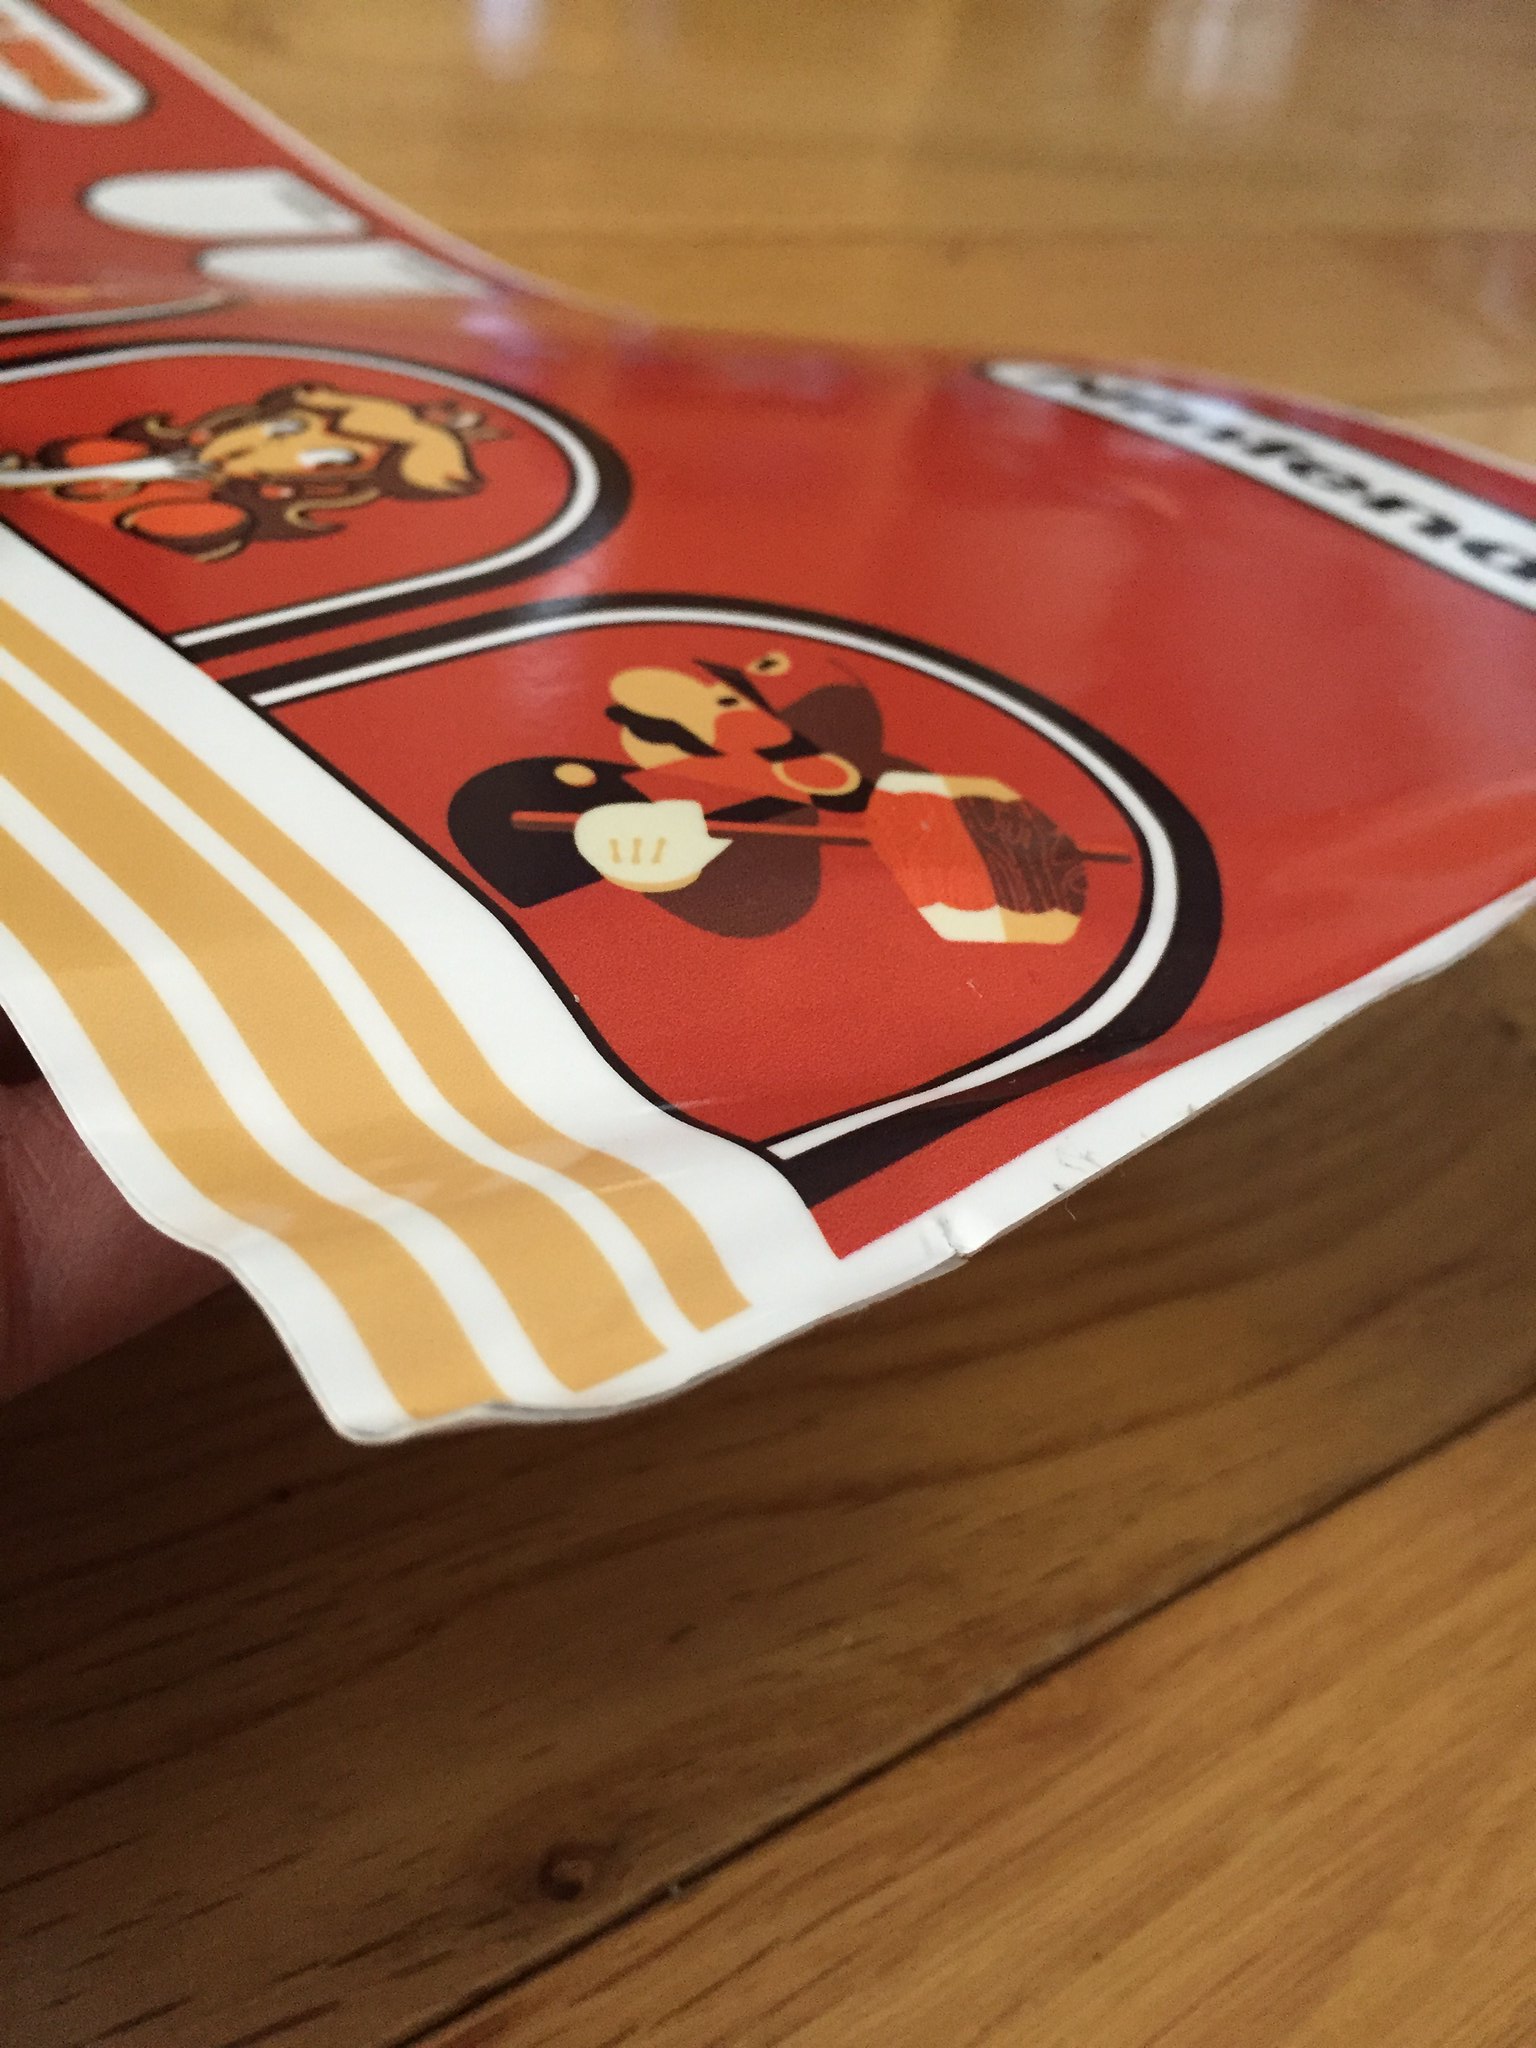
Here are some photos of the arcade and of the crushed artwork. I tried to gently warm it with an iron between some thick paper but it didn't remove the creases. You can see in the photos where the vinyl is torn on the edge as well.


ChanceKJ

  • Trade Count: (0)
  • Full Member
  • ***
  • Offline Offline
  • Posts: 3229
  • Last login:August 07, 2021, 02:52:06 pm
.
« Reply #217 on: June 29, 2017, 02:34:13 am »
.
« Last Edit: March 19, 2021, 02:27:08 am by ChanceKJ »

mwhitney

  • Trade Count: (0)
  • Full Member
  • ***
  • Offline Offline
  • Posts: 129
  • Last login:December 06, 2017, 10:30:20 pm
  • I want to build my own arcade controls!
    • Michael Whitney - Designer. Maker. Builder.
Re: First DK Cabinet Build
« Reply #218 on: November 30, 2017, 02:50:22 pm »
UPDATE -

Hey gents - it's been a while since I've posted as I've been caught up with other projects.

I finally got around to detailing my DK Arcade build. For anyone interested, you can read it here: https://www.michaelwhitney.ca/donkey-kong-arcade-machine/


Hope everyone is having fun!

TheShaner

  • Trade Count: (0)
  • Full Member
  • ***
  • Offline Offline
  • Posts: 451
  • Last login:December 23, 2017, 10:42:25 pm
  • Shut your noise tube filthy Taco Human!
Re: First DK Cabinet Build
« Reply #219 on: December 01, 2017, 12:06:12 am »
Beautiful Cab, excellent thread.  I think I might need to build another.

TheGreatRedDragon

  • Trade Count: (0)
  • Full Member
  • ***
  • Offline Offline
  • Posts: 76
  • Last login:December 23, 2023, 12:40:53 pm
  • I want to build my own arcade controls!
Re: First DK Cabinet Build
« Reply #220 on: December 01, 2017, 04:03:07 am »
This cabinet is a work of art and a huge inspiration. The colors are coordinated perfectly.

barrymossel

  • Trade Count: (0)
  • Full Member
  • ***
  • Offline Offline
  • Posts: 498
  • Last login:October 29, 2021, 11:25:52 am
  • Spectrum
    • forum.arcadecontrols.com/index.php/topic,157647.0.html
Re: First DK Cabinet Build
« Reply #221 on: December 01, 2017, 04:41:13 am »
Really, really nice.

mwhitney

  • Trade Count: (0)
  • Full Member
  • ***
  • Offline Offline
  • Posts: 129
  • Last login:December 06, 2017, 10:30:20 pm
  • I want to build my own arcade controls!
    • Michael Whitney - Designer. Maker. Builder.
Re: First DK Cabinet Build
« Reply #222 on: December 01, 2017, 12:08:05 pm »
Beautiful Cab, excellent thread.  I think I might need to build another.

Thanks Shane! Really appreciate it.

mwhitney

  • Trade Count: (0)
  • Full Member
  • ***
  • Offline Offline
  • Posts: 129
  • Last login:December 06, 2017, 10:30:20 pm
  • I want to build my own arcade controls!
    • Michael Whitney - Designer. Maker. Builder.
Re: First DK Cabinet Build
« Reply #223 on: December 01, 2017, 12:10:06 pm »
Thank you, Barry and Great Red - the only thing lingering is getting the coin door operational... a minor detail and good Sunday project this winter.

zinger

  • Trade Count: (0)
  • Full Member
  • ***
  • Offline Offline
  • Posts: 136
  • Last login:February 25, 2019, 05:09:31 pm
  • There's a Donkey Kong Kill Screen coming up!
Re: First DK Cabinet Build
« Reply #224 on: December 02, 2017, 12:32:50 am »
This turned out really nice!  :applaud: The overall postmodern theme turned out great.

mwhitney

  • Trade Count: (0)
  • Full Member
  • ***
  • Offline Offline
  • Posts: 129
  • Last login:December 06, 2017, 10:30:20 pm
  • I want to build my own arcade controls!
    • Michael Whitney - Designer. Maker. Builder.
Re: First DK Cabinet Build
« Reply #225 on: December 04, 2017, 01:15:45 pm »
Thanks Zinger!