Main Restorations Software Audio/Jukebox/MP3 Everything Else Buy/Sell/Trade
Project Announcements Monitor/Video GroovyMAME Merit/JVL Touchscreen Meet Up Retail Vendors
Driving & Racing Woodworking Software Support Forums Consoles Project Arcade Reviews
Automated Projects Artwork Frontend Support Forums Pinball Forum Discussion Old Boards
Raspberry Pi & Dev Board controls.dat Linux Miscellaneous Arcade Wiki Discussion Old Archives
Lightguns Arcade1Up Try the site in https mode Site News

Unread posts | New Replies | Recent posts | Rules | Chatroom | Wiki | File Repository | RSS | Submit news


Author Topic: First DK Cabinet Build  (Read 41197 times)

0 Members and 1 Guest are viewing this topic.

mwhitney

  • Trade Count: (0)
  • Full Member
  • ***
  • Offline Offline
  • Posts: 129
  • Last login:December 06, 2017, 10:30:20 pm
  • I want to build my own arcade controls!
    • Michael Whitney - Designer. Maker. Builder.
First DK Cabinet Build
« on: March 24, 2017, 02:14:19 am »
Hey gents - I'm Mike from BC and have been pouring over the threads here for a few weeks. The snowball started for me after watching and purchasing a 'Vader' 2600 from eBay with about a dozen games. Down the rabbit hole I went starting about a month ago and I've been obsessing over a build since plugging in Space Invaders - ironically, the first game I ever played at about 5 years old.

To date, I've amassed some casters, white T-mold, the necessary shank and bit, buttons, 2 zippyy controllers, an RPi3, a Xin Mo dual board and have been mocking up my plans in Sketch-Up by following the Jakobud drawings. Like many here, I came a cross a number of discrepancies - especially when working on the artwork and sourcing out parts from Mike's et al. I've yet to pull the trigger on the brackets and have been searching for some pro DIY mounting options to house the bezel and marquee.... still looking.

Most recently, I stumbled upon Gaetan's plans and felt like I'd hit the jackpot (thank you, if you're reading). I've since re-worked the artwork in illustrator for the sides and have a solid vision moving forward.

Personally, I love the shape of the DK3 cab, but I'm not crazy about the artwork. For this build I want to have something that looks a bit different but tasteful utilizing the early Industrial Era artwork - kind of modern pop-art. As such, I found some stuff by Tom Whalen, recreated his artwork in illustrator and then reworked it to fit the curves / layout of the cabinet. I've done the bezel and marquee as well and just need to work out the control panel - I'm not sure if I should use 1 joystick or 2.

So far, I've set up the Pi and have a few games along with a plywood control panel to keep me inspired :). So far my wife and daughters are pretty excited - nostalgic for my wife, and a whole new world to my young daughters as Atari has been their first exposure to video games. I have 2 joysticks and 7 buttons set up for each, plus the P1 / P2 buttons but so far, we haven't used the second controller.... wondering if this is redundant.

Anyway, my two sheets of 3/4 MDF are sitting in the garage ready to make some dust in the morning. In hindsight, (had I found Gaetan's plans earlier), I'd have bought 15mm MDF and smaller T-mold, but 3/4 it is, at least for the sides and shelves.

I'm looking forward to finally getting started and appreciate all the information and trailblazing that's been done here. Thanks for the well-documented write-ups, photos and inspiration.

Here we go...

ChanceKJ

  • Trade Count: (0)
  • Full Member
  • ***
  • Offline Offline
  • Posts: 3229
  • Last login:August 07, 2021, 02:52:06 pm
.
« Reply #1 on: March 24, 2017, 04:09:14 am »
.
« Last Edit: March 19, 2021, 02:52:53 am by ChanceKJ »

zinger

  • Trade Count: (0)
  • Full Member
  • ***
  • Offline Offline
  • Posts: 136
  • Last login:February 25, 2019, 05:09:31 pm
  • There's a Donkey Kong Kill Screen coming up!
Re: First DK Cabinet Build
« Reply #2 on: March 24, 2017, 07:18:35 pm »
Awesome!  :applaud: I originally looked at using MDF for my DK build and decided against it as it weighs a ton. I used 5/8ths (9/16ths actual) for my DK build and found DK blue laminate. It is light enough where I can pick it up myself. I couldn't imagine moving around an MDF based DK.

Check out my DK build here:
http://forum.arcadecontrols.com/index.php/topic,150085.0.html

Also, I need to finish my blog here to show the final result.

mwhitney

  • Trade Count: (0)
  • Full Member
  • ***
  • Offline Offline
  • Posts: 129
  • Last login:December 06, 2017, 10:30:20 pm
  • I want to build my own arcade controls!
    • Michael Whitney - Designer. Maker. Builder.
Re: First DK Cabinet Build
« Reply #3 on: March 24, 2017, 10:44:45 pm »
Thanks Chance, and Zinger. I've bookmarked both of your builds as well as a few others for motivation. I love the detail you guys put into your cabinets! Thanks for the support.

RE MDF - it weighs a ton! In hindsight, I may have gone the G1S route - plus, I hate working with MDF. I'd have gone outside to cut and route, but we had rain today... spent a good hour just vacuuming up ;).

zinger

  • Trade Count: (0)
  • Full Member
  • ***
  • Offline Offline
  • Posts: 136
  • Last login:February 25, 2019, 05:09:31 pm
  • There's a Donkey Kong Kill Screen coming up!
Re: First DK Cabinet Build
« Reply #4 on: March 24, 2017, 10:55:52 pm »
Oh yeah, the dust from routing MDF is terrible too. It's not too late to switch to 5/8ths plywood. :)

mwhitney

  • Trade Count: (0)
  • Full Member
  • ***
  • Offline Offline
  • Posts: 129
  • Last login:December 06, 2017, 10:30:20 pm
  • I want to build my own arcade controls!
    • Michael Whitney - Designer. Maker. Builder.
Re: First DK Cabinet Build
« Reply #5 on: March 24, 2017, 11:02:45 pm »
Oh yeah, the dust from routing MDF is terrible too. It's not too late to switch to 5/8ths plywood. :)

I made some headway today ;) No going back now. [noob alert]... how does one post photos?! I hit the image icon but it just inserts an 'image' tag - do we have to post our images elsewhere and add a link?  I tried the 'Attachment' area as well but it's hard to see which image is which and how to comment on each. Cheers!

UPDATE: Figured out how to post pics ;)
« Last Edit: March 25, 2017, 12:23:25 am by mwhitney »

mwhitney

  • Trade Count: (0)
  • Full Member
  • ***
  • Offline Offline
  • Posts: 129
  • Last login:December 06, 2017, 10:30:20 pm
  • I want to build my own arcade controls!
    • Michael Whitney - Designer. Maker. Builder.
Re: First DK Cabinet Build
« Reply #6 on: March 24, 2017, 11:55:39 pm »
Some progress today!

Hopefully this link works - I'll keep this one short to test the img link.

Here's the 1:1 plan laid out on 3/4 MDF:


Trim Complete:


Taped down and ready to transfer:


Transfered:


Double checking measurements:


Here's where I ran into a glitch - plans read 1692 mm less 60 mm for the base which would be 1632 mm. However, you can see in the photo that the 1:1 drawing is measuring ~1622.


This had me stumped for a while...
« Last Edit: March 25, 2017, 12:06:43 am by mwhitney »

mwhitney

  • Trade Count: (0)
  • Full Member
  • ***
  • Offline Offline
  • Posts: 129
  • Last login:December 06, 2017, 10:30:20 pm
  • I want to build my own arcade controls!
    • Michael Whitney - Designer. Maker. Builder.
Re: First DK Cabinet Build
« Reply #7 on: March 25, 2017, 12:14:42 am »
I went back and working from the bottom right of the "VUE DE COTE" plan, I transferred each measurement, i.e. 36mm, 500mm, 76mm, 15mm, 23mm, 180mm, 31mm, 26mm, 124mm, 454mm, 33mm, 102mm, and 32mm. This totals 1632mm, but the drawing isn't measuring up (unless I'm drunk  :cheers:.

From what I can tell, all looked good until I got up to the marquee area. This is where I found about 10mm of a discrepancy. I shifted the template up to my 1632 line for the top of the panel and just made up the difference.


If I'm wrong, better to have something to trim. Besides, if anyone complains that my cabinet is 1 cm to tall, they're not invited to come over and play ;).

I'm doing custom graphics on this cabinet as well, so if it is off slightly, I'll account for this in my artwork.


mwhitney

  • Trade Count: (0)
  • Full Member
  • ***
  • Offline Offline
  • Posts: 129
  • Last login:December 06, 2017, 10:30:20 pm
  • I want to build my own arcade controls!
    • Michael Whitney - Designer. Maker. Builder.
Re: First DK Cabinet Build
« Reply #8 on: March 25, 2017, 12:16:28 am »
Here's another detail of the top portion after laying out all the measurements. You can see how this kicks everything up about 10 mm and now matches the overall '1632mm' spec:


mwhitney

  • Trade Count: (0)
  • Full Member
  • ***
  • Offline Offline
  • Posts: 129
  • Last login:December 06, 2017, 10:30:20 pm
  • I want to build my own arcade controls!
    • Michael Whitney - Designer. Maker. Builder.
Re: First DK Cabinet Build
« Reply #9 on: March 25, 2017, 12:22:17 am »
Time to trim these boards down:


Cut the curves:


Ready to sand:


Cleaning up the radius':


Transferring to the second side and loosely cutting the excess for the router:


Clamped and ready to roll with a top-bearing bit:


« Last Edit: March 25, 2017, 12:35:58 am by mwhitney »

mwhitney

  • Trade Count: (0)
  • Full Member
  • ***
  • Offline Offline
  • Posts: 129
  • Last login:December 06, 2017, 10:30:20 pm
  • I want to build my own arcade controls!
    • Michael Whitney - Designer. Maker. Builder.
Re: First DK Cabinet Build
« Reply #10 on: March 25, 2017, 12:30:17 am »
Last bit today - I really wanted to try out this T-molding slot cutter. I figure it's better to screw it up now than when the cabinet is assembled ;). Luckily, all went off without a hitch and I managed to get my test cut perfect on the first attempt. The digital calliper came in handy here.


Both sides done!


Feeling good about the progress today:


Goals for tomorrow:

Build the base out of some hardwood I have on-hand, cut some interior panels, and screw in some blocking so this baby can start taking shape.

zinger

  • Trade Count: (0)
  • Full Member
  • ***
  • Offline Offline
  • Posts: 136
  • Last login:February 25, 2019, 05:09:31 pm
  • There's a Donkey Kong Kill Screen coming up!
Re: First DK Cabinet Build
« Reply #11 on: March 25, 2017, 01:08:48 am »
Yeah, you made good progress! When you get those sides cut out and set them up side by side then it feels like you're almost done.  ;)

Also, that's a really sharp pencil with no eraser. :)

Looks like you didn't use the Gaetan plans for your template? I had traced a template from an original DK at the OMSI Museum and the Gaetan plans were really close. I don't recall any big discrepancies.

mwhitney

  • Trade Count: (0)
  • Full Member
  • ***
  • Offline Offline
  • Posts: 129
  • Last login:December 06, 2017, 10:30:20 pm
  • I want to build my own arcade controls!
    • Michael Whitney - Designer. Maker. Builder.
Re: First DK Cabinet Build
« Reply #12 on: March 25, 2017, 01:46:11 am »
Hi Zinger - good eye... that's a life full of revisions ;).

This is the plan I used (printed at Staples): http://www.classicarcadecabinets.com/donkey-kong.html
[Down where it reads "Files to Print"]

So far, this is the only issue (10 mm isn't much at the end of the day). I would like to confirm if the cab sides are, in fact 1632 mm. At this point, I don't think I'll be changing it but I am curious.

As an aside, having not seen a DK3 in real life since I was a kid, I'm surprised by how small it is! I was expecting it to be a bit more substantial. My wife will be happy that it's not an elephant in the room.

mwhitney

  • Trade Count: (0)
  • Full Member
  • ***
  • Offline Offline
  • Posts: 129
  • Last login:December 06, 2017, 10:30:20 pm
  • I want to build my own arcade controls!
    • Michael Whitney - Designer. Maker. Builder.
Re: First DK Cabinet Build
« Reply #13 on: March 25, 2017, 11:50:58 pm »
Day 2 - Built the cabinet base. I'm looking forward to getting those pretty sides up off the ground so I don't chip the edges.


I had some strips of oak veneer plywood sitting around and thought it would work well for the base. Tomorrow I'll hit this with primer and paint. I used the build video from Canadian Arcade.


Goals for tomorrow are to follow Zinger's process of installing batons in the interior to avoid drilling through the sides.

mwhitney

  • Trade Count: (0)
  • Full Member
  • ***
  • Offline Offline
  • Posts: 129
  • Last login:December 06, 2017, 10:30:20 pm
  • I want to build my own arcade controls!
    • Michael Whitney - Designer. Maker. Builder.
Re: First DK Cabinet Build
« Reply #14 on: March 26, 2017, 11:21:09 pm »
Day 3: Primed, sanded and painted the base. Also, started adding batons inside to affix the panels.

QUESTION: What should the interior spacing be between the top panel and the shelf?

I've read 5.875" or app. 149.23 mm. I have my batons set to about 149.61 (off only because of builder error ;) ). Does this sound about right?


Almost completed one side's blocking - this took a ton of time and triple checking.


zinger

  • Trade Count: (0)
  • Full Member
  • ***
  • Offline Offline
  • Posts: 136
  • Last login:February 25, 2019, 05:09:31 pm
  • There's a Donkey Kong Kill Screen coming up!
Re: First DK Cabinet Build
« Reply #15 on: March 27, 2017, 11:49:23 am »
QUESTION: What should the interior spacing be between the top panel and the shelf?

I've read 5.875" or app. 149.23 mm. I have my batons set to about 149.61 (off only because of builder error ;) ). Does this sound about right?
I'm not following the 149.61 measurement that your asking about. That's the distance you have set between your top panel and marquee shelf? That's about the height of the marquee plus a little room. However, the marquee sits at an angle. Your picture where you show the 144.61mm looks like it could be correct when you account for the thickness of baton.

See here for breakdown of measurements:
http://hico-srv004.pixhotel.fr/sites/default/files/gamoovernet/20150323232243-Gaetan-Donkey-Kong-Cab-Gaetan-Coupe.jpg

You'll also notice the 5mm board that's attached to top shelf. That's important to allow clearance of the top bracket for the marquee. I just cut this area out of the top panel.  Is that your plan?

mwhitney

  • Trade Count: (0)
  • Full Member
  • ***
  • Offline Offline
  • Posts: 129
  • Last login:December 06, 2017, 10:30:20 pm
  • I want to build my own arcade controls!
    • Michael Whitney - Designer. Maker. Builder.
Re: First DK Cabinet Build
« Reply #16 on: March 27, 2017, 01:04:24 pm »
Thanks for getting back to me, Zinger.

I think I was staring at things for too long last yesterday.

Just to clarify:

1) The space between the bottom of the top panel and the top of the shelf is 135 mm  (5.3"). This is what yours is set to? If so, the measurement in my photo is correct as far as placement but my bottom baton has to come up to read 135 mm.

2) With the marquee artwork measuring 5.875" (as per Mike's Arcade), the additional height is just because it's on a slight angle, correct? (I get this will add height - just want to double check all of this :) ).

3) The 5mm board - not completely clear on this in terms of what it does. In your case, did you just add 15 mm to your top shelf measurement of 618 mm (633 mm) and then cut a rabbet into it? So, essentially the underside of your top panel doesn't have that 'jut' / extra piece?

I'm going to go back to your thread and try to see what you've done for this portion.

Thank you!
Mike

zinger

  • Trade Count: (0)
  • Full Member
  • ***
  • Offline Offline
  • Posts: 136
  • Last login:February 25, 2019, 05:09:31 pm
  • There's a Donkey Kong Kill Screen coming up!
Re: First DK Cabinet Build
« Reply #17 on: March 27, 2017, 03:39:43 pm »
1) The space between the bottom of the top panel and the top of the shelf is 135 mm  (5.3"). This is what yours is set to? If so, the measurement in my photo is correct as far as placement but my bottom baton has to come up to read 135 mm.
Yes, I'm at 135mm. I just measured it. I pretty much followed the Gaetan plans and I don't recall finding any issues. The marquee, bezel, control panel, brackets, art, etc. all fits great.

2) With the marquee artwork measuring 5.875" (as per Mike's Arcade), the additional height is just because it's on a slight angle, correct? (I get this will add height - just want to double check all of this :) ).
Yes, the marquee sits at an angle. It almost sits at the proper angle just sitting in the marquee holder bracket.

3) The 5mm board - not completely clear on this in terms of what it does. In your case, did you just add 15 mm to your top shelf measurement of 618 mm (633 mm) and then cut a rabbet into it? So, essentially the underside of your top panel doesn't have that 'jut' / extra piece?
The 5mm board just helps to support and hold the marquee in place. The marquee will lean against it. The top marquee bracket will not touch this 5mm board and is screwed to the top panel.

mwhitney

  • Trade Count: (0)
  • Full Member
  • ***
  • Offline Offline
  • Posts: 129
  • Last login:December 06, 2017, 10:30:20 pm
  • I want to build my own arcade controls!
    • Michael Whitney - Designer. Maker. Builder.
Re: First DK Cabinet Build
« Reply #18 on: March 27, 2017, 04:00:54 pm »
Thanks for clarifying, Zinger.

What do you mean by: "I just cut this area out of the top panel...."

Do you have a photo you can send of how you worked this? Also, how far back did you send your shelf? Does it meet up to the back panel - I notice your blocking goes right up to the rear of the cab. Any photos you can send of your marquee area are appreciated!

Thanks.

zinger

  • Trade Count: (0)
  • Full Member
  • ***
  • Offline Offline
  • Posts: 136
  • Last login:February 25, 2019, 05:09:31 pm
  • There's a Donkey Kong Kill Screen coming up!
Re: First DK Cabinet Build
« Reply #19 on: March 27, 2017, 04:13:13 pm »
What do you mean by: "I just cut this area out of the top panel...."
I thought I had rabbetted the top shelf but I looked and I didn't. My mistake. My memory of this build is already going. I have a supporting board like in the Gaetan plans.

Also, to see the inside of the Marquee area then scan this thread.
http://forum.arcadecontrols.com/index.php/topic,144300.0.html

mwhitney

  • Trade Count: (0)
  • Full Member
  • ***
  • Offline Offline
  • Posts: 129
  • Last login:December 06, 2017, 10:30:20 pm
  • I want to build my own arcade controls!
    • Michael Whitney - Designer. Maker. Builder.
Re: First DK Cabinet Build
« Reply #20 on: March 27, 2017, 05:40:36 pm »
What do you mean by: "I just cut this area out of the top panel...."
I thought I had rabbetted the top shelf but I looked and I didn't. My mistake. My memory of this build is already going. I have a supporting board like in the Gaetan plans.

Also, to see the inside of the Marquee area then scan this thread.
http://forum.arcadecontrols.com/index.php/topic,144300.0.html

Thanks for taking a look!

wp34

  • Trade Count: (+3)
  • Full Member
  • ***
  • Offline Offline
  • Posts: 4794
  • Last login:April 10, 2022, 09:48:19 pm
Re: First DK Cabinet Build
« Reply #21 on: March 27, 2017, 06:51:08 pm »
Love the build pictures.  Keep it up! :cheers:

Can you give some more detail on how you used your digital caliper to line up the t-molding slot?

mwhitney

  • Trade Count: (0)
  • Full Member
  • ***
  • Offline Offline
  • Posts: 129
  • Last login:December 06, 2017, 10:30:20 pm
  • I want to build my own arcade controls!
    • Michael Whitney - Designer. Maker. Builder.
Re: First DK Cabinet Build
« Reply #22 on: March 27, 2017, 07:02:51 pm »
Love the build pictures.  Keep it up! :cheers:

Can you give some more detail on how you used your digital caliper to line up the t-molding slot?

Hey WP - thanks for the feedback.

As for the digital calliper, I wish I had a more exact method to share, but I just measured the width of my MDF with the calliper, divided it in half and set it to that number. From there, I marked it on the edge and set this mark to middle of the tooth on my slot-cutter bit.

I did a test cut on some scrap, expected to make some minor adjustments, but when I flipped the test board over, the bit lined up perfectly. I hammered in a piece of T-mold and it was spot-on... I'd attribute most of this to luck ;).

wp34

  • Trade Count: (+3)
  • Full Member
  • ***
  • Offline Offline
  • Posts: 4794
  • Last login:April 10, 2022, 09:48:19 pm
Re: First DK Cabinet Build
« Reply #23 on: March 27, 2017, 07:34:36 pm »
Cool that makes sense.  I got one of those for Christmas but haven't taken it out of the box yet.  Never thought about using it that way.

pbj

  • Trade Count: (+4)
  • Full Member
  • ***
  • Offline Offline
  • Posts: 10875
  • Last login:Yesterday at 07:58:32 pm
  • Obey.
    • The Chris Burke Band
Re: First DK Cabinet Build
« Reply #24 on: March 27, 2017, 08:04:05 pm »
Round off those top rear corners on the sides.

Wyo

  • Trade Count: (0)
  • Full Member
  • ***
  • Offline Offline
  • Posts: 408
  • Last login:May 01, 2023, 09:22:42 pm
  • I want to build my own arcade controls!
Re: First DK Cabinet Build
« Reply #25 on: March 27, 2017, 08:33:09 pm »
Why would he do that?   :dunno

Nice build so far! Love watching nintendo cabs progress.  Subbed!  :applaud:

mwhitney

  • Trade Count: (0)
  • Full Member
  • ***
  • Offline Offline
  • Posts: 129
  • Last login:December 06, 2017, 10:30:20 pm
  • I want to build my own arcade controls!
    • Michael Whitney - Designer. Maker. Builder.
Re: First DK Cabinet Build
« Reply #26 on: March 28, 2017, 01:19:16 am »
Thanks Wyo!

PBJ - not sure which corner you mean - I guess there's only 1 square corner left ;).

...

Made a bit of progress tonight and sorted out the spacing at the top. 135 mm from the underside of the top panel to the top side of the shelf... hopefully I've got it right ;). Many thanks to Zinger for some tips along the way.

Tonight I buttoned up the batons on the one panel and added the key. I followed the measurements exactly from Gaetan's plans but I had to trim a bit off the front-most edge of the key because I'm using 3/4" material. Had I left it, the front panel would have been a bit to close to the edge so I trimmed about a saw blade width of that leading edge.


View from the top:


Also, picked up some nice wheels while I was in Florida a few weeks ago. Twisted Quarter has some great parts so I had them send me the wheels, a coin door, T-mold and my router bit.

Here's my first issue. I failed to measure the wheel height and the wheels are about 1/8" taller than my base height.

Here's the base and bottom assembled:


Here's a closer view. I haven't bolted the wheels on but you can see how they lift the base slightly.


Any ideas here on how to resolve this apart from rebuilding the base? The only thing I can think of is to get some leg levellers for each corner, or, buy some new wheels but I'm not sure if the size increments for wheels are that specific. I'd need one that's about 3.5".

I guess another solution would be to build up the corner braces inside the bottom frame to sit flush with the bottom edge and then nail some of those vinyl furniture feet into them. This would likely raise things ~.25".

Silly mistake...


Wyo

  • Trade Count: (0)
  • Full Member
  • ***
  • Offline Offline
  • Posts: 408
  • Last login:May 01, 2023, 09:22:42 pm
  • I want to build my own arcade controls!
Re: First DK Cabinet Build
« Reply #27 on: March 28, 2017, 08:32:49 am »
You can either route the bottom wood panel down in the location of the wheel bases a 1/4 inch to recess the wheels slightly....or you can just get some leg levelers like you said, which I think is the best and easiest solution. 

If you extended those corner braces on your base down so they were flush with the bottom of your base, (or the same length) you could just get some cheap nail on nylon pads for each corner ($2)....which would raise the base up 1/4-3/8 an inch.  I know this, because I have done this exact same thing.  The 3" wheels at Home Depot are slightly longer than the 1 x 4 pine wood base material I use as well.   

https://www.amazon.com/dp/B00004YOIS/ref=asc_df_B00004YOIS4913288/?tag=hyprod-20&creative=394997&creativeASIN=B00004YOIS&linkCode=df0&hvadid=167142626629&hvpos=1o11&hvnetw=g&hvrand=5718039526752017850&hvpone=&hvptwo=&hvqmt=&hvdev=t&hvdvcmdl=&hvlocint=&hvlocphy=9028915&hvtargid=pla-277840444292
« Last Edit: March 28, 2017, 08:39:38 am by Wyo »

ChanceKJ

  • Trade Count: (0)
  • Full Member
  • ***
  • Offline Offline
  • Posts: 3229
  • Last login:August 07, 2021, 02:52:06 pm
.
« Reply #28 on: March 28, 2017, 11:31:42 am »
.
« Last Edit: March 19, 2021, 02:52:42 am by ChanceKJ »

mwhitney

  • Trade Count: (0)
  • Full Member
  • ***
  • Offline Offline
  • Posts: 129
  • Last login:December 06, 2017, 10:30:20 pm
  • I want to build my own arcade controls!
    • Michael Whitney - Designer. Maker. Builder.
Re: First DK Cabinet Build
« Reply #29 on: March 28, 2017, 02:28:59 pm »
If you extended those corner braces on your base down so they were flush with the bottom of your base, (or the same length) you could just get some cheap nail on nylon pads for each corner ($2)....which would raise the base up 1/4-3/8 an inch.  I know this, because I have done this exact same thing.  The 3" wheels at Home Depot are slightly longer than the 1 x 4 pine wood base material I use as well.   


Perfect - I think this is the route I'll go. Is there an ideal placement for the wheels in terms of how far off the back they should protrude and how much space between the wheel and the floor? Thanks for the suggestion.

mwhitney

  • Trade Count: (0)
  • Full Member
  • ***
  • Offline Offline
  • Posts: 129
  • Last login:December 06, 2017, 10:30:20 pm
  • I want to build my own arcade controls!
    • Michael Whitney - Designer. Maker. Builder.
Re: First DK Cabinet Build
« Reply #30 on: March 28, 2017, 02:30:25 pm »
Nail on nylon pads are the way i'd go too.

Thanks mate. Hitting up the hardware store on my lunch break... I need some bolts for the wheels as well.  :cheers:

Wyo

  • Trade Count: (0)
  • Full Member
  • ***
  • Offline Offline
  • Posts: 408
  • Last login:May 01, 2023, 09:22:42 pm
  • I want to build my own arcade controls!
Re: First DK Cabinet Build
« Reply #31 on: March 28, 2017, 04:07:59 pm »
Well, the wheels you are using are shaped different then the OEM DK wheels, which go straight down...where yours curve out.  So you have som creative license as far as how much they stick out the back.  I always place my wheels 2 1/2 inches from the outside edge of each side of the base piece of wood....I can't remember if that is standard for a nintendo cabinet...and that's why I started doing that.  I use straight mounted 3 inch wheels so they are usually flush with the back of the cabinet and you really can't see them....but again, it really doesn't matter because you have some artistic freedom....as long as they do the job.

As far as the height off the floor, once you get those nylon padson there it will be the perfect distance.  See, like you I had the same problem. Haha.  :cheers:

« Last Edit: March 28, 2017, 04:15:12 pm by Wyo »

mwhitney

  • Trade Count: (0)
  • Full Member
  • ***
  • Offline Offline
  • Posts: 129
  • Last login:December 06, 2017, 10:30:20 pm
  • I want to build my own arcade controls!
    • Michael Whitney - Designer. Maker. Builder.
Re: First DK Cabinet Build
« Reply #32 on: March 28, 2017, 04:38:11 pm »
Well, the wheels you are using are shaped different then the OEM DK wheels, which go straight down...where yours curve out.  So you have som creative license as far as how much they stick out the back.  I always place my wheels 2 1/2 inches from the outside edge of each side of the base piece of wood....I can't remember if that is standard for a nintendo cabinet...and that's why I started doing that.  I use straight mounted 3 inch wheels so they are usually flush with the back of the cabinet and you really can't see them....but again, it really doesn't matter because you have some artistic freedom....as long as they do the job.

As far as the height off the floor, once you get those nylon padson there it will be the perfect distance.  See, like you I had the same problem. Haha.  :cheers:


This is helpful, Wyo - thank you. The photos are great for reference. My wheels actually pivot which I'm thinking may not be the best. I picked up 4 of these anticipating that I may* (read as most likely will) build a second cabinet. Now I'm thinking I could* just put 4 wheels inside the frame in each corner which would raise the whole cab equally off the ground... just a thought. The weight may keep it in place or it may move around too much... tough to know for sure without trying it out. I may resort to picking up 2 fixed wheels if these don't pan out.

As an aside, about how much distance is there between your base front and the front edge of the plywood bottom? That is, on each side there looks to be about .5 to 1 cm - how much space is forward of the front frame? Thanks again!

Wyo

  • Trade Count: (0)
  • Full Member
  • ***
  • Offline Offline
  • Posts: 408
  • Last login:May 01, 2023, 09:22:42 pm
  • I want to build my own arcade controls!
Re: First DK Cabinet Build
« Reply #33 on: March 28, 2017, 05:15:50 pm »
Not sure the exact measurement, but as you can see here not much..1/4" maybe?  I forgot when built these two cabs I was constantly referencing my original DK cab I had at the time....so the measurements were pretty accurate.  The front panel buts up directly to the front of the bottom wood panel, so that puts the base back under about 1/4 inch plus the width of the wood you are using.  I used 5/8 wood...where as you are using 3/4. 


I don't know if you are in the US but if you are and decide to go with the straight wheels, Home Depot carries the 3" wheels for about $8 each.

But like I said, you have creative freedom since you aren't building a total rep, so I think 4 wheels with casters would definitely make the cabinet easier to move around....instead of having to do 3 point turns all the time. Haha. :)
« Last Edit: March 28, 2017, 05:19:15 pm by Wyo »

mwhitney

  • Trade Count: (0)
  • Full Member
  • ***
  • Offline Offline
  • Posts: 129
  • Last login:December 06, 2017, 10:30:20 pm
  • I want to build my own arcade controls!
    • Michael Whitney - Designer. Maker. Builder.
Re: First DK Cabinet Build
« Reply #34 on: March 28, 2017, 05:42:19 pm »
Perfect - my base has about the same spacing. RE the wheels, four may not be such a bad thing if the weight of the cab keeps it relatively still. I'm in Canada and we have HDs here but if I can keep the expense down, that would be ideal. It's only another 20 bones, but things are adding up - $70 on paint and supplies today (add that to the list of receipts my wife doesn't need to see ;) ).

Worst-case, the cab moves too much and she goes up on her back for the leg levellers and new wheels. Since this is not an authentic DK replica as I'll be adding my own graphics etc, these details aren't as important as if I were a DK3 purist.

OK - I've beaten this detail to death - onward and upward!

PS - great work on your build!

zinger

  • Trade Count: (0)
  • Full Member
  • ***
  • Offline Offline
  • Posts: 136
  • Last login:February 25, 2019, 05:09:31 pm
  • There's a Donkey Kong Kill Screen coming up!
Re: First DK Cabinet Build
« Reply #35 on: March 29, 2017, 12:58:29 am »
Are your wheels screwed on in the pictures? If so then consider bolts that go all the way through for strength.

mwhitney

  • Trade Count: (0)
  • Full Member
  • ***
  • Offline Offline
  • Posts: 129
  • Last login:December 06, 2017, 10:30:20 pm
  • I want to build my own arcade controls!
    • Michael Whitney - Designer. Maker. Builder.
Re: First DK Cabinet Build
« Reply #36 on: March 29, 2017, 01:01:00 am »
Not a ton of progress today - came home to a bunch of furniture in the garage as the insurance claim from the winter is getting settled and carpet is going in.  A such, the couch was in the middle of my workspace but I managed to squeeze in and glue / screw the bottom frame to the base. Tomorrow I'll play with the wheel setup and start laying out the second side...


mwhitney

  • Trade Count: (0)
  • Full Member
  • ***
  • Offline Offline
  • Posts: 129
  • Last login:December 06, 2017, 10:30:20 pm
  • I want to build my own arcade controls!
    • Michael Whitney - Designer. Maker. Builder.
Re: First DK Cabinet Build
« Reply #37 on: March 29, 2017, 01:03:52 am »
Are your wheels screwed on in the pictures? If so then consider bolts that go all the way through for strength.

Zinger -  I just set the wheels there for the photo to show the gap. While getting paint today I picked up some bolts, nuts and lock washers that will go right through. Thanks for the suggestion.

ChanceKJ

  • Trade Count: (0)
  • Full Member
  • ***
  • Offline Offline
  • Posts: 3229
  • Last login:August 07, 2021, 02:52:06 pm
.
« Reply #38 on: March 29, 2017, 02:05:20 pm »
.
« Last Edit: March 19, 2021, 02:52:28 am by ChanceKJ »

mwhitney

  • Trade Count: (0)
  • Full Member
  • ***
  • Offline Offline
  • Posts: 129
  • Last login:December 06, 2017, 10:30:20 pm
  • I want to build my own arcade controls!
    • Michael Whitney - Designer. Maker. Builder.
Re: First DK Cabinet Build
« Reply #39 on: March 29, 2017, 02:17:03 pm »
Great photo reference, Chance - cheers. If I start building more cabs I may just hit up Alibaba or Express. It's crazy how much casters cost... I opted to hit up Home Hardware today and bought 2 non-swivel type wheels very similar to the ones you and Wyo posted. I wanted to save the headache of adding my swivel type wheels - 4 would most likely have the cabinet moving during game-play and I'm not sure that 2 wheels that swivel on the back would be ideal either. Now I've got 4 swivel wheels I can donate to the shop which are handy anyway for carts etc.

ChanceKJ

  • Trade Count: (0)
  • Full Member
  • ***
  • Offline Offline
  • Posts: 3229
  • Last login:August 07, 2021, 02:52:06 pm
.
« Reply #40 on: March 30, 2017, 02:30:12 am »
.
« Last Edit: March 19, 2021, 02:52:18 am by ChanceKJ »

mwhitney

  • Trade Count: (0)
  • Full Member
  • ***
  • Offline Offline
  • Posts: 129
  • Last login:December 06, 2017, 10:30:20 pm
  • I want to build my own arcade controls!
    • Michael Whitney - Designer. Maker. Builder.
Re: First DK Cabinet Build
« Reply #41 on: March 30, 2017, 03:50:45 pm »
Thanks Chance. The wheels I bought yesterday at HH aren't going to work. Height was right, they were stationary but the base (didn't think to measure) would overhang about 3". I picked up some others today that will still overhang slightly, but nothing a cutting wheel can't fix... who would have thought finding wheels would be so tricky.

Made a bit of progress last night with some primer and paint on the bottom shelf and I laid out most of the batons on the second side. This went much quicker than the first now that I have something to take direct measurements from.

Also, cut the rear upper and lower strips that bookend the rear panel as well as the top shelf, so I should be able to get her upright this weekend.

QUESTION - one thing I'm not completely clear on is how the rear panel attaches. I bought a keyed lock for the top of the rear panel and get how that clasps but what's supporting the bottom edge as it rests on the lower rear strip with the cutout? Is there a piano hinge here?

Here's the second side with the batons in place:


Wyo

  • Trade Count: (0)
  • Full Member
  • ***
  • Offline Offline
  • Posts: 408
  • Last login:May 01, 2023, 09:22:42 pm
  • I want to build my own arcade controls!
Re: First DK Cabinet Build
« Reply #42 on: March 30, 2017, 04:07:56 pm »
Great work! You have a very nice selection of tools/shop! I'm jealous!

The bottom of the back door is attached to the cabinet with a tongue and groove.  I route the inside edge of the back bottom piece about 5/8 wide groove and half the thickness of the material and then do the same thing thing on the bottom of the back door panel.   

Then there is a piece of wood attached to the backside of the lower back panel that sandwiches the lower back door groove when installed.  You can kinda see the double thickness of that back panel on the pic that chance put up.  I usually just put a strip of wood along the top and not all the way down the back of the back panel.

Hope that make sense.

I actually didn't realize this when I made my first two cabs and had to Mickey mouse a way to attach the lower part of the door as well. Haha.  Kinda getting hung up on the same things.

Are you using stock nintendo lower marquee mounting brackets? Because If you are, there's a final issue there too...another builder on here did as well in the same place.  I ran there If not, you should be fine.

ChanceKJ

  • Trade Count: (0)
  • Full Member
  • ***
  • Offline Offline
  • Posts: 3229
  • Last login:August 07, 2021, 02:52:06 pm
.
« Reply #43 on: March 30, 2017, 04:15:36 pm »
.
« Last Edit: March 19, 2021, 02:52:06 am by ChanceKJ »

ChanceKJ

  • Trade Count: (0)
  • Full Member
  • ***
  • Offline Offline
  • Posts: 3229
  • Last login:August 07, 2021, 02:52:06 pm
.
« Reply #44 on: March 30, 2017, 04:18:14 pm »
.
« Last Edit: March 19, 2021, 02:51:48 am by ChanceKJ »

wp34

  • Trade Count: (+3)
  • Full Member
  • ***
  • Offline Offline
  • Posts: 4794
  • Last login:April 10, 2022, 09:48:19 pm
Re: First DK Cabinet Build
« Reply #45 on: March 30, 2017, 04:19:02 pm »
Great photo reference, Chance - cheers. If I start building more cabs I may just hit up Alibaba or Express. It's crazy how much casters cost... I opted to hit up Home Hardware today and bought 2 non-swivel type wheels very similar to the ones you and Wyo posted. I wanted to save the headache of adding my swivel type wheels - 4 would most likely have the cabinet moving during game-play and I'm not sure that 2 wheels that swivel on the back would be ideal either. Now I've got 4 swivel wheels I can donate to the shop which are handy anyway for carts etc.

I put swivel casters on my scratch built FIF just so that my 5' tall daughter will be able to move it herself easily.  So far we haven't noticed any stability issues. 

http://forum.arcadecontrols.com/index.php/topic,147560.msg1547087.html#msg1547087

mwhitney

  • Trade Count: (0)
  • Full Member
  • ***
  • Offline Offline
  • Posts: 129
  • Last login:December 06, 2017, 10:30:20 pm
  • I want to build my own arcade controls!
    • Michael Whitney - Designer. Maker. Builder.
Re: First DK Cabinet Build
« Reply #46 on: March 30, 2017, 05:50:59 pm »
Great work! You have a very nice selection of tools/shop! I'm jealous!

The bottom of the back door is attached to the cabinet with a tongue and groove.  I route the inside edge of the back bottom piece about 5/8 wide groove and half the thickness of the material and then do the same thing thing on the bottom of the back door panel. 

This makes sense. I'll put a tongue / groove (probably better than 45-ing) to give it a lip to keep closed on the bottom. Thanks!


Then there is a piece of wood attached to the backside of the lower back panel that sandwiches the lower back door groove when installed.  You can kinda see the double thickness of that back panel on the pic that chance put up.  I usually just put a strip of wood along the top and not all the way down the back of the back panel.


RE this piece of wood... Rather than a dado on the back edges of my cabinet sides, I have those baton strips to affix my rear lower/upper panels on either side of the larger access panel. That said, I'm not sure how (or if I'd need to) have this strip. Do you think the rabbet would be enough to keep everything happy back there? ;)


Are you using stock nintendo lower marquee mounting brackets? Because If you are, there's a final issue there too...another builder on here did as well in the same place.  I ran there If not, you should be fine.

OK - now I'm completely confused ;). I did order the brackets from Mike's a few days ago (had considered trying something 'generic' from Home Depot, but decided to splurge on the brackets. What issue should I be expecting, or can I mitigate ??

Cheers!

Wyo

  • Trade Count: (0)
  • Full Member
  • ***
  • Offline Offline
  • Posts: 408
  • Last login:May 01, 2023, 09:22:42 pm
  • I want to build my own arcade controls!
Re: First DK Cabinet Build
« Reply #47 on: March 30, 2017, 06:06:30 pm »
Okay, you should be fine then since those batons will act like that piece to keep the bottom of the door moving Inwards on the edges.

As far as the lower marquee bracket issue goes...that lower marquee bracket mounts on the underside of the marquee box shelf....so make sure to accomodate for that because you are using 3/4 wood.  Otherwise, you will have to make your plexiglass marquee taller than the standard Nintendo marquee....if that matters to you, if not disregard this post. :)

Ive seen people on here who are scratch building these cabs mount the lower marquee bracket on the top of the shelf to accomodate the standard Nintendo plex Marquee....but that's kinda lame looking.

What I learned to do after I messed this up on my first Nintendo build is to route the bottom side of the marquee shelf (like your gonna do on the bottom of the door) to make that height adjustment for the marquee...and the depth for the bracket mounting tabs.   Somebody else on here learned to do that as well, I forget who it was.  Better to do this now before you put it together....as it will be impossible if you glue it in. 

Hope that makes sense....I'll see if I can find a pic.
« Last Edit: March 30, 2017, 06:09:22 pm by Wyo »

Wyo

  • Trade Count: (0)
  • Full Member
  • ***
  • Offline Offline
  • Posts: 408
  • Last login:May 01, 2023, 09:22:42 pm
  • I want to build my own arcade controls!
Re: First DK Cabinet Build
« Reply #48 on: March 30, 2017, 06:07:50 pm »
You can kinda see what I'm talking about here on the bottom of the marquee boxes,  the shelf edge is routed to accomodate for the height difference.  I think the standard nintendo shelf is 1/2 wood in there....I think...so that's why I'd doesn't need to be adjusted like this.   Anyways, just wanted to alert you so you aren't surprised like I was when I went to put my marquee on the first cabs I built.  :banghead: haha

« Last Edit: March 30, 2017, 06:17:45 pm by Wyo »

mwhitney

  • Trade Count: (0)
  • Full Member
  • ***
  • Offline Offline
  • Posts: 129
  • Last login:December 06, 2017, 10:30:20 pm
  • I want to build my own arcade controls!
    • Michael Whitney - Designer. Maker. Builder.
Re: First DK Cabinet Build
« Reply #49 on: March 30, 2017, 08:00:38 pm »
Wyo -

This is excellent. I get what you're saying now and appreciate the photos and clarification. I may make some DK purists shudder but I'm doing custom graphics on my cab, including the marquee. I'm still going to use the bezel but just with different artwork from GameOn Graphics. As far as I know, they don't supply the plexi, so I'll have them send me the vinyl and apply it to the plexi for the bezel.

That being said, I do have some allowance as far as height, but I want to make the build as close to original as possible. Also, while most of my build is MDF, I've been cutting shelves from 5/8" ply (that pretty stuff you can see in my photos). It's probably overkill but I've had it on hand for a while and thought I may as well use it up.

Ok - I think I've got that part dialled in. I can continue with the build and then just adjust artwork to suit slightly if need be.

On a separate note, I was thinking that it may be tricky to screw my panels together. I have the batons at 3/4" but getting a drill in there could be tight. I've read about guys gluing the batons down on the side panels for the final steps of the build, but is the whole thing typically getting glued and screwed or are guys just screwing the shelves / back / top etc. so the unit can be disassembled (if need be) down the road?

PS - Are those your builds with the custom speaker cutouts ?! Incredible man. How the heck did you get those so perfect?!  :applaud:
« Last Edit: March 30, 2017, 08:25:21 pm by mwhitney »

mwhitney

  • Trade Count: (0)
  • Full Member
  • ***
  • Offline Offline
  • Posts: 129
  • Last login:December 06, 2017, 10:30:20 pm
  • I want to build my own arcade controls!
    • Michael Whitney - Designer. Maker. Builder.
Re: First DK Cabinet Build
« Reply #50 on: March 30, 2017, 08:06:46 pm »
[Noob question alert] - what is the bottom right cutout for? I'm picking up some of those slick handles from Mike's for the top cutouts at the back - just not clear on the bottom cutout.

Also, how about power? I like the idea of those computer--style plugs with the slick little insert. Just wondering what the general consensus is on how to power this baby so all looks pro and clean.

I'm running an LCD and RPi.

OH - what about a keyboard tray? I saw one build where the speaker panel folds forward to reveal a drawer for a keyboard. Is this sacrilege? What are most guys doing to control the RPi when / if necessary?

Thanks guys.

yotsuya

  • Trade Count: (+21)
  • Full Member
  • ***
  • Offline Offline
  • Posts: 19955
  • Last login:April 12, 2024, 11:03:32 pm
  • 2014 UCA Winner, 2014, 2015, 2016 ZapCon Winner
    • forum.arcadecontrols.com/index.php/topic,137636.msg1420628.html
Re: First DK Cabinet Build
« Reply #51 on: March 30, 2017, 08:15:09 pm »
It's a scratch build... no one's going to "shudder".
***Build what you dig, bro. Build what you dig.***

wp34

  • Trade Count: (+3)
  • Full Member
  • ***
  • Offline Offline
  • Posts: 4794
  • Last login:April 10, 2022, 09:48:19 pm
Re: First DK Cabinet Build
« Reply #52 on: March 30, 2017, 08:41:11 pm »
OH - what about a keyboard tray? I saw one build where the speaker panel folds forward to reveal a drawer for a keyboard. Is this sacrilege? What are most guys doing to control the RPi when / if necessary?

Thanks guys.

A lot of use use a version of this cordless keyboard/touchpad.  Makes things a lot easier and no keyboard drawer required.

https://smile.amazon.com/Logitech-920-007119-Wireless-Keyboard-Connected/dp/B014EUQOGK/ref=sr_1_1?ie=UTF8&qid=1490920765&sr=8-1&keywords=logitech+keyboard+touchpad


Wyo

  • Trade Count: (0)
  • Full Member
  • ***
  • Offline Offline
  • Posts: 408
  • Last login:May 01, 2023, 09:22:42 pm
  • I want to build my own arcade controls!
Re: First DK Cabinet Build
« Reply #53 on: March 30, 2017, 08:43:28 pm »
Right on, you're good then.  :cheers:

The bottom back cut out your talking about is for the power switch.  It's cutout and then there is a piece of wood behind it with the switch mounted, so it's recessed in case you lay the machine down and drag it or soemthing....it won't rip the switch off.  I don't really include that in the past but I will probabaly start doing that cut out and recessing the switch.


As far as gluing and screwing, I typically glue and screw the panels to the batons.  Are you planning on taking it apart? The hardest screws to get in are the ones inside the marquee box and on the backside marquee light panel.  However, if you just use a square bit on a quarter inch rachet....it will work just fine for that tight right angle.  It's a good thing you are using those square headed screws....as a Phillips would suck! I made the switch myself and made life easier. If you look at JDBailey1206s FIFJ build, I think he bought a right angle attachment for his drill to get those marquee screws.

I just got a Kreg jig....best investment ever! No more batons....save like $75 per cab now not buying 3/4 inch square dowels.

« Last Edit: March 30, 2017, 08:53:20 pm by Wyo »

wp34

  • Trade Count: (+3)
  • Full Member
  • ***
  • Offline Offline
  • Posts: 4794
  • Last login:April 10, 2022, 09:48:19 pm
Re: First DK Cabinet Build
« Reply #54 on: March 30, 2017, 08:47:26 pm »

I just got a Kreg jig....best investment ever! No more batons....save like $75 per cab now not buying 3/4 inch square dowels.

Kreg's are fantastic.  No more gluing either.   :cheers:

Wyo

  • Trade Count: (0)
  • Full Member
  • ***
  • Offline Offline
  • Posts: 408
  • Last login:May 01, 2023, 09:22:42 pm
  • I want to build my own arcade controls!
Re: First DK Cabinet Build
« Reply #55 on: March 30, 2017, 08:50:34 pm »

I just got a Kreg jig....best investment ever! No more batons....save like $75 per cab now not buying 3/4 inch square dowels.

Kreg's are fantastic.  No more gluing either.   :cheers:

Agreed. There's nothing more satisfying than seeing the panels draw tightly into each other as you screw them in....well, there's things more satisfying....but that's definitely up there! Haha. :)

wp34

  • Trade Count: (+3)
  • Full Member
  • ***
  • Offline Offline
  • Posts: 4794
  • Last login:April 10, 2022, 09:48:19 pm
Re: First DK Cabinet Build
« Reply #56 on: March 30, 2017, 08:59:49 pm »

I just got a Kreg jig....best investment ever! No more batons....save like $75 per cab now not buying 3/4 inch square dowels.

Kreg's are fantastic.  No more gluing either.   :cheers:

Agreed. There's nothing more satisfying than seeing the panels draw tightly into each other as you screw them in....well, there's things more satisfying....but that's definitely up there! Haha. :)

Ha ha!  True that!

yotsuya

  • Trade Count: (+21)
  • Full Member
  • ***
  • Offline Offline
  • Posts: 19955
  • Last login:April 12, 2024, 11:03:32 pm
  • 2014 UCA Winner, 2014, 2015, 2016 ZapCon Winner
    • forum.arcadecontrols.com/index.php/topic,137636.msg1420628.html
Re: First DK Cabinet Build
« Reply #57 on: March 30, 2017, 09:32:40 pm »
I love my Kreg. I still use glue, though.
***Build what you dig, bro. Build what you dig.***

wp34

  • Trade Count: (+3)
  • Full Member
  • ***
  • Offline Offline
  • Posts: 4794
  • Last login:April 10, 2022, 09:48:19 pm
Re: First DK Cabinet Build
« Reply #58 on: March 30, 2017, 09:53:43 pm »
I love my Kreg. I still use glue, though.

I was at a Kreg seminar last week at our local Woodsmith Store.  Somebody asked the Kreg rep if you needed to use glue.  He said if you needed glue Kreg would sell glue. They don't sell glue.  Made me laugh.

Their plant is about 20 minutes from where I live.  Same small town where I picked up my Q*Bert.

yotsuya

  • Trade Count: (+21)
  • Full Member
  • ***
  • Offline Offline
  • Posts: 19955
  • Last login:April 12, 2024, 11:03:32 pm
  • 2014 UCA Winner, 2014, 2015, 2016 ZapCon Winner
    • forum.arcadecontrols.com/index.php/topic,137636.msg1420628.html
Re: First DK Cabinet Build
« Reply #59 on: March 30, 2017, 10:38:30 pm »
I love my Kreg. I still use glue, though.

I was at a Kreg seminar last week at our local Woodsmith Store.  Somebody asked the Kreg rep if you needed to use glue.  He said if you needed glue Kreg would sell glue. They don't sell glue.  Made me laugh.

Their plant is about 20 minutes from where I live.  Same small town where I picked up my Q*Bert.
LOL.

I like to reinforce my stuff with glue, mainly because I know how people like to sit and lean on stuff. But yeah, the Kreg joints are solid.
***Build what you dig, bro. Build what you dig.***

mwhitney

  • Trade Count: (0)
  • Full Member
  • ***
  • Offline Offline
  • Posts: 129
  • Last login:December 06, 2017, 10:30:20 pm
  • I want to build my own arcade controls!
    • Michael Whitney - Designer. Maker. Builder.
Re: First DK Cabinet Build
« Reply #60 on: March 31, 2017, 12:03:21 am »
Crap - that Kreg jig looks like the way to go... Now I'm considering removing all the dowels.  ???

Wyo

  • Trade Count: (0)
  • Full Member
  • ***
  • Offline Offline
  • Posts: 408
  • Last login:May 01, 2023, 09:22:42 pm
  • I want to build my own arcade controls!
Re: First DK Cabinet Build
« Reply #61 on: March 31, 2017, 12:20:30 am »
No, no, no....don't do that.  You're good with the dowels.

Just get one for the next build...because there will be one, there always is!  :dizzy:

mwhitney

  • Trade Count: (0)
  • Full Member
  • ***
  • Offline Offline
  • Posts: 129
  • Last login:December 06, 2017, 10:30:20 pm
  • I want to build my own arcade controls!
    • Michael Whitney - Designer. Maker. Builder.
Re: First DK Cabinet Build
« Reply #62 on: April 02, 2017, 08:25:27 pm »
Hard at it this weekend and made some good progress.

Wheel base was too long so had to trim and drill some new holes:


That's a better fit:


Batons all screwed down - double checking alignment:


Milled down a piece of fir I had kicking around for the control panel and bezel retainer:


Started to dry fit all the cross-members etc.:


Starting to look like something!


Drilled a few holes below control panel for 'add credit buttons':


Wheels in place with some risers:


She lives! This is the first time she was upright. I can't lie - I pretend to play a game complete with shooting noises ;)


Saturday: Made some progress with the bezel retainer. I screwed up on the wider dado and trimmed it too wide. I had to fill it with a strip and re-cut but the repair is hardly noticeable and the slot is perfect:


Continuing to dry fit:


Cut the top '5mm' strip as well as the bottom shelf. I ended up picking up a half sheet of thin ply that measures about 6mm... close enough.


Sunday - Got the back panel cut and screwed up the orientation of my rabbet. It took me quite a while to get the reverse of my rabbet cut on the back panel (lots of head scratching and test cuts) only to cut it on the wrong side  :banghead: -  now my G1S is on the inside... ah well, at least it's on the back. I can fill the few voids and paint - no one will know but me and you guys.


Once my keyed lock shows up from Mike's, I'll know where to drill the hole and it should* suck this top portion in tight:


Sunday:

Last night I glued down all my batons on the side panels so she'd be good to go this morning. I hit the bottom edges with primer and paint b/c getting a brush in there once she's assembled would be tough.

I started glueing and screwing the panels  to the one side and hit the inside w/ primer while she's all open... I figure this will be a better and quicker job than brushing and foam rolling. I also got the coin door cut out and almost made a fatal error drawing it all out 'square' -- that would have left some nice vent holes around the rounded corners ;)... luckily I caught it before I fired up the jig saw:


Another shot of the inside w/ primer... ran out of paint:


Goals for tomorrow evening are to hit the remaining bits w/ primer & paint. I want to get a nice smooth finish on those interior edges so spray is the way to go IMO. From there, the other side panel can get glued and screwed into place and she'll be ready to stand up for good!

Wyo

  • Trade Count: (0)
  • Full Member
  • ***
  • Offline Offline
  • Posts: 408
  • Last login:May 01, 2023, 09:22:42 pm
  • I want to build my own arcade controls!
Re: First DK Cabinet Build
« Reply #63 on: April 02, 2017, 09:26:11 pm »
You do really good work, take awesome pictures, and did I mention I'm jealous of your shop and tools?

Really great job!  :cheers:

mwhitney

  • Trade Count: (0)
  • Full Member
  • ***
  • Offline Offline
  • Posts: 129
  • Last login:December 06, 2017, 10:30:20 pm
  • I want to build my own arcade controls!
    • Michael Whitney - Designer. Maker. Builder.
Re: First DK Cabinet Build
« Reply #64 on: April 02, 2017, 11:28:27 pm »
You do really good work, take awesome pictures, and did I mention I'm jealous of your shop and tools?

Really great job!  :cheers:

Hey, thanks Wyo - I'm humbled by your comments. Your builds and artwork are outstanding!

It's definitely nice to have a good supply of tools - most of which I've saved for over the years but many I inherited from my grandfather when he passed. It's kind of a cool project in that respect as I'm using many of his tools to build something we spent many hours playing when I was a kid. He had an old Atari and we used to duke it out over Warlords and Pitfall. I've thought several times through this build that this would have been a fun project to work on together.

rablack97

  • Trade Count: (+3)
  • Full Member
  • ***
  • Offline Offline
  • Posts: 2215
  • Last login:May 11, 2022, 06:50:10 pm
  • If you don't try, you have no chance at innovation
Re: First DK Cabinet Build
« Reply #65 on: April 03, 2017, 12:18:16 am »
 :notworthy: :notworthy:

Wyo

  • Trade Count: (0)
  • Full Member
  • ***
  • Offline Offline
  • Posts: 408
  • Last login:May 01, 2023, 09:22:42 pm
  • I want to build my own arcade controls!
Re: First DK Cabinet Build
« Reply #66 on: April 03, 2017, 01:37:03 am »
I thought some of those upright tools looked pretty old in the background! Cool, my 79 year old neighbor has a bunch of old shop tools from the 50s that he lets me use.  I love his old Delta Table saw....they don't make Em like they used too.

Also, I can tell you are slightly OCD by the fact that your screws in your batons match on both sides...mine have to match too. Weirdos. Haha.

Also, REALLY nice job on that cross member angled cut....I don't even do that. I need too.

Nice job man, look forward to updates!
« Last Edit: April 03, 2017, 01:38:56 am by Wyo »

mwhitney

  • Trade Count: (0)
  • Full Member
  • ***
  • Offline Offline
  • Posts: 129
  • Last login:December 06, 2017, 10:30:20 pm
  • I want to build my own arcade controls!
    • Michael Whitney - Designer. Maker. Builder.
Re: First DK Cabinet Build
« Reply #67 on: April 03, 2017, 02:38:33 pm »
I thought some of those upright tools looked pretty old in the background! Cool, my 79 year old neighbor has a bunch of old shop tools from the 50s that he lets me use.  I love his old Delta Table saw....they don't make Em like they used too.

Also, I can tell you are slightly OCD by the fact that your screws in your batons match on both sides...mine have to match too. Weirdos. Haha.

Also, REALLY nice job on that cross member angled cut....I don't even do that. I need too.

Nice job man, look forward to updates!

Haha - seriously, I hadn't noticed that but I have been taking my time. Painting the inside may even be overkill but if I'm going to have my head in there, I want it to look decent. Thanks for the compliments!

Another screw-up was when drilling the outermost holes for the wheels, the hole came through my inner batons. I had to cut those sections out to allow for the bolts / nuts... all little things I'd map out better for a second build. Funny you should mention that as well as I've been thinking about my next project already.... lights, wood, video games, graphics... man, what could be more fun to build?!

QUESTION: I'm at the point of thinking about paint. Lots of guys roll this out with a sponge roller with good results. I've used that technique on other projects, but have considered a rattle can for this project. What's your experience with this? Can a guy get a good finish if sanding lightly between coats and applying multiple (say 2-3) coats?

I want to do this in an orange color and found a good match to my graphics with the Rustoleum orange, but it only comes in 'gloss'. I'm thinking semi-gloss is the way to go... can a guy mute the finish by spraying a semi-gloss clear over the gloss paint? I'm not 100% on the best way to approach this but it's a critical step on the build so I want to get it right!

Thanks for any input.

emphatic

  • Trade Count: (0)
  • Full Member
  • ***
  • Offline Offline
  • Posts: 2009
  • Last login:Yesterday at 07:05:41 pm
  • -"Suck it, Donny!" -"No, YOU suck it.... more".
    • Emphatic's Video Game Collection
Re: First DK Cabinet Build
« Reply #68 on: April 03, 2017, 03:24:12 pm »
You do really good work, take awesome pictures, and did I mention I'm jealous of your shop and tools?

Really great job!  :cheers:

^^This exactly. :cheers:

Wyo

  • Trade Count: (0)
  • Full Member
  • ***
  • Offline Offline
  • Posts: 408
  • Last login:May 01, 2023, 09:22:42 pm
  • I want to build my own arcade controls!
Re: First DK Cabinet Build
« Reply #69 on: April 03, 2017, 05:37:47 pm »
I thought some of those upright tools looked pretty old in the background! Cool, my 79 year old neighbor has a bunch of old shop tools from the 50s that he lets me use.  I love his old Delta Table saw....they don't make Em like they used too.

Also, I can tell you are slightly OCD by the fact that your screws in your batons match on both sides...mine have to match too. Weirdos. Haha.

Also, REALLY nice job on that cross member angled cut....I don't even do that. I need too.

Nice job man, look forward to updates!

Haha - seriously, I hadn't noticed that but I have been taking my time. Painting the inside may even be overkill but if I'm going to have my head in there, I want it to look decent. Thanks for the compliments!

Another screw-up was when drilling the outermost holes for the wheels, the hole came through my inner batons. I had to cut those sections out to allow for the bolts / nuts... all little things I'd map out better for a second build. Funny you should mention that as well as I've been thinking about my next project already.... lights, wood, video games, graphics... man, what could be more fun to build?!

QUESTION: I'm at the point of thinking about paint. Lots of guys roll this out with a sponge roller with good results. I've used that technique on other projects, but have considered a rattle can for this project. What's your experience with this? Can a guy get a good finish if sanding lightly between coats and applying multiple (say 2-3) coats?

I want to do this in an orange color and found a good match to my graphics with the Rustoleum orange, but it only comes in 'gloss'. I'm thinking semi-gloss is the way to go... can a guy mute the finish by spraying a semi-gloss clear over the gloss paint? I'm not 100% on the best way to approach this but it's a critical step on the build so I want to get it right!

Thanks for any input.


To answer your last question, yes.  You can actually spray a flat basecoat of Orange....and then clear coat it with semi gloss for the desired effect.  The clear has the final say in the matter.  In the automotive paint systems, the base coat is actually dull...then the clear coat is what makes the paint finish shine. Make sure you wait for your base coat of lacquer to fully cure before you clear.  Also, lightly scuff it with a gray or red scotch brite pad and clean it really good before you apply the clear as well. 

All that being said, as far as using rattle can....that's Chances area of expertise.  He had really great results with his DK Ultimate build. 

The challenge with rattle can is the small fan pattern....which gives you an increased chance of runs and tiger stripes (gaps in the paint strokes)

To combat this, I would do one side of the cab at a time, lying down in a clean environment.....that way you are painting you using gravity to work with you...instead of wanting to run.   This increases your chance of dirt, bugs, and debris settling on to your paint tho....so make sure you are in a clean space.  If you use a semigloss clear coat, you won't be able to sand out and polish any dirt nibs....it won't look right.

To combat tiger stripes, do one coat horizontally, then another vertically, or diagonally,  then horizontally again...whatever you need to do to make the rattle can finish even.

Above all this, if you want to learn a new skill and have a compressor with enough CFM in that badass shop of yours...I'd suggest buying that $15 purple harbor freight HVLP paint gun and going to town with that.  It's a great gun!  If you don't want to use automotive urethane paint, you can use it to put down some enamel (reduced with acetone) and do it all in one shot (3 coats).  Enamel tends to dry to the finish of a semi gloss.
« Last Edit: April 03, 2017, 05:43:33 pm by Wyo »

ChanceKJ

  • Trade Count: (0)
  • Full Member
  • ***
  • Offline Offline
  • Posts: 3229
  • Last login:August 07, 2021, 02:52:06 pm
.
« Reply #70 on: April 04, 2017, 04:39:24 am »
.
« Last Edit: March 19, 2021, 02:51:13 am by ChanceKJ »

jdbailey1206

  • Trade Count: (+1)
  • Full Member
  • ***
  • Offline Offline
  • Posts: 2656
  • Last login:March 11, 2023, 01:32:56 pm
  • No. It's your top score on Pole Position.
Re: First DK Cabinet Build
« Reply #71 on: April 04, 2017, 06:10:55 am »
Another option would be to try the vinyl rolls sold on ThisOldGame.com.....

For one reason or another...


mwhitney

  • Trade Count: (0)
  • Full Member
  • ***
  • Offline Offline
  • Posts: 129
  • Last login:December 06, 2017, 10:30:20 pm
  • I want to build my own arcade controls!
    • Michael Whitney - Designer. Maker. Builder.
Re: First DK Cabinet Build
« Reply #72 on: April 04, 2017, 12:27:39 pm »
You do really good work, take awesome pictures, and did I mention I'm jealous of your shop and tools?

Really great job!  :cheers:

^^This exactly. :cheers:

Thanks for the support!

mwhitney

  • Trade Count: (0)
  • Full Member
  • ***
  • Offline Offline
  • Posts: 129
  • Last login:December 06, 2017, 10:30:20 pm
  • I want to build my own arcade controls!
    • Michael Whitney - Designer. Maker. Builder.
Re: First DK Cabinet Build
« Reply #73 on: April 04, 2017, 12:41:07 pm »
Another option would be to try the vinyl rolls sold on ThisOldGame.com

http://www.thisoldgame.com/categories/vinyl

I was talking to a friend of mine on the phone last week who just finished a Nintendo restoration in Arizona. He was saying that it's an amazingly good way to get a nice finish on a Nintendo cab. Put a base coat of black primer on the front/back/sides, then spray or roll on your black gloss sections, then apply this stuff to the front/sides and trim it with a knife.  Sounds quite good. He was very happy with the end result.

Keep in mind, colour on actual Nintendo cabs are not painted, but they are applied like formica counter top surfaces.


Thanks for the tips, Chance. I actually found your build thread yesterday and was inspired to pick up some gloss. That was my hangup as I didn't really want gloss but had found the Rustoleum Orange and thought the color would be perfect w/ my graphics. After seeing your finish the gloss coat looks good - great work on your build. The detailed posts you've made are helpful - cheers.

Vinyl... I hadn't considered that. Both sides of my cab are going to be covered completely so the only orange sections would be the front and speaker grill, both of which are MDF so the surface is nice and flat. It may be worth just picking up some orange vinyl...

On a side note, where did you get your bezel and other graphics printed? To date, I've found Game On Graphics and they seem to be reasonable. They don't print / lay the vinyl on the bezel itself though... did you apply your graphics to your plexiglass (I think I read that you used a smoked bezel?). Also, is it Lexan that most are using?

Thanks again!

ChanceKJ

  • Trade Count: (0)
  • Full Member
  • ***
  • Offline Offline
  • Posts: 3229
  • Last login:August 07, 2021, 02:52:06 pm
.
« Reply #74 on: April 04, 2017, 01:46:16 pm »
..
« Last Edit: March 19, 2021, 02:51:32 am by ChanceKJ »

mwhitney

  • Trade Count: (0)
  • Full Member
  • ***
  • Offline Offline
  • Posts: 129
  • Last login:December 06, 2017, 10:30:20 pm
  • I want to build my own arcade controls!
    • Michael Whitney - Designer. Maker. Builder.
Re: First DK Cabinet Build
« Reply #75 on: April 04, 2017, 03:06:33 pm »
Here's the orange I'm considering if I go paint vs vinyl:


ChanceKJ

  • Trade Count: (0)
  • Full Member
  • ***
  • Offline Offline
  • Posts: 3229
  • Last login:August 07, 2021, 02:52:06 pm
.
« Reply #76 on: April 04, 2017, 03:08:10 pm »
.
« Last Edit: March 19, 2021, 02:48:00 am by ChanceKJ »

jdbailey1206

  • Trade Count: (+1)
  • Full Member
  • ***
  • Offline Offline
  • Posts: 2656
  • Last login:March 11, 2023, 01:32:56 pm
  • No. It's your top score on Pole Position.
Re: First DK Cabinet Build
« Reply #77 on: April 04, 2017, 03:31:17 pm »
This worked for me when I did the marquee.  A little expensive but the look was amazing. 

I have to say Sjaak that your marquee looks a lot better than what I had purchased for my previous cab.  Where did you get it done?

Foil at https://www.onlineprinters.com/
Plexi at http://www.pixartprinting.com/wide-format/printing-flat-bed-rigid-materials/perspex/

Not sure if they ship to the US

It has been awhile since my last update.  A lot has happened in my personal life and with that I have not had much time to work on my FFJR cab.  No major work has to be done and I am just slowly accumulating all of the artwork.  That being said I purchased the marquee.  I went with Sjaak's advice and went with pixart printing.  Needless to say I was  completely impressed.  I would highly recommend pixart printing if you are looking for a marquee that pops.  Anyway...Enough of me plugging pixart printing.  On to the showcase.   ;D

When I opened the package I was taken aback on how well this resembled a true arcade marquee.  I believe this is how I am going to do marquees from now on.


I could not believe how reflective this was.  But once I pseudo installed it in front of the marquee light it really gave that original look.


By the end of the month I hope to get the control panel and monitor bezel artwork printed out.  After that I am going to send the cab to its permanent home.  More to come.

mwhitney

  • Trade Count: (0)
  • Full Member
  • ***
  • Offline Offline
  • Posts: 129
  • Last login:December 06, 2017, 10:30:20 pm
  • I want to build my own arcade controls!
    • Michael Whitney - Designer. Maker. Builder.
Re: First DK Cabinet Build
« Reply #78 on: April 04, 2017, 04:00:15 pm »
Quote
  If its Digital and custom: Brad, If its Repro: one of the three listed above.

Brad did my marquee reverse printed. Which came out AMAZING. I really think he's got that down to a science.


Perfect - I'm going to email Brad now. Thanks for the tip on the tiger-striping.

mwhitney

  • Trade Count: (0)
  • Full Member
  • ***
  • Offline Offline
  • Posts: 129
  • Last login:December 06, 2017, 10:30:20 pm
  • I want to build my own arcade controls!
    • Michael Whitney - Designer. Maker. Builder.
Re: First DK Cabinet Build
« Reply #79 on: April 04, 2017, 05:04:34 pm »
QUESTION:

This has likely been covered to death but I had mapped out my control panel w/ 2 joysticks, 6 buttons per side, a 1/2 player button and a select button for each.

To date, we've been playing Atari games, Tetris, Shinobi, Space Harrier, Mario, DK - that kind of sums it up or at least gives you an idea of the games we're playing. Is the second controller / set of buttons pointless? I don't think we've used the second set for any game so far.

Street Fighter would be great, but I think that's the only game I've played that needed the second set. This will dictate my artwork / control panel layout, so I want to nail this down.

Looking forward to feedback on this!

yotsuya

  • Trade Count: (+21)
  • Full Member
  • ***
  • Offline Offline
  • Posts: 19955
  • Last login:April 12, 2024, 11:03:32 pm
  • 2014 UCA Winner, 2014, 2015, 2016 ZapCon Winner
    • forum.arcadecontrols.com/index.php/topic,137636.msg1420628.html
Re: First DK Cabinet Build
« Reply #80 on: April 04, 2017, 06:26:02 pm »
If you're building a Donkey Kong cabinet, just stick with one set of controls. Your next cabinet can be the two-player head-to-head fighting cabinet.
***Build what you dig, bro. Build what you dig.***

Wyo

  • Trade Count: (0)
  • Full Member
  • ***
  • Offline Offline
  • Posts: 408
  • Last login:May 01, 2023, 09:22:42 pm
  • I want to build my own arcade controls!
Re: First DK Cabinet Build
« Reply #81 on: April 04, 2017, 06:34:46 pm »
That red DK is beautiful. 

And so are Chances purple arm hairs....I haven't seen purple body hair like that since the women's march. ;)

mwhitney

  • Trade Count: (0)
  • Full Member
  • ***
  • Offline Offline
  • Posts: 129
  • Last login:December 06, 2017, 10:30:20 pm
  • I want to build my own arcade controls!
    • Michael Whitney - Designer. Maker. Builder.
Re: First DK Cabinet Build
« Reply #82 on: April 04, 2017, 06:41:58 pm »
If you're building a Donkey Kong cabinet, just stick with one set of controls. Your next cabinet can be the two-player head-to-head fighting cabinet.

Good call - makes sense. How about buttons? DK3 looks to have P1/P2, Jump and the Controller. Will this be sufficient for the games I listed?

I set up the Xin Mo with 6 buttons + Select + P1 (same for the second side) but found most buttons I didn't use, i.e. 'Bump Left / Right' etc. Donkey Kong Country used a few more if I recall correctly....


mwhitney

  • Trade Count: (0)
  • Full Member
  • ***
  • Offline Offline
  • Posts: 129
  • Last login:December 06, 2017, 10:30:20 pm
  • I want to build my own arcade controls!
    • Michael Whitney - Designer. Maker. Builder.
Re: First DK Cabinet Build
« Reply #83 on: April 04, 2017, 06:43:57 pm »
That red DK is beautiful. 

And so are Chances purple arm hairs....I haven't seen purple body hair like that since the women's march. ;)

^^^ :lol

ChanceKJ

  • Trade Count: (0)
  • Full Member
  • ***
  • Offline Offline
  • Posts: 3229
  • Last login:August 07, 2021, 02:52:06 pm
.
« Reply #84 on: April 04, 2017, 10:28:45 pm »
.
« Last Edit: March 19, 2021, 02:47:47 am by ChanceKJ »

jdbailey1206

  • Trade Count: (+1)
  • Full Member
  • ***
  • Offline Offline
  • Posts: 2656
  • Last login:March 11, 2023, 01:32:56 pm
  • No. It's your top score on Pole Position.
Re: First DK Cabinet Build
« Reply #85 on: April 05, 2017, 06:14:27 am »

For one reason or another...

...you know me way too well. :D

I'm still looking for the one where you painted your feet and sandals black...


If you're building a Donkey Kong cabinet, just stick with one set of controls. Your next cabinet can be the two-player head-to-head fighting cabinet.

This is perfect advice.  You'll get the bug and want to build another cab.  No need to make your first build look like junk just because 'it works'.

zinger

  • Trade Count: (0)
  • Full Member
  • ***
  • Offline Offline
  • Posts: 136
  • Last login:February 25, 2019, 05:09:31 pm
  • There's a Donkey Kong Kill Screen coming up!
Re: First DK Cabinet Build
« Reply #86 on: April 05, 2017, 01:37:21 pm »
Keep up the great work!  :cheers: Also, lots of good feedback in this thread.

One minor mistake that I made in my build was to glue the control panel block to the side panels. On the original DK cabinets you can remove the entire control panel with speaker panel, etc. from the cabinet. For me this would have been useful since most of the electronics would be in this area and I could just swap in a different set with different design, etc.


mwhitney

  • Trade Count: (0)
  • Full Member
  • ***
  • Offline Offline
  • Posts: 129
  • Last login:December 06, 2017, 10:30:20 pm
  • I want to build my own arcade controls!
    • Michael Whitney - Designer. Maker. Builder.
Re: First DK Cabinet Build
« Reply #87 on: April 05, 2017, 01:51:16 pm »
Keep up the great work!  :cheers: Also, lots of good feedback in this thread.

One minor mistake that I made in my build was to glue the control panel block to the side panels. On the original DK cabinets you can remove the entire control panel with speaker panel, etc. from the cabinet. For me this would have been useful since most of the electronics would be in this area and I could just swap in a different set with different design, etc.

Thanks Zinger.

If I'm reading you correctly, then I glued in those side blocks as well (with the 3 screws)...  :banghead: ah well... I'll still be able to lift out the control panel itself.

mwhitney

  • Trade Count: (0)
  • Full Member
  • ***
  • Offline Offline
  • Posts: 129
  • Last login:December 06, 2017, 10:30:20 pm
  • I want to build my own arcade controls!
    • Michael Whitney - Designer. Maker. Builder.
Re: First DK Cabinet Build
« Reply #88 on: April 05, 2017, 01:56:54 pm »

Quote

This is perfect advice.  You'll get the bug and want to build another cab.  No need to make your first build look like junk just because 'it works'.

Thanks JDB - It makes sense. As a new builder, I kind of wanted it all. Realistically, I'm willing to bet the games I play will be a dozen or less.

In your experience, would this be sufficient then:

1) P1
2) P2
3) Add credit (hidden)
4) Jump (or fire etc.)
5) Select (hidden)?

I have 2 holes drilled beneath my speaker grill on the horizontal filler strip that could accommodate an 'add credit' and 'select' button to keep the main control panel simple like the DK layout.

zinger

  • Trade Count: (0)
  • Full Member
  • ***
  • Offline Offline
  • Posts: 136
  • Last login:February 25, 2019, 05:09:31 pm
  • There's a Donkey Kong Kill Screen coming up!
Re: First DK Cabinet Build
« Reply #89 on: April 05, 2017, 01:59:51 pm »
If I'm reading you correctly, then I glued in those side blocks as well (with the 3 screws)...  :banghead: ah well... I'll still be able to lift out the control panel itself.
I meant to mention this the other day but forgot. :-[

ChanceKJ

  • Trade Count: (0)
  • Full Member
  • ***
  • Offline Offline
  • Posts: 3229
  • Last login:August 07, 2021, 02:52:06 pm
.
« Reply #90 on: April 05, 2017, 02:07:11 pm »
.
« Last Edit: March 19, 2021, 02:47:32 am by ChanceKJ »

mwhitney

  • Trade Count: (0)
  • Full Member
  • ***
  • Offline Offline
  • Posts: 129
  • Last login:December 06, 2017, 10:30:20 pm
  • I want to build my own arcade controls!
    • Michael Whitney - Designer. Maker. Builder.
Re: First DK Cabinet Build
« Reply #91 on: April 05, 2017, 02:07:23 pm »
UPDATE -

1) Finished painting the inside of the cabinet last night (all but the second side). I'm painting and gluing this on the bench and will just 'cap' off the build with the opposite side and paint that inner section last.

We're heading out to Texas for a few days, so the build will be on hold.

2) I've been spinning over what to do as far as paint on the kick-plate and speaker grill. That orange looks good, but I really don't want gloss... the HVLP is a good option, but Chance's comment about vinyl got me thinking.

I found a nice matte vehicle wrap product from a CDN distributor in Montreal that I'm going to try out. The cost for a 2' by 5' piece (more than enough for these two front areas) was very reasonable, and the product looks to be top-notch and easy to apply with heat. Worst-case, I'm out $20 USD if I screw it up, but I think this is going to work well.

http://www.vvividhq.com/


mwhitney

  • Trade Count: (0)
  • Full Member
  • ***
  • Offline Offline
  • Posts: 129
  • Last login:December 06, 2017, 10:30:20 pm
  • I want to build my own arcade controls!
    • Michael Whitney - Designer. Maker. Builder.
Re: First DK Cabinet Build
« Reply #92 on: April 05, 2017, 02:09:47 pm »
Those side blocks are suposed to be permanently attached. The control panel rests on top of them and the latches to secure the control panel screw in to them.

Good to know. I think glue was overkill as the screws would have kept it in place, but she's locked down now. RE the clasps that hold the CP down, in an arcade scenario, I can see how this would be necessary; for the home, would it be enough to throw some cabinet magnets or something similar in there just to keep it in place?

ChanceKJ

  • Trade Count: (0)
  • Full Member
  • ***
  • Offline Offline
  • Posts: 3229
  • Last login:August 07, 2021, 02:52:06 pm
.
« Reply #93 on: April 05, 2017, 02:10:07 pm »
.
« Last Edit: March 19, 2021, 02:47:22 am by ChanceKJ »

ChanceKJ

  • Trade Count: (0)
  • Full Member
  • ***
  • Offline Offline
  • Posts: 3229
  • Last login:August 07, 2021, 02:52:06 pm
.
« Reply #94 on: April 05, 2017, 02:11:50 pm »
.
« Last Edit: March 19, 2021, 02:47:11 am by ChanceKJ »

mwhitney

  • Trade Count: (0)
  • Full Member
  • ***
  • Offline Offline
  • Posts: 129
  • Last login:December 06, 2017, 10:30:20 pm
  • I want to build my own arcade controls!
    • Michael Whitney - Designer. Maker. Builder.
Re: First DK Cabinet Build
« Reply #95 on: April 05, 2017, 02:38:52 pm »
Even in a home scenario those clamps are worth it. They keep the panel from sliding around. To unlock them you reach in from the coin door. Simple. easy.   Why over complicate a good design thats lasted the test of time?

Good call. Did you pick yours up at a BigBox store or are they arcade-specific?

Wyo

  • Trade Count: (0)
  • Full Member
  • ***
  • Offline Offline
  • Posts: 408
  • Last login:May 01, 2023, 09:22:42 pm
  • I want to build my own arcade controls!
Re: First DK Cabinet Build
« Reply #96 on: April 05, 2017, 06:29:39 pm »
Oh, I didn't realize you were just painting the speaker panel and coin door panel.  It's such a small area I'd just rattle can it and call it a day.  ;D

ChanceKJ

  • Trade Count: (0)
  • Full Member
  • ***
  • Offline Offline
  • Posts: 3229
  • Last login:August 07, 2021, 02:52:06 pm
.
« Reply #97 on: April 05, 2017, 07:15:55 pm »
.
« Last Edit: March 19, 2021, 02:46:59 am by ChanceKJ »

mwhitney

  • Trade Count: (0)
  • Full Member
  • ***
  • Offline Offline
  • Posts: 129
  • Last login:December 06, 2017, 10:30:20 pm
  • I want to build my own arcade controls!
    • Michael Whitney - Designer. Maker. Builder.
Re: First DK Cabinet Build
« Reply #98 on: April 05, 2017, 10:52:44 pm »
Mine all came with my Nintendo cabs. its how Nintendo chose to hold down the panel.  You can buy them in lots of places, its a common bit of hardware.


Here are the more nintendo style ones:
Latch: http://mikesarcade.com/cgi-bin/store.pl?sku=CPLATCH
Catch: http://mikesarcade.com/cgi-bin/store.pl?sku=CPSTRIKESN
Bolts: http://mikesarcade.com/cgi-bin/store.pl?sku=CPNINBOLTSET


And here are some other vendors selling similar parts:
http://gameroomdesigns.ca/shop/accessories/control-panel-locking-hooks-1-pair/
http://groovygamegear.com/webstore/index.php?main_page=product_info&cPath=70&products_id=204
http://retroactivearcade.ca/locking-hook-for-arcades-1/

Man, you're a wealth of info. Thanks a ton!

jdbailey1206

  • Trade Count: (+1)
  • Full Member
  • ***
  • Offline Offline
  • Posts: 2656
  • Last login:March 11, 2023, 01:32:56 pm
  • No. It's your top score on Pole Position.
Re: First DK Cabinet Build
« Reply #99 on: April 06, 2017, 06:09:56 am »

Quote

This is perfect advice.  You'll get the bug and want to build another cab.  No need to make your first build look like junk just because 'it works'.

Thanks JDB - It makes sense. As a new builder, I kind of wanted it all. Realistically, I'm willing to bet the games I play will be a dozen or less.

In your experience, would this be sufficient then:

1) P1
2) P2
3) Add credit (hidden)
4) Jump (or fire etc.)
5) Select (hidden)?

I have 2 holes drilled beneath my speaker grill on the horizontal filler strip that could accommodate an 'add credit' and 'select' button to keep the main control panel simple like the DK layout.

The easiest way to figure out what you need whitney is to know what games you want, see what it takes to control those games then you will know what buttons you will need.  I made the mistake of throwing a 2 player 6,4 button set up on my weecade and when my buddy and I would play a 2 player game my right hand kept bumping into his left hand.  Like Yots said earlier its easier to make another cab then to fight for years on end bumping into the guy next to you because you want to fit it all in...

I would try to get the correct latch for your control panel also.  I have found that since they are longer they are easier to reach when going in through the coin door.  When you unlatch the CP its going to be blind so you need the ease of popping these bad boys with one hand. 

I don't know if I mentioned this before but your bolts can be found almost anywhere for half the price of what you can find online.  Take the size you need from Mikes Arcade and go to into specialty bolt shop and they should be able to find it for you cheaper....
« Last Edit: April 06, 2017, 06:11:43 am by jdbailey1206 »

mwhitney

  • Trade Count: (0)
  • Full Member
  • ***
  • Offline Offline
  • Posts: 129
  • Last login:December 06, 2017, 10:30:20 pm
  • I want to build my own arcade controls!
    • Michael Whitney - Designer. Maker. Builder.
Re: First DK Cabinet Build
« Reply #100 on: April 10, 2017, 07:09:55 pm »
Back to the build after 4 days in Texas and we had a great time in San Antonio. I picked up a few parts while we were away and decided to get the clasps for the CP and some odds/ends from RetroActive Arcade. Thanks for the tips JD - we've got a good fastener shop here where I can get the bolts.

...

Maybe this is common, but I've be putting off the speaker grill for fear of messing it up. I took my time following Johnrt's tutorial. If you're reading this, thanks John - stacking the strips worked like a charm! This part of the build seems like a rite of passage!

After finishing the speaker grill, I gave the shop a good clean and primed all remaining parts aside from the back panel. My goal this week is to button up the other side, install the cross-members (speaker grill, CP, shelves etc.), get her upright, and then send off my artwork after double checking my measurements.

Here's some shots of the speaker grill:


So far so good - I put a stop block on either side...


On the downhill:


Quick sand:


Pretty happy I didn't mess this up!


Ready for primer:


QUESTION: I've seen a few MAME builds where guys are lining their light-box with aluminum tape or foil - has anyone done this? Does it make that big of a difference? White paint?

ChanceKJ

  • Trade Count: (0)
  • Full Member
  • ***
  • Offline Offline
  • Posts: 3229
  • Last login:August 07, 2021, 02:52:06 pm
.
« Reply #101 on: April 10, 2017, 09:07:36 pm »
.
« Last Edit: March 19, 2021, 02:46:46 am by ChanceKJ »

mwhitney

  • Trade Count: (0)
  • Full Member
  • ***
  • Offline Offline
  • Posts: 129
  • Last login:December 06, 2017, 10:30:20 pm
  • I want to build my own arcade controls!
    • Michael Whitney - Designer. Maker. Builder.
Re: First DK Cabinet Build
« Reply #102 on: April 11, 2017, 12:24:08 am »
Good job.

Thankfully ive never had to cut out a grill. I bet that was pretty satisfying.

I wouldnt bother with the foil tape in the marque light area. The originals never had it, its a cost and time expense that wont make a difference to you. I did i for my MAME cab because i was selectively lighting the marquee and wanted to controll the light. You just need to go into Home Depot and get a light bar and screw it in. (Some newer cabinetsfrom the 90's  like ones from Dynamo just had a pair of 60w light bulbs and a ---smurfy--- fixture).

Your best bet for a lot of little things like that is to reserch how people restore actual nintendo cabinets. It will save you a lot of wasted time trying to come up with solutions for things that have already been solved on the cheap, which also stood the test of time.

Thanks Chance. I'm not sure what was more satisfying -- the finished grill or simply not have to do this more than once! I've had the plunge router for about 8 years and have never had a need to use it... it really just came down to double checking everything, making sure all was secure and going slow. I took a lunch break at the 5th slot just to come at it fresh ;).

What you say makes sense regarding the light. I'm sure Nintendo knew what they were doing ;). Looking forward to getting her wired up!

mwhitney

  • Trade Count: (0)
  • Full Member
  • ***
  • Offline Offline
  • Posts: 129
  • Last login:December 06, 2017, 10:30:20 pm
  • I want to build my own arcade controls!
    • Michael Whitney - Designer. Maker. Builder.
Re: First DK Cabinet Build
« Reply #103 on: April 12, 2017, 06:00:59 pm »
Hey guys - looking for some feedback on this CP. Not so much the artwork but the layout. Here's where I'm at:

1) Most games we'll play are 1-button games, but we also want to play DK Country and a few games that may require other buttons. It was suggested not to make this cab an all-in-one build and save the double joysticks etc. for another cab. This will be my plan, but for this one, a few extra buttons are needed.

As such, I've followed bplail's build and added 3 white buttons. This will give me 4 controller buttons in total, which I think is more than enough.

2) I added the instruction card from the PDF at Mike's. His corners weren't rounded but many samples I've seen on this forum have rounded corners so I changed the background... not 100% on alignment of this on the CP graphic itself - I think I'm close. Does it matter if the card is printed as part of the graphic? Added separately?

3) DK logo - I moved this to be centered with the joystick - this just looked off to me as it was pushed over toward the 1/2 player buttons.

4) Reduced the size of the 'JUMP' font as the button was overlapping the text on the original CP template I downloaded (now significantly modified).

5) Shrunk Mario, DK and Peach to allow for the additional buttons.

6) What do you think about the placement of the 3 buttons?

Thanks -

« Last Edit: April 12, 2017, 06:33:17 pm by mwhitney »

mourix

  • Trade Count: (0)
  • Full Member
  • ***
  • Offline Offline
  • Posts: 302
  • Last login:April 14, 2024, 11:22:08 am
Re: First DK Cabinet Build
« Reply #104 on: April 13, 2017, 06:51:03 am »
Quote
Does it matter if the card is printed as part of the graphic? Added separately?

With people's hand sweat and friction, you want to try to avoid seperate stickers or else they will peel after a while.

Quote
Reduced the size of the 'JUMP' font as the button was overlapping the text on the original CP template I downloaded (now significantly modified).

Compared to the original cpo, your 'player' font is too big, and 'jump' too small.

Quote
What do you think about the placement of the 3 buttons?
The sloped buttons don't really look right on the original symmetric control panel.

Apart from those things, the design looks really nice! I've done a quick paint mockup on how I would change the fonts and add symmetry:

mwhitney

  • Trade Count: (0)
  • Full Member
  • ***
  • Offline Offline
  • Posts: 129
  • Last login:December 06, 2017, 10:30:20 pm
  • I want to build my own arcade controls!
    • Michael Whitney - Designer. Maker. Builder.
Re: First DK Cabinet Build
« Reply #105 on: April 13, 2017, 12:13:01 pm »
Thanks Mourix -

I'll adjust the fonts as you recommend. With the buttons, I aligned the left and middle to fall inline with the P1/P2 and then brought the right button up into the space which looked to occupy things in a balanced way. That was my thinking ;).

I see what you mean with your layout... the right-most button looks a little too close to the icons - maybe I should reduce those icons a bit. I'll play with it and re-post.

I appreciate you taking the time to comment and play with the design. Your feedback is well-received!

mwhitney

  • Trade Count: (0)
  • Full Member
  • ***
  • Offline Offline
  • Posts: 129
  • Last login:December 06, 2017, 10:30:20 pm
  • I want to build my own arcade controls!
    • Michael Whitney - Designer. Maker. Builder.
Re: First DK Cabinet Build
« Reply #106 on: April 14, 2017, 02:01:27 pm »
Progress Update:

On impulse, I ordered the matte orange vinyl last week, thinking that the gloss rattle can orange would be too glossy. Since I had the paint, and was impatient, I decided to hit the speaker grill and coinbox surround. Worst-case, I cover the paint when the vinyl comes as the manuf. recommends a glossy / flawless finish for best results.

The vinyl actually showed up as I was painting and I was amazed at how close the vinyl was to the Rustoleum Orange I bought. Anyway, the paint looks great and I'm going to roll with it. After the primer coat, I wet-sanded and the grill now has 2 nice coats.

EPIC failure on the coin-door. Same primer, same procedure, but when I painted the orange top-coat, the paint started separating like a crackle effect. I was tempted to start scraping it off or ragging it while wet but thought better of it and let it dry. Yesterday morning, I proceeded to sand it and this just made it worse as the paint gummed up and left debris throughout.

In hindsight (and if I do another build), I would paint the panels all separately. Masking my inner sidewall (only installed one side) and worrying about a nice clean edge on the return was a bit stressful. At least w/ one side off, I could spray and fix my mess without worry.

Long story short, I took paint thinner and a scraper to the orange and brought it all back down to the black primer, degreased, re-primed, sanded, primed, sanded and then added 2 nice coats following the 'within one hour' recommendation.

Why the crackle? The only thing I can think of is residue from my tack cloth (wax) or debris in my sanding sponge.

The front looks great now and I've got her on her side with the second side resting on top and ready to be glued / screwed and to add the shelves etc.

Here's the florescent light installed:


And the speaker grill, painted:


Here's a shot of the cab on it's side, surround painted and top panel ready to be affixed:


For interest, here is the orange vinyl (2' x 5' roll). I may just re-sell it on eBay or save it for another build:


That's it - off for the Easter weekend but should be back on Monday with a few hours to get her together and upright (hopefully!).

Happy Easter gents.
« Last Edit: April 14, 2017, 02:11:29 pm by mwhitney »

ChanceKJ

  • Trade Count: (0)
  • Full Member
  • ***
  • Offline Offline
  • Posts: 3229
  • Last login:August 07, 2021, 02:52:06 pm
.
« Reply #107 on: April 14, 2017, 03:20:07 pm »
.
« Last Edit: March 19, 2021, 02:46:35 am by ChanceKJ »

mwhitney

  • Trade Count: (0)
  • Full Member
  • ***
  • Offline Offline
  • Posts: 129
  • Last login:December 06, 2017, 10:30:20 pm
  • I want to build my own arcade controls!
    • Michael Whitney - Designer. Maker. Builder.
Re: First DK Cabinet Build
« Reply #108 on: April 15, 2017, 10:33:11 pm »
Thanks brother. I'm happy with the off-the-shelf colour as well and think it will work well with the side art. Can't go wrong with black and 🍊!

mourix

  • Trade Count: (0)
  • Full Member
  • ***
  • Offline Offline
  • Posts: 302
  • Last login:April 14, 2024, 11:22:08 am
Re: First DK Cabinet Build
« Reply #109 on: April 16, 2017, 12:56:27 pm »
I'm really liking your attention to detail. With this finish level I'm sure the cab will turn out awesome :applaud:

mwhitney

  • Trade Count: (0)
  • Full Member
  • ***
  • Offline Offline
  • Posts: 129
  • Last login:December 06, 2017, 10:30:20 pm
  • I want to build my own arcade controls!
    • Michael Whitney - Designer. Maker. Builder.
Re: First DK Cabinet Build
« Reply #110 on: April 18, 2017, 05:34:51 pm »
Thank Mourix! So far so good on the build. If the artwork comes out like I hope and I can apply it, I think the cab will turn out great. I look forward to watching my young girls play some of the classics we all played. Last night I got her glued, clamped and upright! I'll post some photos tonight.

mwhitney

  • Trade Count: (0)
  • Full Member
  • ***
  • Offline Offline
  • Posts: 129
  • Last login:December 06, 2017, 10:30:20 pm
  • I want to build my own arcade controls!
    • Michael Whitney - Designer. Maker. Builder.
Re: First DK Cabinet Build
« Reply #111 on: April 19, 2017, 12:50:25 am »
SHE'S STANDING!

Made some good progress the last two nights:

Painted the recesses between the speaker grill slots using a flat artist's brush - kind of felt like playing 'Operation':


Clamped up and installed the 'shelves' and light box:


Clamps came off today and dry fit my control panel - I couldn't resist adding the T-mold. This is ready to be drilled out but I want to get my artwork before I drill just to make sure everything is lined up. There's something comforting about working under the glow of the marquee ;).


For the speaker grill, I noticed some guys adding a screen but I didn't want to wait (or pay) for the authentic grill. I started scouring the house / office and was tempted to buy a perforated BBQ or baking sheet but then found this drawer from a knick-knack stand from Staples... this will do the trick:


Hacked up and hammered using a rubber mallet - didn't even need to paint this as it was factory powder-coated:


From the front:


Got the coin door installed as well:


Lastly - got 2 coats of primer on the side panels and the rear door. Rather than spray these, I'm going to just foam roll / sand to get the finish as smooth as possible. The sides will be completely covered w/ artwork, so I just need a smooth surface to work with.


Remaining tasks for the cabinet are to paint the sides / back, and cut out the holes for the top rear handles and recess for the power switch. From there, I'm tempted to bring her inside to do the wiring, monitor etc.

Starting to look like something...

mwhitney

  • Trade Count: (0)
  • Full Member
  • ***
  • Offline Offline
  • Posts: 129
  • Last login:December 06, 2017, 10:30:20 pm
  • I want to build my own arcade controls!
    • Michael Whitney - Designer. Maker. Builder.
Re: First DK Cabinet Build
« Reply #112 on: April 21, 2017, 01:33:29 am »
Made some progress over the past 2 nights:

Speaker, buttons and clasps installed:


Control panel clamped down:


I wasn't sure if my printer could do 'posters' but had some success. Spent some time cutting each bit out and taping together with the help of my daughter and then stuck these in place to test the fit.

Control Panel, check.


Marquee - found some issues with bracket overlap and width being incorrect.... I cut some super thin particle board I had kicking around as a backing. Glad I printed these off!


Looks good from a few feet away ;):


Taped up the bezel as well - same issue with the width:


Close up of CP - I have about .25" on either side... looks about right, I think:


New Marquee with artwork adjusted and width set to match cab:


Much better. No overlap of logo and the artwork spans as it should:


Tomorrow I'll adjust the bezel artwork width and do another test print before sending off to the printer.

NIVO

  • Global Moderator
  • Trade Count: (+1)
  • Full Member
  • *****
  • Offline Offline
  • Posts: 1256
  • Last login:August 08, 2022, 12:32:13 pm
  • danny_galaga is my mail man.
    • N.A.M.E. - arcade cabinet project
Re: First DK Cabinet Build
« Reply #113 on: April 21, 2017, 01:06:38 pm »
i think that marquee is gonna look great with the design.

Wyo

  • Trade Count: (0)
  • Full Member
  • ***
  • Offline Offline
  • Posts: 408
  • Last login:May 01, 2023, 09:22:42 pm
  • I want to build my own arcade controls!
Re: First DK Cabinet Build
« Reply #114 on: April 21, 2017, 10:05:00 pm »
COOL ARTWORK!!!!

This is shaping up to be my favorite build this year!

Keep up the awesome work, can't wait to see the side art.  :cheers:

mwhitney

  • Trade Count: (0)
  • Full Member
  • ***
  • Offline Offline
  • Posts: 129
  • Last login:December 06, 2017, 10:30:20 pm
  • I want to build my own arcade controls!
    • Michael Whitney - Designer. Maker. Builder.
Re: First DK Cabinet Build
« Reply #115 on: April 22, 2017, 07:17:02 pm »
i think that marquee is gonna look great with the design.

Thanks Nivo!

mwhitney

  • Trade Count: (0)
  • Full Member
  • ***
  • Offline Offline
  • Posts: 129
  • Last login:December 06, 2017, 10:30:20 pm
  • I want to build my own arcade controls!
    • Michael Whitney - Designer. Maker. Builder.
Re: First DK Cabinet Build
« Reply #116 on: April 22, 2017, 07:17:56 pm »
COOL ARTWORK!!!!

This is shaping up to be my favorite build this year!

Keep up the awesome work, can't wait to see the side art.  :cheers:

Thanks Wyo - I really appreciate your feedback.

mwhitney

  • Trade Count: (0)
  • Full Member
  • ***
  • Offline Offline
  • Posts: 129
  • Last login:December 06, 2017, 10:30:20 pm
  • I want to build my own arcade controls!
    • Michael Whitney - Designer. Maker. Builder.
Re: First DK Cabinet Build
« Reply #117 on: April 22, 2017, 07:31:33 pm »
Well, I brought her inside yesterday. I kind of just got to a point where it was like 'she's done' - at least as far as the cab goes. I figured I'd bring her in out of harm's way where I can keep her clean, free of getting banged and where I can start working on the insides while I wait for the artwork to show up.

On that note, I emailed all the files off and am awaiting a reply to finalize things - pretty exciting.

Here's a shot of her where she'll be living - I re-did the bezel art to the right size... :


Got the back door and handles in:


And.. couldn't resist printing out the side art just to make sure my files were going to work. This was a tedious job of cutting / pasting and then the printer ran out of ink... anyway, I have enough to see how it will look and to make sure all will fit. I had about 2" overhang that I'll be able to trim / wrap the edge with. Color palate will be orange, dark brown, cream and white.


I have a few questions:

1) If I have all components plugged into a powerbar (that remains on) and then tapped into a switch, which will be on the backside of the cab, will everything switch on when flicking the main switch? May main point of inquiry is for the computer monitor.

2) I found these carriage bolts as a fastener shop, but they were the smallest size they had. The head looks a bit big (1/2") for the control panel - can someone confirm how big the carriage bolt head is on their CP fasteners?


3) I picked up a small amplifier from RetroActive Arcade. Has anyone used this? If so, is the wiring fairly simple, AND, where is this best mounted for simple / hidden access to the v/c knob? I'd love to see some photos of this installed.

http://retroactivearcade.ca/mini-hi-fi-audio-amplifier-12v-for-raspberry-pi-1/

Thanks guys!

NIVO

  • Global Moderator
  • Trade Count: (+1)
  • Full Member
  • *****
  • Offline Offline
  • Posts: 1256
  • Last login:August 08, 2022, 12:32:13 pm
  • danny_galaga is my mail man.
    • N.A.M.E. - arcade cabinet project
Re: First DK Cabinet Build
« Reply #118 on: April 22, 2017, 08:29:58 pm »
honestly I'd hate to see you use bolts at all like that. This design deserves to have no screw/bolt heads visible at all on the control panel. blind hole underside mounting for the stick. Attaching the panel could be done either with velcro/latch system/magnet system.

yotsuya

  • Trade Count: (+21)
  • Full Member
  • ***
  • Offline Offline
  • Posts: 19955
  • Last login:April 12, 2024, 11:03:32 pm
  • 2014 UCA Winner, 2014, 2015, 2016 ZapCon Winner
    • forum.arcadecontrols.com/index.php/topic,137636.msg1420628.html
Re: First DK Cabinet Build
« Reply #119 on: April 22, 2017, 10:38:58 pm »
I vote carriage bolts. All the old games had them. I find them more authentic.
***Build what you dig, bro. Build what you dig.***

mwhitney

  • Trade Count: (0)
  • Full Member
  • ***
  • Offline Offline
  • Posts: 129
  • Last login:December 06, 2017, 10:30:20 pm
  • I want to build my own arcade controls!
    • Michael Whitney - Designer. Maker. Builder.
Re: First DK Cabinet Build
« Reply #120 on: April 23, 2017, 03:36:47 pm »
honestly I'd hate to see you use bolts at all like that. This design deserves to have no screw/bolt heads visible at all on the control panel. blind hole underside mounting for the stick. Attaching the panel could be done either with velcro/latch system/magnet system.

Thanks for the feedback. I thought the carriage bolts were standard :


Do you have a photo of what you mean? Just velcro on the underside of the panel and stuck to the painted MDF?

I really don't mind the look of the carriage bolts - I just don't want them to be overbearing. The photo I posted yesterday (1/2") seem too big.

As for my joysticks, I have the ones that mount from the underside (no screws through the top).

mwhitney

  • Trade Count: (0)
  • Full Member
  • ***
  • Offline Offline
  • Posts: 129
  • Last login:December 06, 2017, 10:30:20 pm
  • I want to build my own arcade controls!
    • Michael Whitney - Designer. Maker. Builder.
Re: First DK Cabinet Build
« Reply #121 on: April 23, 2017, 03:38:08 pm »
I vote carriage bolts. All the old games had them. I find them more authentic.

I agree with you and kind of like the look. Any idea what the head measurement is on the original bolts?

ChanceKJ

  • Trade Count: (0)
  • Full Member
  • ***
  • Offline Offline
  • Posts: 3229
  • Last login:August 07, 2021, 02:52:06 pm
.
« Reply #122 on: April 23, 2017, 04:46:59 pm »
.
« Last Edit: March 19, 2021, 02:46:23 am by ChanceKJ »

yotsuya

  • Trade Count: (+21)
  • Full Member
  • ***
  • Offline Offline
  • Posts: 19955
  • Last login:April 12, 2024, 11:03:32 pm
  • 2014 UCA Winner, 2014, 2015, 2016 ZapCon Winner
    • forum.arcadecontrols.com/index.php/topic,137636.msg1420628.html
Re: First DK Cabinet Build
« Reply #123 on: April 23, 2017, 06:12:16 pm »
Imma just gonna put this right here... all shot in my actual gameroom....


***Build what you dig, bro. Build what you dig.***

Wyo

  • Trade Count: (0)
  • Full Member
  • ***
  • Offline Offline
  • Posts: 408
  • Last login:May 01, 2023, 09:22:42 pm
  • I want to build my own arcade controls!
Re: First DK Cabinet Build
« Reply #124 on: April 23, 2017, 07:05:17 pm »
Mikes arcade has OEM sized carriage bolts for DK cabs.  Twisted quarter also has a nice selection on smaller headed carriage bolts.  I bought a lot of like 700 smaller headed carriage bolts off ebay for like $10 that I use on my CPs and coin doors. 

Go smaller for sure, 1/2 is to big. 

Also, bad ass and unique side art.

Also, bad ass wood wall.  Dig your style, the game is gonna look perfect in that room.

mwhitney

  • Trade Count: (0)
  • Full Member
  • ***
  • Offline Offline
  • Posts: 129
  • Last login:December 06, 2017, 10:30:20 pm
  • I want to build my own arcade controls!
    • Michael Whitney - Designer. Maker. Builder.
Re: First DK Cabinet Build
« Reply #125 on: April 24, 2017, 07:53:13 pm »
Mikes arcade has OEM sized carriage bolts for DK cabs.  Twisted quarter also has a nice selection on smaller headed carriage bolts.  I bought a lot of like 700 smaller headed carriage bolts off ebay for like $10 that I use on my CPs and coin doors. 

Go smaller for sure, 1/2 is to big. 

Also, bad ass and unique side art.

Also, bad ass wood wall.  Dig your style, the game is gonna look perfect in that room.

Hey Wyo - thanks for the kudos man! I'm really looking forward to getting the artwork on. Last night I took a monitor apart that I had and painted the outer frame from silver to black so it disappears in the cab. Tonight, I should be able to mount the monitor inside and start playing with hookups.

RE the carriage bolts, man - I'm having a helluva time finding M4 bolts. I need 8 that are about 1.25" long as I have to go through 3/4" MDF and the plexiglass... Mike's seems like the only* place to find them but even at that, I'm not sure they will be long enough. I could countersink the underside if need be and use shorter bolts, but shipping is probably going to be 2-3 times the cost of the bolts themselves. I have a request in to Mike's to see what the damage / availability is.

I held the bolts I have up to the CP art mockup and they would look way out of scale. I can't believe there isn't anything to be had locally... anyway, it's the thrill of the hunt with some of this stuff ;).

Thanks for your support along this build. The wall behind the machine was all free lumber from thrown away pallets. I broke them all apart, ran them through the saw for some uniformity and clean edges and then stained them all... took some time, but it turned out kinda cool IMO. In hindsight, I'd have painted the wall dark first. When the sun hits it, you can some some space here and there despite having squared up my edges. One day I may pop them off as they're only brad-nailed, and hit the wall with some dark paint.

mwhitney

  • Trade Count: (0)
  • Full Member
  • ***
  • Offline Offline
  • Posts: 129
  • Last login:December 06, 2017, 10:30:20 pm
  • I want to build my own arcade controls!
    • Michael Whitney - Designer. Maker. Builder.
Re: First DK Cabinet Build
« Reply #126 on: April 24, 2017, 07:56:19 pm »
Thanks for the pics Yotsuya - great to have the reference. I'm on-board 100% with the bolts and feel it ties into the whole feel. Nivo, thanks for your feedback as well - I hear you about a completely clean panel, but I think if the bolts are kept nice and small / neat, it adds a cool element- it's all subjective, I suppose. I don't mind a bit of bling on the board ;).

yotsuya

  • Trade Count: (+21)
  • Full Member
  • ***
  • Offline Offline
  • Posts: 19955
  • Last login:April 12, 2024, 11:03:32 pm
  • 2014 UCA Winner, 2014, 2015, 2016 ZapCon Winner
    • forum.arcadecontrols.com/index.php/topic,137636.msg1420628.html
Re: First DK Cabinet Build
« Reply #127 on: April 24, 2017, 08:16:25 pm »
No problem. I just think carriage bolts are a simple solution that for whatever reason get a bad rap.
***Build what you dig, bro. Build what you dig.***

Wyo

  • Trade Count: (0)
  • Full Member
  • ***
  • Offline Offline
  • Posts: 408
  • Last login:May 01, 2023, 09:22:42 pm
  • I want to build my own arcade controls!
Re: First DK Cabinet Build
« Reply #128 on: April 24, 2017, 09:53:49 pm »
Mikes arcade has OEM sized carriage bolts for DK cabs.  Twisted quarter also has a nice selection on smaller headed carriage bolts.  I bought a lot of like 700 smaller headed carriage bolts off ebay for like $10 that I use on my CPs and coin doors. 

Go smaller for sure, 1/2 is to big. 

Also, bad ass and unique side art.

Also, bad ass wood wall.  Dig your style, the game is gonna look perfect in that room.

Hey Wyo - thanks for the kudos man! I'm really looking forward to getting the artwork on. Last night I took a monitor apart that I had and painted the outer frame from silver to black so it disappears in the cab. Tonight, I should be able to mount the monitor inside and start playing with hookups.

RE the carriage bolts, man - I'm having a helluva time finding M4 bolts. I need 8 that are about 1.25" long as I have to go through 3/4" MDF and the plexiglass... Mike's seems like the only* place to find them but even at that, I'm not sure they will be long enough. I could countersink the underside if need be and use shorter bolts, but shipping is probably going to be 2-3 times the cost of the bolts themselves. I have a request in to Mike's to see what the damage / availability is.

I held the bolts I have up to the CP art mockup and they would look way out of scale. I can't believe there isn't anything to be had locally... anyway, it's the thrill of the hunt with some of this stuff ;).

Thanks for your support along this build. The wall behind the machine was all free lumber from thrown away pallets. I broke them all apart, ran them through the saw for some uniformity and clean edges and then stained them all... took some time, but it turned out kinda cool IMO. In hindsight, I'd have painted the wall dark first. When the sun hits it, you can some some space here and there despite having squared up my edges. One day I may pop them off as they're only brad-nailed, and hit the wall with some dark paint.

http://www.ebay.com/itm/6-Lbs-or-approximately-840-8-32-x-1-1-4-zinc-coated-carriage-bolts-/201890156078?hash=item2f01974e2e:g:yoIAAOSwjDZYkPzZ

These are the ones I bought. I have a million of them....the heads are slightly bigger than original but they work great and are long enough for what you need.  PM me your addy and I'll send you a handful....but it won't be until the weekend if that's cool...I work to much. :)

mwhitney

  • Trade Count: (0)
  • Full Member
  • ***
  • Offline Offline
  • Posts: 129
  • Last login:December 06, 2017, 10:30:20 pm
  • I want to build my own arcade controls!
    • Michael Whitney - Designer. Maker. Builder.
Re: First DK Cabinet Build
« Reply #129 on: April 25, 2017, 01:34:33 pm »
Hi Wyo - I appreciate it man! Not to look a gift-horse..., but would you mind telling me what the head measures on yours? Also, is there any numbers etc. on the heads? I could be wrong but the head size in the eBay photo looks like it could measure 1/2" across.

Do you have a photo of your build CP with these in place?

Thanks mate!

Wyo

  • Trade Count: (0)
  • Full Member
  • ***
  • Offline Offline
  • Posts: 408
  • Last login:May 01, 2023, 09:22:42 pm
  • I want to build my own arcade controls!
Re: First DK Cabinet Build
« Reply #130 on: April 25, 2017, 10:00:22 pm »
I believe they are 8/32 wide heads and 1 1/4 inch long.

Check out my LOZ build control panel for the cp pics.  I use them on the coin door as well.

ChanceKJ

  • Trade Count: (0)
  • Full Member
  • ***
  • Offline Offline
  • Posts: 3229
  • Last login:August 07, 2021, 02:52:06 pm
.
« Reply #131 on: April 25, 2017, 11:14:52 pm »
.
« Last Edit: March 19, 2021, 02:36:13 am by ChanceKJ »

mwhitney

  • Trade Count: (0)
  • Full Member
  • ***
  • Offline Offline
  • Posts: 129
  • Last login:December 06, 2017, 10:30:20 pm
  • I want to build my own arcade controls!
    • Michael Whitney - Designer. Maker. Builder.
Re: First DK Cabinet Build
« Reply #132 on: April 26, 2017, 12:21:52 am »
I believe they are 8/32 wide heads and 1 1/4 inch long.

Check out my LOZ build control panel for the cp pics.  I use them on the coin door as well.

Sounds perfect, Wyo. If you're willing to fire these off to me, I'd be extremely grateful. I can PM you my addy and just let me know what the shipping etc. and bolt cost is. I've hit up every specialty shop in the area and even RC car / model / hobby shots with no luck. I did find some pins I could make work they are silver with small round heads and take cotter pins with holds drilled along their length for different depth options. The head size is perfect and I could cotter pin them underneath / drill new holes or space them out with washers but it's a bit of #effarounditis PLUS, they are $3 and change per piece!

Man - Chance's hashtag is spot on. Your build is freakin' amazing brother.... hats off to you. It makes me want to build one!

mwhitney

  • Trade Count: (0)
  • Full Member
  • ***
  • Offline Offline
  • Posts: 129
  • Last login:December 06, 2017, 10:30:20 pm
  • I want to build my own arcade controls!
    • Michael Whitney - Designer. Maker. Builder.
Re: First DK Cabinet Build
« Reply #133 on: April 26, 2017, 12:36:36 am »
A bit more progress over the past two days:

I have an old Samsung monitor with an adjustable base - the thing spins 180* and has an arm that lowers / raises the monitor and tilts. I was tempted to get rid of this thing long before I ever thought I'd be building an arcade, but I'm glad I hung onto it.

The bezel was silver, so I took it all apart and hit it with the rattle can. Because of the adjustability, I didn't have to mess around too much with finding the perfect angle. Instead, I just stacked a bunch of misc. items (chair, stool, books, kids foam blocks) and got the shelf to the right height. From there I marked the cab and installed the shelf.

I would have had it in last night but the wood strips kept splitting on me - go figure. This is the same lumber I used for my batons inside but I finally said screw it and picked up some small aluminum angle iron for the shelf supports.

Once in, I tested the monitor to make sure I didn't screw anything up and started loading my RPi etc. in the cab to start mapping out where things will go.

One thing I'm not clear on is how to wire up this lit power module to my power-bar. I got as far as cutting the plug off and crimping some spade terminals but have no idea how this thing works. Wiring is not my specialty... I looked on Google last night but didn't have much luck - if anyone has a shot of how this goes, I'd appreciate it.

Bezel removed:


Painted:


Reassembled:


One side in:


Second side:


Shelf installed - yeah, there's T-mold on it, you can laugh at me ;). I had a chunk of black and figured 'why the hell not?'


Shelf drilled - Samsung was nice enough to put some threaded inserts in the bottom. Thanks Samsung -


Monitor works! Whew...


Powerbar leads crimped and heat-shrunk... no idea how this wires / where the jumpers go:


Lastly - artwork was all sent off and proofs came back today! It was pretty cool seeing everything in pre-production... can't wait to get the artwork on this baby.
« Last Edit: April 26, 2017, 01:28:59 pm by mwhitney »

mwhitney

  • Trade Count: (0)
  • Full Member
  • ***
  • Offline Offline
  • Posts: 129
  • Last login:December 06, 2017, 10:30:20 pm
  • I want to build my own arcade controls!
    • Michael Whitney - Designer. Maker. Builder.
Re: First DK Cabinet Build
« Reply #134 on: April 26, 2017, 01:06:09 am »
I think I may have it...

The only thing I need are 2 jumper wires.

If the empty terminals in my photo are numbered 1-4 from top to bottom, would I just need a jumper from 1 to 4 and another from 2 to 3?


On a completely different subject, my buddy found this cover (no vinyl) in a bin of used records. Thought the cover was cool...


PL1

  • Global Moderator
  • Trade Count: (+1)
  • Full Member
  • *****
  • Offline Offline
  • Posts: 9399
  • Last login:Today at 05:32:12 am
  • Designated spam hunter
Re: First DK Cabinet Build
« Reply #135 on: April 26, 2017, 01:14:54 am »

NIVO

  • Global Moderator
  • Trade Count: (+1)
  • Full Member
  • *****
  • Offline Offline
  • Posts: 1256
  • Last login:August 08, 2022, 12:32:13 pm
  • danny_galaga is my mail man.
    • N.A.M.E. - arcade cabinet project
Re: First DK Cabinet Build
« Reply #136 on: April 26, 2017, 01:27:57 am »
i made ya two pics based on your own pic.

NIVO

  • Global Moderator
  • Trade Count: (+1)
  • Full Member
  • *****
  • Offline Offline
  • Posts: 1256
  • Last login:August 08, 2022, 12:32:13 pm
  • danny_galaga is my mail man.
    • N.A.M.E. - arcade cabinet project
Re: First DK Cabinet Build
« Reply #137 on: April 26, 2017, 01:29:38 am »
ahh nuts, PL1 posted while i was doing this hehe. Sorry about that.

PL1

  • Global Moderator
  • Trade Count: (+1)
  • Full Member
  • *****
  • Offline Offline
  • Posts: 9399
  • Last login:Today at 05:32:12 am
  • Designated spam hunter
Re: First DK Cabinet Build
« Reply #138 on: April 26, 2017, 01:39:38 am »
If the empty terminals in my photo are numbered 1-4 from top to bottom, would I just need a jumper from 1 to 4 and another from 2 to 3?


Pretty close.

If you do it that way, the lamp will always be on -- the lamp is between the wider tabs on the right. (1+2)

To wire it so the lamp is off when the switch is open:

1. Move the white wire from 1 left to 1 right.

2. Move the black wire from 2 left to 2 right.

3. Jumper from 4 to 1 left for neutral. (white)

4. Jumper from 3 to 2 left for hot. (black)

Make sure you have both good mechanical connections (QDs won't twist free) and good electrical connections (<2 ohms) BEFORE you try to run power through it.

Why is it important to have clean, corrosion-free, mechanically-solid and low-resistance power connections?

Badmouth shows why here and here.


Scott
« Last Edit: April 26, 2017, 01:41:41 am by PL1 »

mwhitney

  • Trade Count: (0)
  • Full Member
  • ***
  • Offline Offline
  • Posts: 129
  • Last login:December 06, 2017, 10:30:20 pm
  • I want to build my own arcade controls!
    • Michael Whitney - Designer. Maker. Builder.
Re: First DK Cabinet Build
« Reply #139 on: April 26, 2017, 01:37:06 pm »
Hey Scott and Nivo  - this is great info. I'll have to read up on how to test for low ohm connections... this is all new to me. The extend of my wiring experience is wiring pos/neg to speakers / car batteries ;).

Thanks again! I'll post how I make out, tonight (hopefully).

mwhitney

  • Trade Count: (0)
  • Full Member
  • ***
  • Offline Offline
  • Posts: 129
  • Last login:December 06, 2017, 10:30:20 pm
  • I want to build my own arcade controls!
    • Michael Whitney - Designer. Maker. Builder.
Re: First DK Cabinet Build
« Reply #140 on: April 26, 2017, 02:37:29 pm »
SERIAL NUMBER PLATE:

Does anyone have a vector file (AI, or editable PDF) for the serial number plates for these Nintendo cabs?

Thanks!

ChanceKJ

  • Trade Count: (0)
  • Full Member
  • ***
  • Offline Offline
  • Posts: 3229
  • Last login:August 07, 2021, 02:52:06 pm
.
« Reply #141 on: April 26, 2017, 05:17:11 pm »
.
« Last Edit: March 19, 2021, 02:46:12 am by ChanceKJ »

mwhitney

  • Trade Count: (0)
  • Full Member
  • ***
  • Offline Offline
  • Posts: 129
  • Last login:December 06, 2017, 10:30:20 pm
  • I want to build my own arcade controls!
    • Michael Whitney - Designer. Maker. Builder.
Re: First DK Cabinet Build
« Reply #142 on: April 26, 2017, 05:21:34 pm »
just saw your PM for the number plate.
I've got you covered.

SERIAL NUMBER PLATE:

Does anyone have a vector file (AI, or editable PDF) for the serial number plates for these Nintendo cabs?

Thanks!

Thanks brother!

Wyo

  • Trade Count: (0)
  • Full Member
  • ***
  • Offline Offline
  • Posts: 408
  • Last login:May 01, 2023, 09:22:42 pm
  • I want to build my own arcade controls!
Re: First DK Cabinet Build
« Reply #143 on: April 26, 2017, 11:09:39 pm »
haha, thanks Chance. I was to lazy to cut and paste a pic. Haha

As far as the bolts, no problem my man. I Forgot you were in Canada so shipping them will mean I'll need to go when the post office is open....no worries. I'll shoot for Saturday morning.  And I'm gonna send you more than 8, you'll need them for your next Nintendo build....because you know there will be another one. :)

mwhitney

  • Trade Count: (0)
  • Full Member
  • ***
  • Offline Offline
  • Posts: 129
  • Last login:December 06, 2017, 10:30:20 pm
  • I want to build my own arcade controls!
    • Michael Whitney - Designer. Maker. Builder.
Re: First DK Cabinet Build
« Reply #144 on: April 27, 2017, 12:31:47 am »
As far as the bolts, no problem my man. I Forgot you were in Canada so shipping them will mean I'll need to go when the post office is open....no worries. I'll shoot for Saturday morning.  And I'm gonna send you more than 8, you'll need them for your next Nintendo build....because you know there will be another one. :)

No rush at all and I really appreciate it. I think you may be right about another build. My wife on the other-hand... her girlfriends were joking over dinner on the weekend to the effect of, "Oh yes, it's every girl's dream to have an arcade...". Funny thing is, when I had the dummy CP upstairs, she spent hours paying Tetris. We'll see who clocks more hours on the machine ;).
« Last Edit: April 27, 2017, 12:48:49 am by mwhitney »

mwhitney

  • Trade Count: (0)
  • Full Member
  • ***
  • Offline Offline
  • Posts: 129
  • Last login:December 06, 2017, 10:30:20 pm
  • I want to build my own arcade controls!
    • Michael Whitney - Designer. Maker. Builder.
Re: First DK Cabinet Build
« Reply #145 on: April 27, 2017, 12:41:00 am »
Success w/ the wiring tonight. Many thanks again to Nivo and PL1 - got it all sorted, and no burning :timebomb:

Maybe this pic will help someone down the road:


All lights up, main switch turns the power bar on/off, and the light goes out when turning off the module switch:


Not a ton of progress tonight but I'm ready to start figuring out where to put stuff. I'm going to follow Chance's lead with the velcro wraps to keep things neat and keep drilling / screws to a minimum inside.

Couldn't resist putting the coin sticker on tonight. I trimmed off all the white for a cleaner look -


Also - had some time today and used some design elements from Chance's plate and requested a quote for a plate (thanks again for the info, Chance). I was pretty tempted to do the DIY method but I'd be in it for a good $16 for the Avery labels, close to $20 for the flashing and then clear... I'm thinking a legit one would be less than that.

Here's what I came up with:

« Last Edit: April 27, 2017, 12:43:17 am by mwhitney »

ChanceKJ

  • Trade Count: (0)
  • Full Member
  • ***
  • Offline Offline
  • Posts: 3229
  • Last login:August 07, 2021, 02:52:06 pm
.
« Reply #146 on: April 27, 2017, 02:13:05 am »
.
« Last Edit: March 19, 2021, 02:30:53 am by ChanceKJ »

PL1

  • Global Moderator
  • Trade Count: (+1)
  • Full Member
  • *****
  • Offline Offline
  • Posts: 9399
  • Last login:Today at 05:32:12 am
  • Designated spam hunter
Re: First DK Cabinet Build
« Reply #147 on: April 27, 2017, 02:40:21 am »
Success w/ the wiring tonight. Many thanks again to Nivo and PL1 - got it all sorted, and no burning :timebomb:
The burning takes time.   >:D

Keep your nose alert, just in case.  :duckhunt


1. Nintedo?   :lol

2. You might want to check the math.

Watts = Volts * Amps

110W = 120V * 1.2A  :dizzy:

Your cab will probably draw more than 1.2 Amps by the time you add the RasPi3, monitor, audio amp, marquee light, etc.

LMK if you need help figuring out the correct electrical info for your serial plate.  :cheers:


Scott

mwhitney

  • Trade Count: (0)
  • Full Member
  • ***
  • Offline Offline
  • Posts: 129
  • Last login:December 06, 2017, 10:30:20 pm
  • I want to build my own arcade controls!
    • Michael Whitney - Designer. Maker. Builder.
Re: First DK Cabinet Build
« Reply #148 on: April 27, 2017, 10:54:28 am »
Thanks Scott.

1) Too funny. I read it and thought, 'Nintedo - yeah, what's wrong with tha ---- ohh!' Thanks for catching it.... :)

2) My lack of knowledge here is shining through. I just copied the numbers from a Google image. Someone else's math is wrong too ;)

3)I'd definitely like to take you up on that offer, Scott.

Cheers!

Mike

PL1

  • Global Moderator
  • Trade Count: (+1)
  • Full Member
  • *****
  • Offline Offline
  • Posts: 9399
  • Last login:Today at 05:32:12 am
  • Designated spam hunter
Re: First DK Cabinet Build
« Reply #149 on: April 27, 2017, 03:54:20 pm »
I'd definitely like to take you up on that offer, Scott.
OK.

The RasPi3 power supply draws 0.5A @120v -- that includes the Xin-Mo(?) encoders and anything else that gets power from USB.

Need to know what other specific equipment will be in your cab.

Monitor:
- What model Samsung are you using?
- Are the amperage and voltage listed on the back? (or on the power brick?)

Audio amp:
- How are you powering it? (separate power brick, USB, etc.)
- Are the amperage and voltage listed?
- What are you using?  Link?

Marquee backlight:
- Are the amperage and voltage listed on the fixture? 
- What are you using?  Link?

Anything else?


Scott

mwhitney

  • Trade Count: (0)
  • Full Member
  • ***
  • Offline Offline
  • Posts: 129
  • Last login:December 06, 2017, 10:30:20 pm
  • I want to build my own arcade controls!
    • Michael Whitney - Designer. Maker. Builder.
Re: First DK Cabinet Build
« Reply #150 on: April 27, 2017, 04:27:50 pm »
Hi Scott - please see below:


The RasPi3 power supply draws 0.5A @120v -- that includes the Xin-Mo(?) encoders and anything else that gets power from USB.

** Perfect - I'm using the Xin-Mo encoder. **

Need to know what other specific equipment will be in your cab.

Monitor:
- What model Samsung are you using?
- Are the amperage and voltage listed on the back? (or on the power brick?)

** Monitor is a Samsung Syncmaster 193 P **
40 Watt
Link: https://www.cnet.com/products/samsung-syncmaster-193p/specs/
http://www.samsung.com/ca/support/model/DI19PSQAQ

Audio amp:
- How are you powering it? (separate power brick, USB, etc.)
- Are the amperage and voltage listed?
- What are you using?  Link?

** Amplifier specs are as follows: Operating voltage:DC7.5-15V - Recommended supply voltage:12V **
I'll be powering this with an adapter.
Link: http://retroactivearcade.ca/mini-hi-fi-audio-amplifier-12v-for-raspberry-pi-1/

Marquee backlight:
- Are the amperage and voltage listed on the fixture? 
- What are you using?  Link?

** I'm using a 'Good Earth' 18" florescent - 120V, 15W **
Here's a link to the light with data sheet / specs: https://www.craftwoodlumber.com/products/523275?via=57c72f9a69702d410a00387c%2C57c72fb269702d410a0039e1

Anything else?
I think that's it: Monitor, Xin Mo, RPi3, 4" speaker, mini amp, and at times, I may hook up a wireless keyboard / mouse for the RPi.

Let me know if you need anything else!

Thanks again!


PL1

  • Global Moderator
  • Trade Count: (+1)
  • Full Member
  • *****
  • Offline Offline
  • Posts: 9399
  • Last login:Today at 05:32:12 am
  • Designated spam hunter
Re: First DK Cabinet Build
« Reply #151 on: April 27, 2017, 05:08:50 pm »
** Amplifier specs are as follows: Operating voltage:DC7.5-15V - Recommended supply voltage:12V **
I'll be powering this with an adapter.
By "adapter", I assume you mean a separate power supply "wall wart" or "brick".

Link/specs for the amplifier power supply?

Your setup draws a lot less current than I expected.   ;D

0.5A   @ 120v for RasPi3  + encoder + keyboard/mouse
0.33A @ 120v for monitor -- 40W = 120V * 0.33A
0.13A @ 120v for marquee backlight -- 15W = 120V * 0.125A (round up)
       ? @ 120v for amplifier power supply
--------
0.96A @ 120v + amplifier power supply


Scott

mwhitney

  • Trade Count: (0)
  • Full Member
  • ***
  • Offline Offline
  • Posts: 129
  • Last login:December 06, 2017, 10:30:20 pm
  • I want to build my own arcade controls!
    • Michael Whitney - Designer. Maker. Builder.
Re: First DK Cabinet Build
« Reply #152 on: April 27, 2017, 05:28:55 pm »
** Amplifier specs are as follows: Operating voltage:DC7.5-15V - Recommended supply voltage:12V **
I'll be powering this with an adapter.
By "adapter", I assume you mean a separate power supply "wall wart" or "brick".

Link/specs for the amplifier power supply?

Your setup draws a lot less current than I expected.   ;D

0.5A   @ 120v for RasPi3  + encoder + keyboard/mouse
0.33A @ 120v for monitor -- 40W = 120V * 0.33A
0.13A @ 120v for marquee backlight -- 15W = 120V * 0.125A (round up)
       ? @ 120v for amplifier power supply
--------
0.96A @ 120v + amplifier power supply


Scott

Thanks Scott - yes, by 'adapter' I just meant the plug / wall brick to power the amp. The only info I can find on the amp power supply (wasn't included) is: "Recommended supply voltage: 12V". I don't know if this tells you anything.

PL1

  • Global Moderator
  • Trade Count: (+1)
  • Full Member
  • *****
  • Offline Offline
  • Posts: 9399
  • Last login:Today at 05:32:12 am
  • Designated spam hunter
Re: First DK Cabinet Build
« Reply #153 on: April 27, 2017, 07:17:42 pm »
The only info I can find on the amp power supply (wasn't included) is: "Recommended supply voltage: 12V". I don't know if this tells you anything.
It tells me that the amp manufacturer didn't bother to publish useful info like max current draw or recommended power supply rating.   :banghead:

The product listings and spec sheets only list "Quiescent current" -- how much current it draws when doing nothing.   :angry:

Since there appears to be no clear data, here's my spitball guess: (LMK if I got this wrong, audio guys)
- The amplifier you linked to is 10W+10W and based on the PAM8610 (~90% efficient)
- The highest power the PAM8610 amplifier is rated for is 15W+15W (30W total)
- 30W = 120v * 0.25A

If you get a 12v power supply rated for at least 0.25A @ 120v (2.5A @ 12v) you should be good.

0.5A   @ 120v for RasPi3  + encoder + keyboard/mouse
0.33A @ 120v for monitor -- 40W = 120v * 0.33A
0.13A @ 120v for marquee backlight -- 15W = 120v * 0.125A (round up)
0.24A @ 120v for amplifier power supply -- 30W = 120v * 0.25 (round down)
--------
1.20A @ 120v = 144W


Scott

mwhitney

  • Trade Count: (0)
  • Full Member
  • ***
  • Offline Offline
  • Posts: 129
  • Last login:December 06, 2017, 10:30:20 pm
  • I want to build my own arcade controls!
    • Michael Whitney - Designer. Maker. Builder.
Re: First DK Cabinet Build
« Reply #154 on: April 27, 2017, 07:55:55 pm »
The only info I can find on the amp power supply (wasn't included) is: "Recommended supply voltage: 12V". I don't know if this tells you anything.
It tells me that the amp manufacturer didn't bother to publish useful info like max current draw or recommended power supply rating.   :banghead:

The product listings and spec sheets only list "Quiescent current" -- how much current it draws when doing nothing.   :angry:

Since there appears to be no clear data, here's my spitball guess: (LMK if I got this wrong, audio guys)
- The amplifier you linked to is 10W+10W and based on the PAM8610 (~90% efficient)
- The highest power the PAM8610 amplifier is rated for is 15W+15W (30W total)
- 30W = 120v * 0.25A

If you get a 12v power supply rated for at least 0.25A @ 120v (2.5A @ 12v) you should be good.

0.5A   @ 120v for RasPi3  + encoder + keyboard/mouse
0.33A @ 120v for monitor -- 40W = 120v * 0.33A
0.13A @ 120v for marquee backlight -- 15W = 120v * 0.125A (round up)
0.24A @ 120v for amplifier power supply -- 30W = 120v * 0.25 (round down)
--------
1.20A @ 120v = 144W


Scott

Scott- thanks a ton for all of this technical figuring. This is where my coconut shuts down ;) but it's good to see the process and learn how to figure this out. Cheers.

Here's the revised plate (no 'Nintedo' or 'Nintitties') :)


mwhitney

  • Trade Count: (0)
  • Full Member
  • ***
  • Offline Offline
  • Posts: 129
  • Last login:December 06, 2017, 10:30:20 pm
  • I want to build my own arcade controls!
    • Michael Whitney - Designer. Maker. Builder.
Re: First DK Cabinet Build
« Reply #155 on: April 28, 2017, 07:46:06 pm »
Scrolling through my resource files for the build and thought I'd post my initial loose mockup from Sketchup.


SN plate artwork has been sent off, found a power supply for my micro-amp and sadly, away for the weekend so no progress for a few days. When I get back, it's on to the wiring ,stapling and velcro-ing.


ChanceKJ

  • Trade Count: (0)
  • Full Member
  • ***
  • Offline Offline
  • Posts: 3229
  • Last login:August 07, 2021, 02:52:06 pm
.
« Reply #156 on: April 29, 2017, 03:23:10 am »
.
« Last Edit: March 19, 2021, 02:30:40 am by ChanceKJ »

mwhitney

  • Trade Count: (0)
  • Full Member
  • ***
  • Offline Offline
  • Posts: 129
  • Last login:December 06, 2017, 10:30:20 pm
  • I want to build my own arcade controls!
    • Michael Whitney - Designer. Maker. Builder.
Re: First DK Cabinet Build
« Reply #157 on: April 29, 2017, 12:08:13 pm »
End up ordering it from the place here in Calgary?

Hey Chance - no. I emailed them the same day and didn't ever hear back. I found a company in Kelowna - $20 bones and I can go pick it up / save on the shipping.

ChanceKJ

  • Trade Count: (0)
  • Full Member
  • ***
  • Offline Offline
  • Posts: 3229
  • Last login:August 07, 2021, 02:52:06 pm
.
« Reply #158 on: April 29, 2017, 01:17:16 pm »
.
« Last Edit: March 19, 2021, 02:30:29 am by ChanceKJ »

rootbeer

  • Trade Count: (0)
  • Full Member
  • ***
  • Offline Offline
  • Posts: 42
  • Last login:October 13, 2018, 10:06:41 am
  • .
Re: First DK Cabinet Build
« Reply #159 on: April 29, 2017, 01:32:00 pm »
What's the side art going to look like on the other side? Are you able to reverse the 1981, coins and coin slot elements so they read properly?

mwhitney

  • Trade Count: (0)
  • Full Member
  • ***
  • Offline Offline
  • Posts: 129
  • Last login:December 06, 2017, 10:30:20 pm
  • I want to build my own arcade controls!
    • Michael Whitney - Designer. Maker. Builder.
Re: First DK Cabinet Build
« Reply #160 on: April 29, 2017, 01:41:19 pm »
Hey Rootbeer - exactly. I created all the art in illustrator and mirrored the opposite side so that the coins / text all read properly.

rootbeer

  • Trade Count: (0)
  • Full Member
  • ***
  • Offline Offline
  • Posts: 42
  • Last login:October 13, 2018, 10:06:41 am
  • .
Re: First DK Cabinet Build
« Reply #161 on: April 29, 2017, 01:54:05 pm »
Hey Rootbeer - exactly. I created all the art in illustrator and mirrored the opposite side so that the coins / text all read properly.

Beautiful. That was definitely worth the effort.

ChanceKJ

  • Trade Count: (0)
  • Full Member
  • ***
  • Offline Offline
  • Posts: 3229
  • Last login:August 07, 2021, 02:52:06 pm
.
« Reply #162 on: April 30, 2017, 02:12:40 am »
.
« Last Edit: March 19, 2021, 02:30:13 am by ChanceKJ »

mwhitney

  • Trade Count: (0)
  • Full Member
  • ***
  • Offline Offline
  • Posts: 129
  • Last login:December 06, 2017, 10:30:20 pm
  • I want to build my own arcade controls!
    • Michael Whitney - Designer. Maker. Builder.
Re: First DK Cabinet Build
« Reply #163 on: April 30, 2017, 08:28:09 pm »
Thanks guys!

Richie_jones

  • Trade Count: (0)
  • Full Member
  • ***
  • Offline Offline
  • Posts: 307
  • Last login:February 10, 2024, 02:04:21 pm
Re: First DK Cabinet Build
« Reply #164 on: April 30, 2017, 09:52:13 pm »
Great build..

One question you had that didn't seem to be answered...did you check your monitor to see if it will power up and autoswitch on after it's been powered down as you'll have no access to the power buttons when cab complete...

mwhitney

  • Trade Count: (0)
  • Full Member
  • ***
  • Offline Offline
  • Posts: 129
  • Last login:December 06, 2017, 10:30:20 pm
  • I want to build my own arcade controls!
    • Michael Whitney - Designer. Maker. Builder.
Re: First DK Cabinet Build
« Reply #165 on: April 30, 2017, 09:59:14 pm »
Great build..

One question you had that didn't seem to be answered...did you check your monitor to see if it will power up and autoswitch on after it's been powered down as you'll have no access to the power buttons when cab complete...

Hey Richie -
The monitor does power up with the main power switch. Hopefully this doesn't change if I leave it for a long length of time. I should probably check this again after leaving it overnight, just to be sure.

For reference, and idea what guys are using in the case where the monitor does go off? Surely someone has come across this and found a workaround...

Richie_jones

  • Trade Count: (0)
  • Full Member
  • ***
  • Offline Offline
  • Posts: 307
  • Last login:February 10, 2024, 02:04:21 pm
Re: First DK Cabinet Build
« Reply #166 on: April 30, 2017, 10:57:02 pm »
I've not seen it discussed much to be honest but it's something I've always needed in my builds.  Most dell screens remember there power state when the power is killed.  Not only does it need to switch back on but it needs to be on the same source obviously.
If not then your options would be to wire in a switch across the contacts on the power button or change the monitor.
I don't think the length if time matters as I've asked before how it remembers it's state but no one seems to know how they do it.  I've left my current bartop for 6+ months and it always powers back on...
For a proper test you'll need to completely remove the power cable from the rear of the cab...
« Last Edit: April 30, 2017, 10:58:37 pm by Richie_jones »

mwhitney

  • Trade Count: (0)
  • Full Member
  • ***
  • Offline Offline
  • Posts: 129
  • Last login:December 06, 2017, 10:30:20 pm
  • I want to build my own arcade controls!
    • Michael Whitney - Designer. Maker. Builder.
Re: First DK Cabinet Build
« Reply #167 on: May 04, 2017, 12:44:57 am »
Update:

The past few nights I've just been trying to sort out my wiring and get everything as neat as possible. It's been a bit tricky given that the length of some of the chords is very long, so it's either buy shorter ones, cut and mend or coil up what I have. I opted to just combine what I could in loom and keep things as direct as possible.

To date, I have all the components set to come on with the main power: marquee light, RPi, micro amp and monitor. Last night I had the sound working and played a bit of Mario - one hand holding the mock CP and the other running the joystick and buttons... not a pretty sight, but I wanted to test out the sound. The little micro-amp pumps out quite a bit of juice through that $4 speaker.

One thing I'm stumped on is how to wire up the coin door. As far as the 'add credit', I think a y-pigtail to the one of the add-credit buttons > XinMo should work, but I'm not quite there yet. What I'd like to get sorted at this point is:

A) How to wire the two coin slots, and;
B) From what to power it? I've read of guys powering to the 'Kade' or the iPac, but I can't see an additional power source from the XinMo.

What do you guys suggest for wiring and powering up this coin door (again, my skills here are limited).

Here's a few pics of where I'm at so far:

About as tidy as I could get things...


Micro amp and speaker hooked up:


Powered up:


Temporary paper marquee, backlit:


...

Here's a pic of the inside of my coin door - not sure what the best power source / wiring would be:

thomas_surles

  • Trade Count: (+1)
  • Full Member
  • ***
  • Offline Offline
  • Posts: 2115
  • Last login:June 19, 2023, 07:20:00 pm
Re: First DK Cabinet Build
« Reply #168 on: May 04, 2017, 01:20:38 am »
Just wire the switches on the coin mech the sames as you do the buttons.

mwhitney

  • Trade Count: (0)
  • Full Member
  • ***
  • Offline Offline
  • Posts: 129
  • Last login:December 06, 2017, 10:30:20 pm
  • I want to build my own arcade controls!
    • Michael Whitney - Designer. Maker. Builder.
Re: First DK Cabinet Build
« Reply #169 on: May 04, 2017, 01:19:42 pm »
Just wire the switches on the coin mech the sames as you do the buttons.

Thanks Thomas - that part makes sense to me. Just wondering what the best way to power this up would be... run off of the XinMo somehow / Power of the RPi / use a separate power supply / splice into another power feed....

NIVO

  • Global Moderator
  • Trade Count: (+1)
  • Full Member
  • *****
  • Offline Offline
  • Posts: 1256
  • Last login:August 08, 2022, 12:32:13 pm
  • danny_galaga is my mail man.
    • N.A.M.E. - arcade cabinet project
Re: First DK Cabinet Build
« Reply #170 on: May 04, 2017, 06:42:25 pm »
get you one of these. you can use a molex splitter and a few things needed this way. Basically its point and shoot :)  http://www.ebay.com/itm/AC-to-12V-5-Volt-DC-Power-Supply-Adapter-with-4-Pin-Molex-Connector-Plug-Output/152529011591?_trksid=p2047675.c100012.m1985&_trkparms=aid%3D777003%26algo%3DDISCL.MBE%26ao%3D2%26asc%3D40130%26meid%3D2f45527c52d641a7bdc369259b55e1fc%26pid%3D100012%26rk%3D4%26rkt%3D7%26mehot%3Dlo%26sd%3D311844547836


**not my auction nor do I know who the seller is, just an example as I purchased one from ebay as well and they do the job perfectly.

mwhitney

  • Trade Count: (0)
  • Full Member
  • ***
  • Offline Offline
  • Posts: 129
  • Last login:December 06, 2017, 10:30:20 pm
  • I want to build my own arcade controls!
    • Michael Whitney - Designer. Maker. Builder.
Re: First DK Cabinet Build
« Reply #171 on: May 04, 2017, 11:05:38 pm »
Thanks Nivo.

This looks like a good option. I actually have a ton of 5v power supplies at work, so I grabbed one and hacked the end off. There are three wires in there: red, black and white.

I bought the coin door lights would just take a pos/neg wire - can anyone steer me clear on this?

NIVO

  • Global Moderator
  • Trade Count: (+1)
  • Full Member
  • *****
  • Offline Offline
  • Posts: 1256
  • Last login:August 08, 2022, 12:32:13 pm
  • danny_galaga is my mail man.
    • N.A.M.E. - arcade cabinet project
Re: First DK Cabinet Build
« Reply #172 on: May 05, 2017, 08:04:42 am »
heres a quick diagram i made for pc molex connector wiring. as for your adapter I cant really say, what was it from? generally if it was also a 5v power source then red would be your + and black would be your -    the white wire could serve several different functions, which one? I cant say but it could be a common ground, neutral or even something like monitoring voltage drop if it was from something like a charger. do you have a meter/polarity checker to test with?

mwhitney

  • Trade Count: (0)
  • Full Member
  • ***
  • Offline Offline
  • Posts: 129
  • Last login:December 06, 2017, 10:30:20 pm
  • I want to build my own arcade controls!
    • Michael Whitney - Designer. Maker. Builder.
Re: First DK Cabinet Build
« Reply #173 on: May 05, 2017, 11:31:41 am »
Thanks Nivo.

I hooked up black to black on my voltmeter, and red to red and got 5V. When I checked the white, nothing.

I tested on my bulbs and they lit up, so I wired it all up last night.

One thing I notice is that the bulbs seem to be a warm amber and not as bright as I'd anticipated. I just assumed these took 5V - maybe I was expecting too much.. it just seemed to lack the 'wow' factor (or at least as much 'wow' as one might expect from coin lights ;) ).

This is the door I bought - could it be that it needs 12V?


NIVO

  • Global Moderator
  • Trade Count: (+1)
  • Full Member
  • *****
  • Offline Offline
  • Posts: 1256
  • Last login:August 08, 2022, 12:32:13 pm
  • danny_galaga is my mail man.
    • N.A.M.E. - arcade cabinet project
Re: First DK Cabinet Build
« Reply #174 on: May 05, 2017, 07:04:00 pm »
well it doesnt "need" 12v per say, but if you were to use 12v they would be brighter for sure. Of course using 12v bulbs with a 5v power source will not harm them either as you'd be under powering them.

and yes as i suspected the white is one of two things. it is neutral or serves another function used by the item from the adapter you chose.
« Last Edit: May 05, 2017, 07:05:44 pm by NIVO »

mwhitney

  • Trade Count: (0)
  • Full Member
  • ***
  • Offline Offline
  • Posts: 129
  • Last login:December 06, 2017, 10:30:20 pm
  • I want to build my own arcade controls!
    • Michael Whitney - Designer. Maker. Builder.
Re: First DK Cabinet Build
« Reply #175 on: May 05, 2017, 07:55:01 pm »
well it doesnt "need" 12v per say, but if you were to use 12v they would be brighter for sure. Of course using 12v bulbs with a 5v power source will not harm them either as you'd be under powering them.

and yes as i suspected the white is one of two things. it is neutral or serves another function used by the item from the adapter you chose.

I hear you. Being underpowered was more of a blow to my enthusiasm -- basically they look like a flashlight on it's way out. After the effort, I'm going to put a 12V supply on there and get some sunglasses at the ready :). Good to know about the white wire. This was a plug charger for bluetooth accessories... Cheers again!

PL1

  • Global Moderator
  • Trade Count: (+1)
  • Full Member
  • *****
  • Offline Offline
  • Posts: 9399
  • Last login:Today at 05:32:12 am
  • Designated spam hunter
Re: First DK Cabinet Build
« Reply #176 on: May 05, 2017, 08:10:06 pm »
One thing I notice is that the bulbs seem to be a warm amber and not as bright as I'd anticipated. I just assumed these took 5V - maybe I was expecting too much.. it just seemed to lack the 'wow' factor (or at least as much 'wow' as one might expect from coin lights ;) ).
I'm going to put a 12V supply on there and get some sunglasses at the ready :).
What is the bulb number? (55, 47, 161, etc.)

If you apply 12v to the wrong type of bulb, you'll only need the sunglasses for a second or two.  ::)


Scott

mwhitney

  • Trade Count: (0)
  • Full Member
  • ***
  • Offline Offline
  • Posts: 129
  • Last login:December 06, 2017, 10:30:20 pm
  • I want to build my own arcade controls!
    • Michael Whitney - Designer. Maker. Builder.
Re: First DK Cabinet Build
« Reply #177 on: May 05, 2017, 08:19:20 pm »
One thing I notice is that the bulbs seem to be a warm amber and not as bright as I'd anticipated. I just assumed these took 5V - maybe I was expecting too much.. it just seemed to lack the 'wow' factor (or at least as much 'wow' as one might expect from coin lights ;) ).
I'm going to put a 12V supply on there and get some sunglasses at the ready :).
What is the bulb number? (55, 47, 161, etc.)

If you apply 12v to the wrong type of bulb, you'll only need the sunglasses for a second or two.  ::)


Scott

Hey Scott -
Twisted Quarter got back to me and confirmed these should have a 12V power supply. For interest, my bulbs read '161'. Thanks!

PL1

  • Global Moderator
  • Trade Count: (+1)
  • Full Member
  • *****
  • Offline Offline
  • Posts: 9399
  • Last login:Today at 05:32:12 am
  • Designated spam hunter
Re: First DK Cabinet Build
« Reply #178 on: May 05, 2017, 10:40:06 pm »
Twisted Quarter got back to me and confirmed these should have a 12V power supply. For interest, my bulbs read '161'.
161 bulbs are rated for 14 volts so they'll work well with 12v.

If they still aren't bright enough (or don't last long enough) there are ultra-bright 12v wedge-base T3-1/4 LEDs that you could use in place of the 161 bulbs.   ;D


Scott

mwhitney

  • Trade Count: (0)
  • Full Member
  • ***
  • Offline Offline
  • Posts: 129
  • Last login:December 06, 2017, 10:30:20 pm
  • I want to build my own arcade controls!
    • Michael Whitney - Designer. Maker. Builder.
Re: First DK Cabinet Build
« Reply #179 on: May 06, 2017, 12:53:48 am »
Twisted Quarter got back to me and confirmed these should have a 12V power supply. For interest, my bulbs read '161'.
161 bulbs are rated for 14 volts so they'll work well with 12v.

If they still aren't bright enough (or don't last long enough) there are ultra-bright 12v wedge-base T3-1/4 LEDs that you could use in place of the 161 bulbs.   ;D


Scott

Good to know! Actually, I have a bunch of little LED bulbs from converting my trailer... I wonder if they are the right size. I'll have to check those.

mwhitney

  • Trade Count: (0)
  • Full Member
  • ***
  • Offline Offline
  • Posts: 129
  • Last login:December 06, 2017, 10:30:20 pm
  • I want to build my own arcade controls!
    • Michael Whitney - Designer. Maker. Builder.
Re: First DK Cabinet Build
« Reply #180 on: May 06, 2017, 12:58:59 am »
Small update:

Picked up my serial number plate today in Kelowna - pretty happy with how it turned out. The guy there gave me an extra plate which was good to have in case I screwed anything up ;). Drilled out the corners using the reference dots I left from Illustrator and mounted it...


I have to put a spacer behind my rear lock to suck this in tighter...


Apart from picking up a 12v power supply from my buddy tomorrow and hooking that up, I'm officially at a standstill on the build until the graphics come. I'm already eying up those sweet little NES bartop builds.... thinking that would make a great gift for my buddy.

mwhitney

  • Trade Count: (0)
  • Full Member
  • ***
  • Offline Offline
  • Posts: 129
  • Last login:December 06, 2017, 10:30:20 pm
  • I want to build my own arcade controls!
    • Michael Whitney - Designer. Maker. Builder.
Re: First DK Cabinet Build
« Reply #181 on: May 06, 2017, 01:42:15 am »
Just checked and the lot of bulbs I got from China to swap out all the analog bulbs in my trailer are T10s. I put one in the coin light but no-go. I'm thinking these just won't run on 5V. I'm guessing that tomorrow when I swap out the power supply, these T10s should work nicely.

mwhitney

  • Trade Count: (0)
  • Full Member
  • ***
  • Offline Offline
  • Posts: 129
  • Last login:December 06, 2017, 10:30:20 pm
  • I want to build my own arcade controls!
    • Michael Whitney - Designer. Maker. Builder.
Re: First DK Cabinet Build
« Reply #182 on: May 10, 2017, 05:16:47 pm »
Finally found a 12V supply. This made a huge difference ;) and now the bulbs are running as bright as they should. The LED's kicked it up a notch as well. here you can see the difference between the LED and the analog bulb running off the 12v supply:


I think I need to customize the coin return graphic:


That's it for progress until the graphics arrive. I may make a cardboard template to shroud the monitor - these LED's throw back quite a bit of ambient light.

PL1

  • Global Moderator
  • Trade Count: (+1)
  • Full Member
  • *****
  • Offline Offline
  • Posts: 9399
  • Last login:Today at 05:32:12 am
  • Designated spam hunter
Re: First DK Cabinet Build
« Reply #183 on: May 10, 2017, 05:55:50 pm »
I think I need to customize the coin return graphic:
There are some pretty cool examples here on KLOV.   ;D


Scott

Kodaxx

  • Trade Count: (0)
  • Full Member
  • ***
  • Offline Offline
  • Posts: 13
  • Last login:September 23, 2019, 06:13:28 pm
    • portfolio
Re: First DK Cabinet Build
« Reply #184 on: May 10, 2017, 06:57:03 pm »
Watching this build - everything is soo meticulous! Detail is one of the things that really makes a build
First Build: Multicade
Second Build: Nintendo Bartop

mwhitney

  • Trade Count: (0)
  • Full Member
  • ***
  • Offline Offline
  • Posts: 129
  • Last login:December 06, 2017, 10:30:20 pm
  • I want to build my own arcade controls!
    • Michael Whitney - Designer. Maker. Builder.
Re: First DK Cabinet Build
« Reply #185 on: May 31, 2017, 02:50:48 pm »
Watching this build - everything is soo meticulous! Detail is one of the things that really makes a build

Thanks Kodaxx - I appreciate that. I pick my work apart, endlessly and don't really ever feel like it's done 'perfectly'. I have to learn to accept the blemishes and imperfections as being a part of the build... adding to, not taking away. Thanks for your feedback.

mwhitney

  • Trade Count: (0)
  • Full Member
  • ***
  • Offline Offline
  • Posts: 129
  • Last login:December 06, 2017, 10:30:20 pm
  • I want to build my own arcade controls!
    • Michael Whitney - Designer. Maker. Builder.
Re: First DK Cabinet Build
« Reply #186 on: May 31, 2017, 03:05:56 pm »
Hey guys!

Well, I was at a standstill until the graphics arrived last week. All in all, I'm pretty happy so far. Laying a big piece of 3M was a bit of a task and I learned a few things.

1) My surface was prepped and clean but I failed to think about wiping down the backing paper of the vinyl roll. As I peeled the paper off and put down the vinyl, there was some debris that got stuck underneath... tiny bits of grit in a few spots. Likely no-one will ever scrutinize like I will but it bugs me that I didn't think of this. Anyway, second side went down way better.

2) Get a proper application tool. I wrapped a credit card with a microfiber cloth and it worked 'okay'. A proper 3M squeegy would have been far better I think.

3) To wrap the edges or not. Side one, I just trimmed the vinyl tight. When I tapped in the T-mold, there were a few areas where the pressure pushed against the edge of the vinyl and lifted it. I had to go back and really work the edges for them to lay properly. Side 2, I thought I would wrap the edges and the T-mold would then suck it all nice and tight. However, due to the thickness of the vinyl, wrapping it and tapping the T-mold into place forced the edges to lift as well in some spots. I tried to roll these out but in some places ended up removing the T-mold, trimming as per side 1, and re-attaching. If I were to do this again, I'd just trim the vinyl to the edge of the cab, OR, not use a graphic that spanned right to the edges.

I'm pleased with the results, but it's not 100% perfect. Again - likely something only I'll notice (and now maybe you guys ;) ).

One issue is that the graphics shop cut my bezel the wrong size, so I'm waiting for another to ship. Aside from that, I'm pleased with the quality of the graphics / application on the Lexan.

Here's a few shots to date. Once she's done completely, I'll take some 'glamour' shots in better lighting.

Laying the vinyl and sorting out positioning:
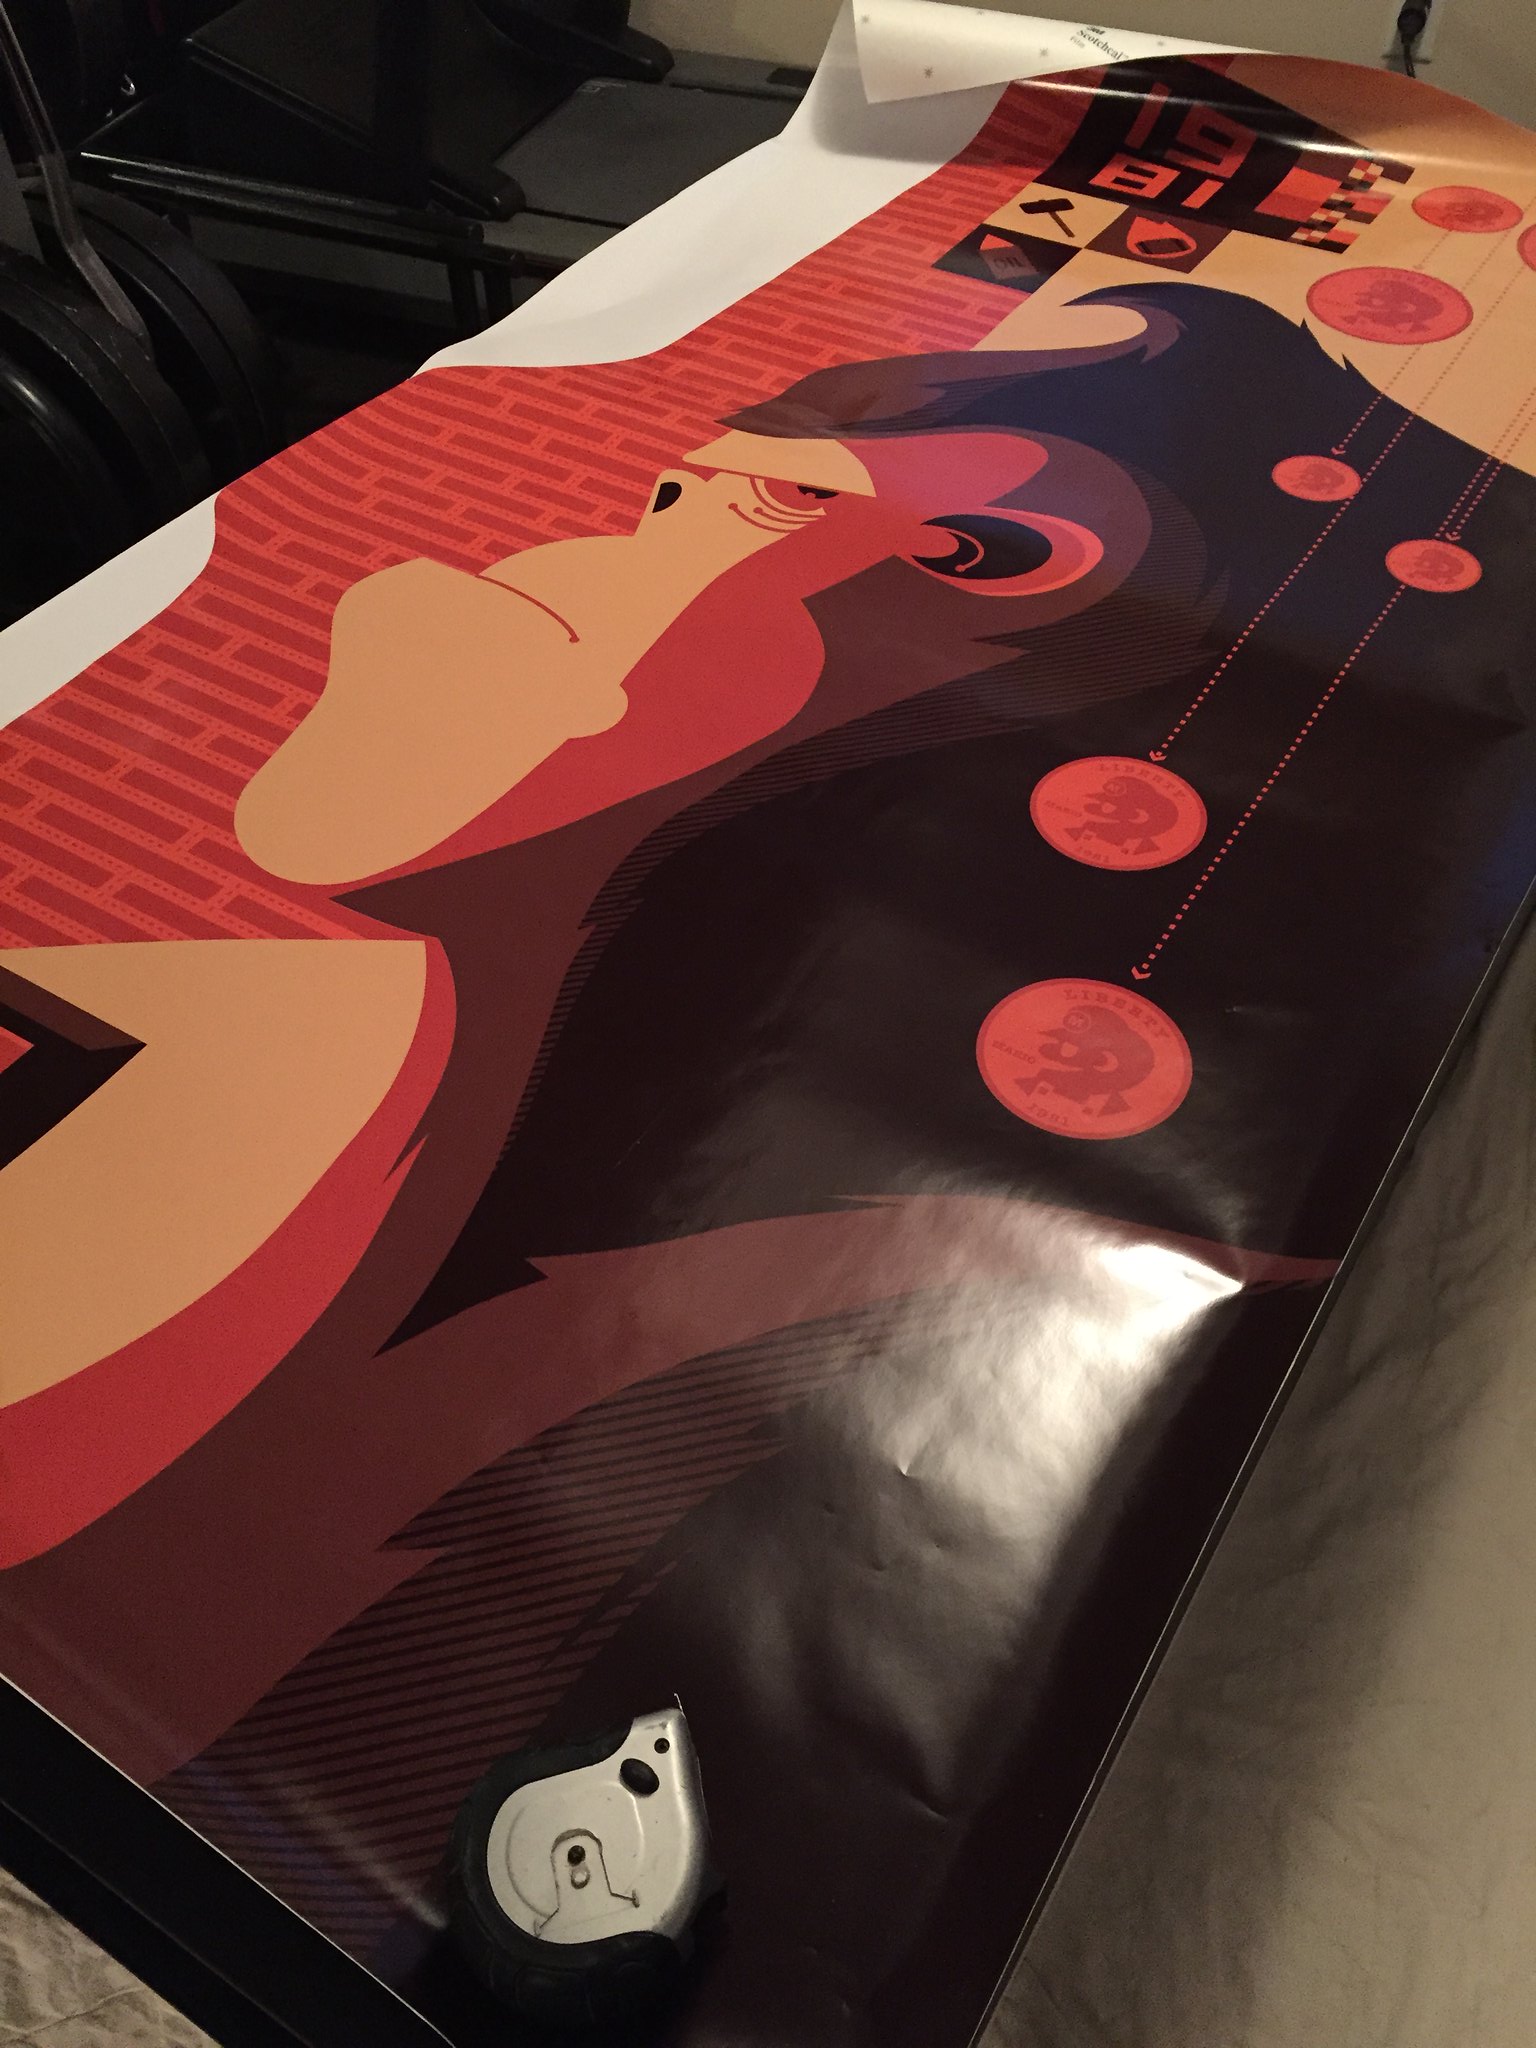


Wetting the surface with water/soap solution:


Both sides applied and put back where she's going to live:
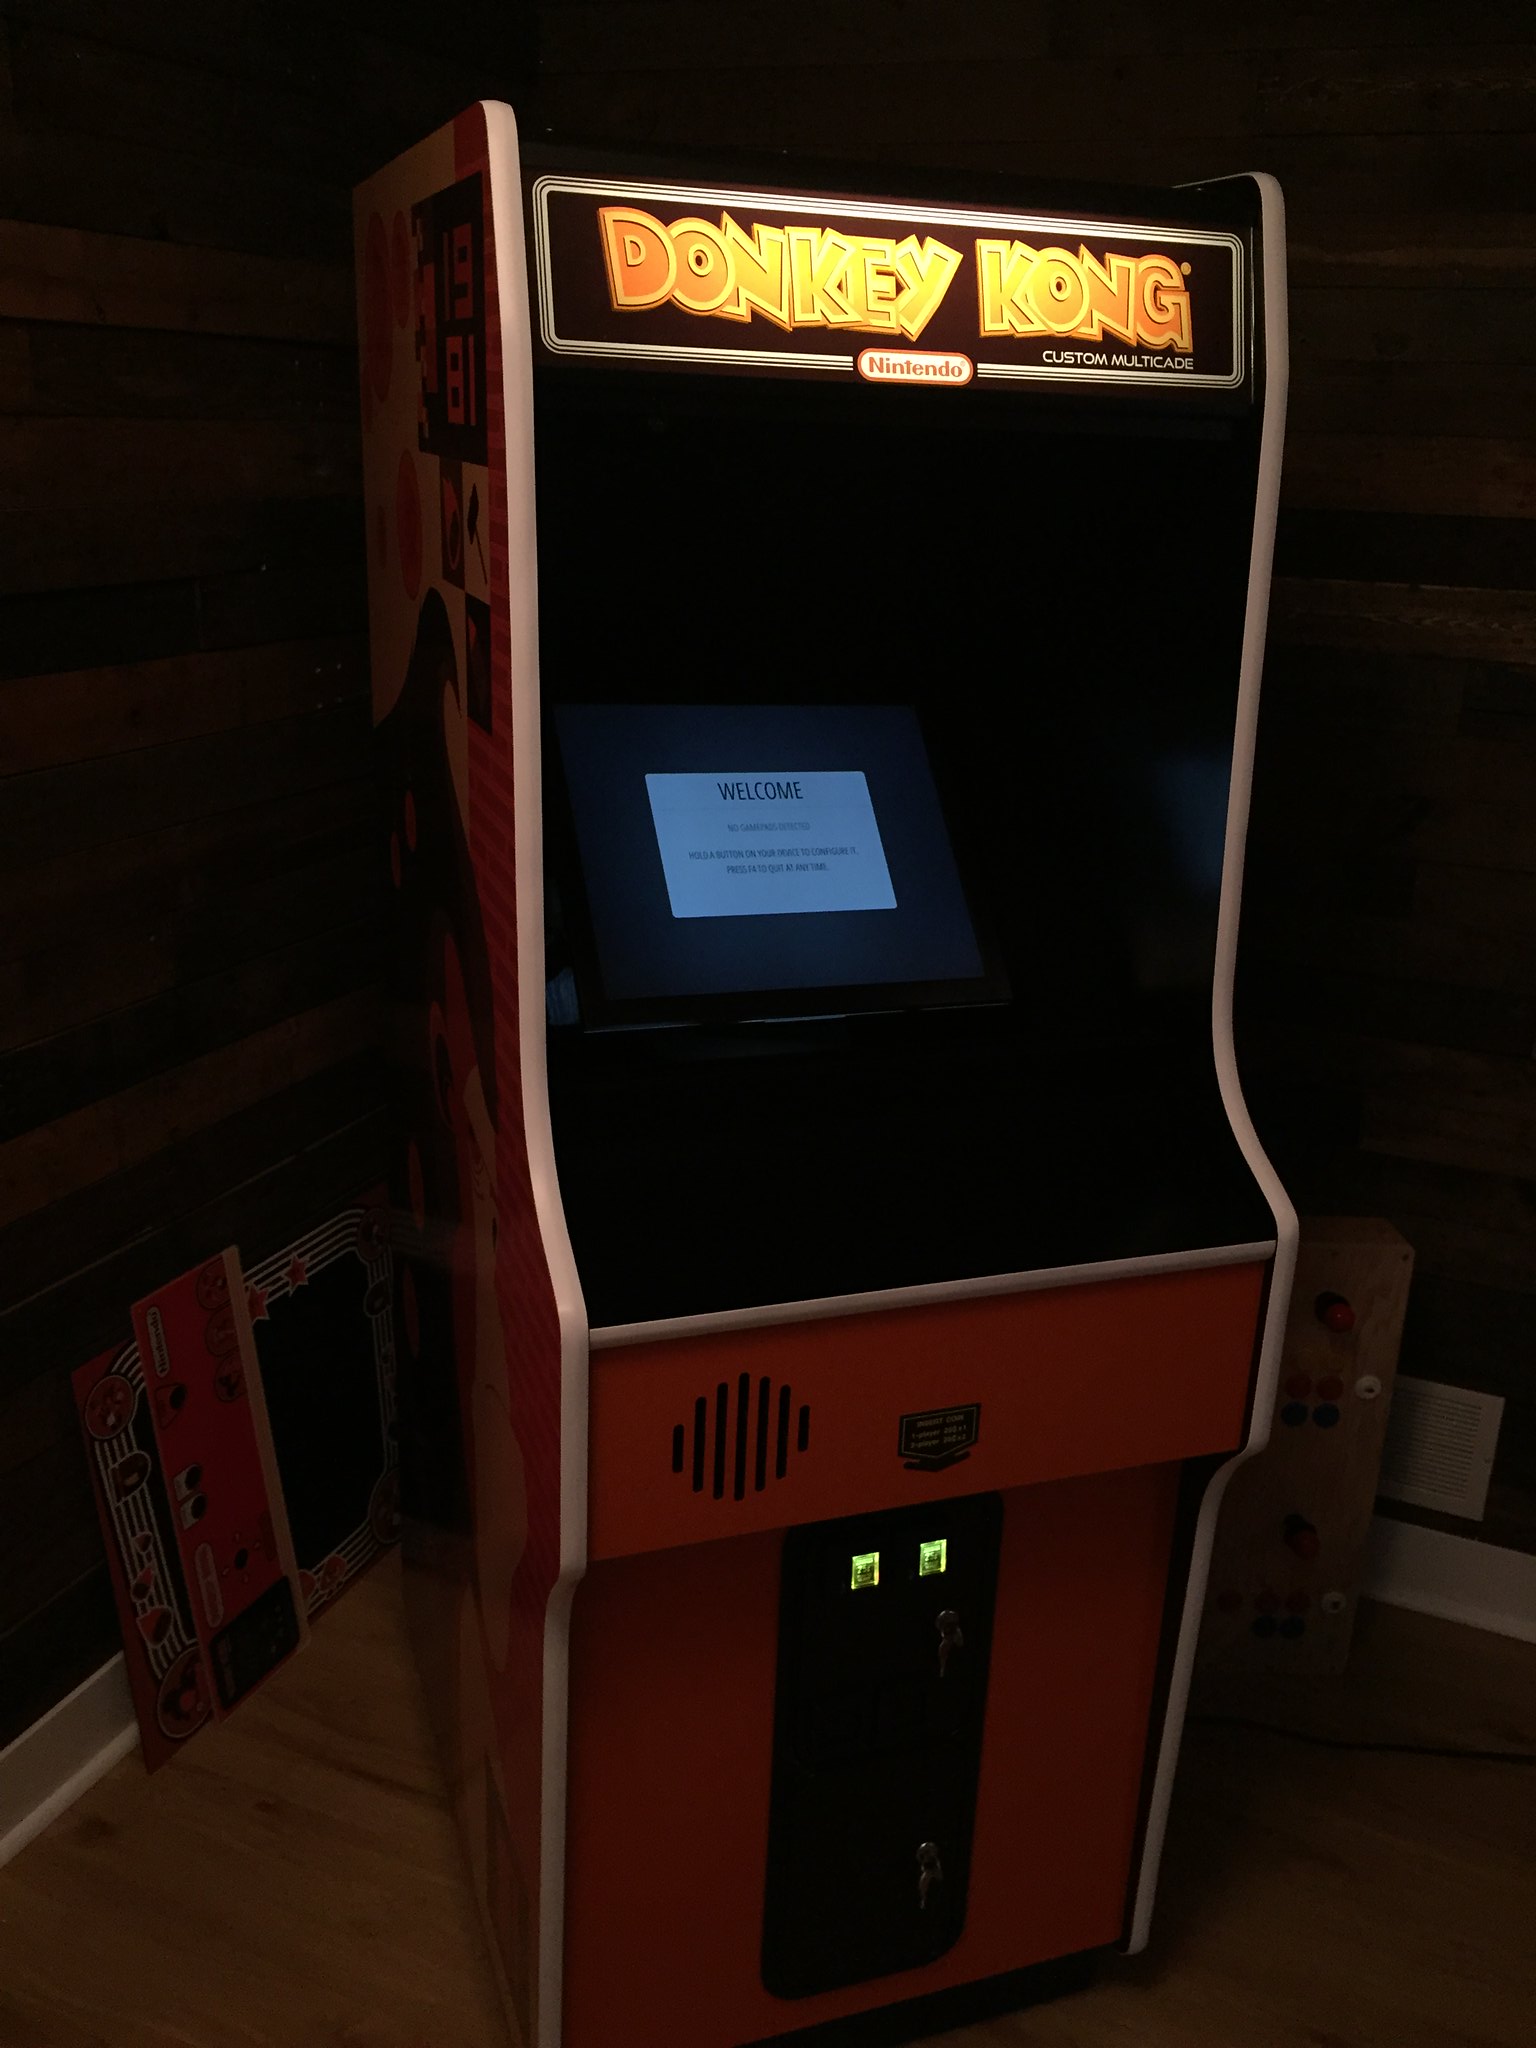


Lighting doesn't do the marquee justice - it actually looks really good in real-life.
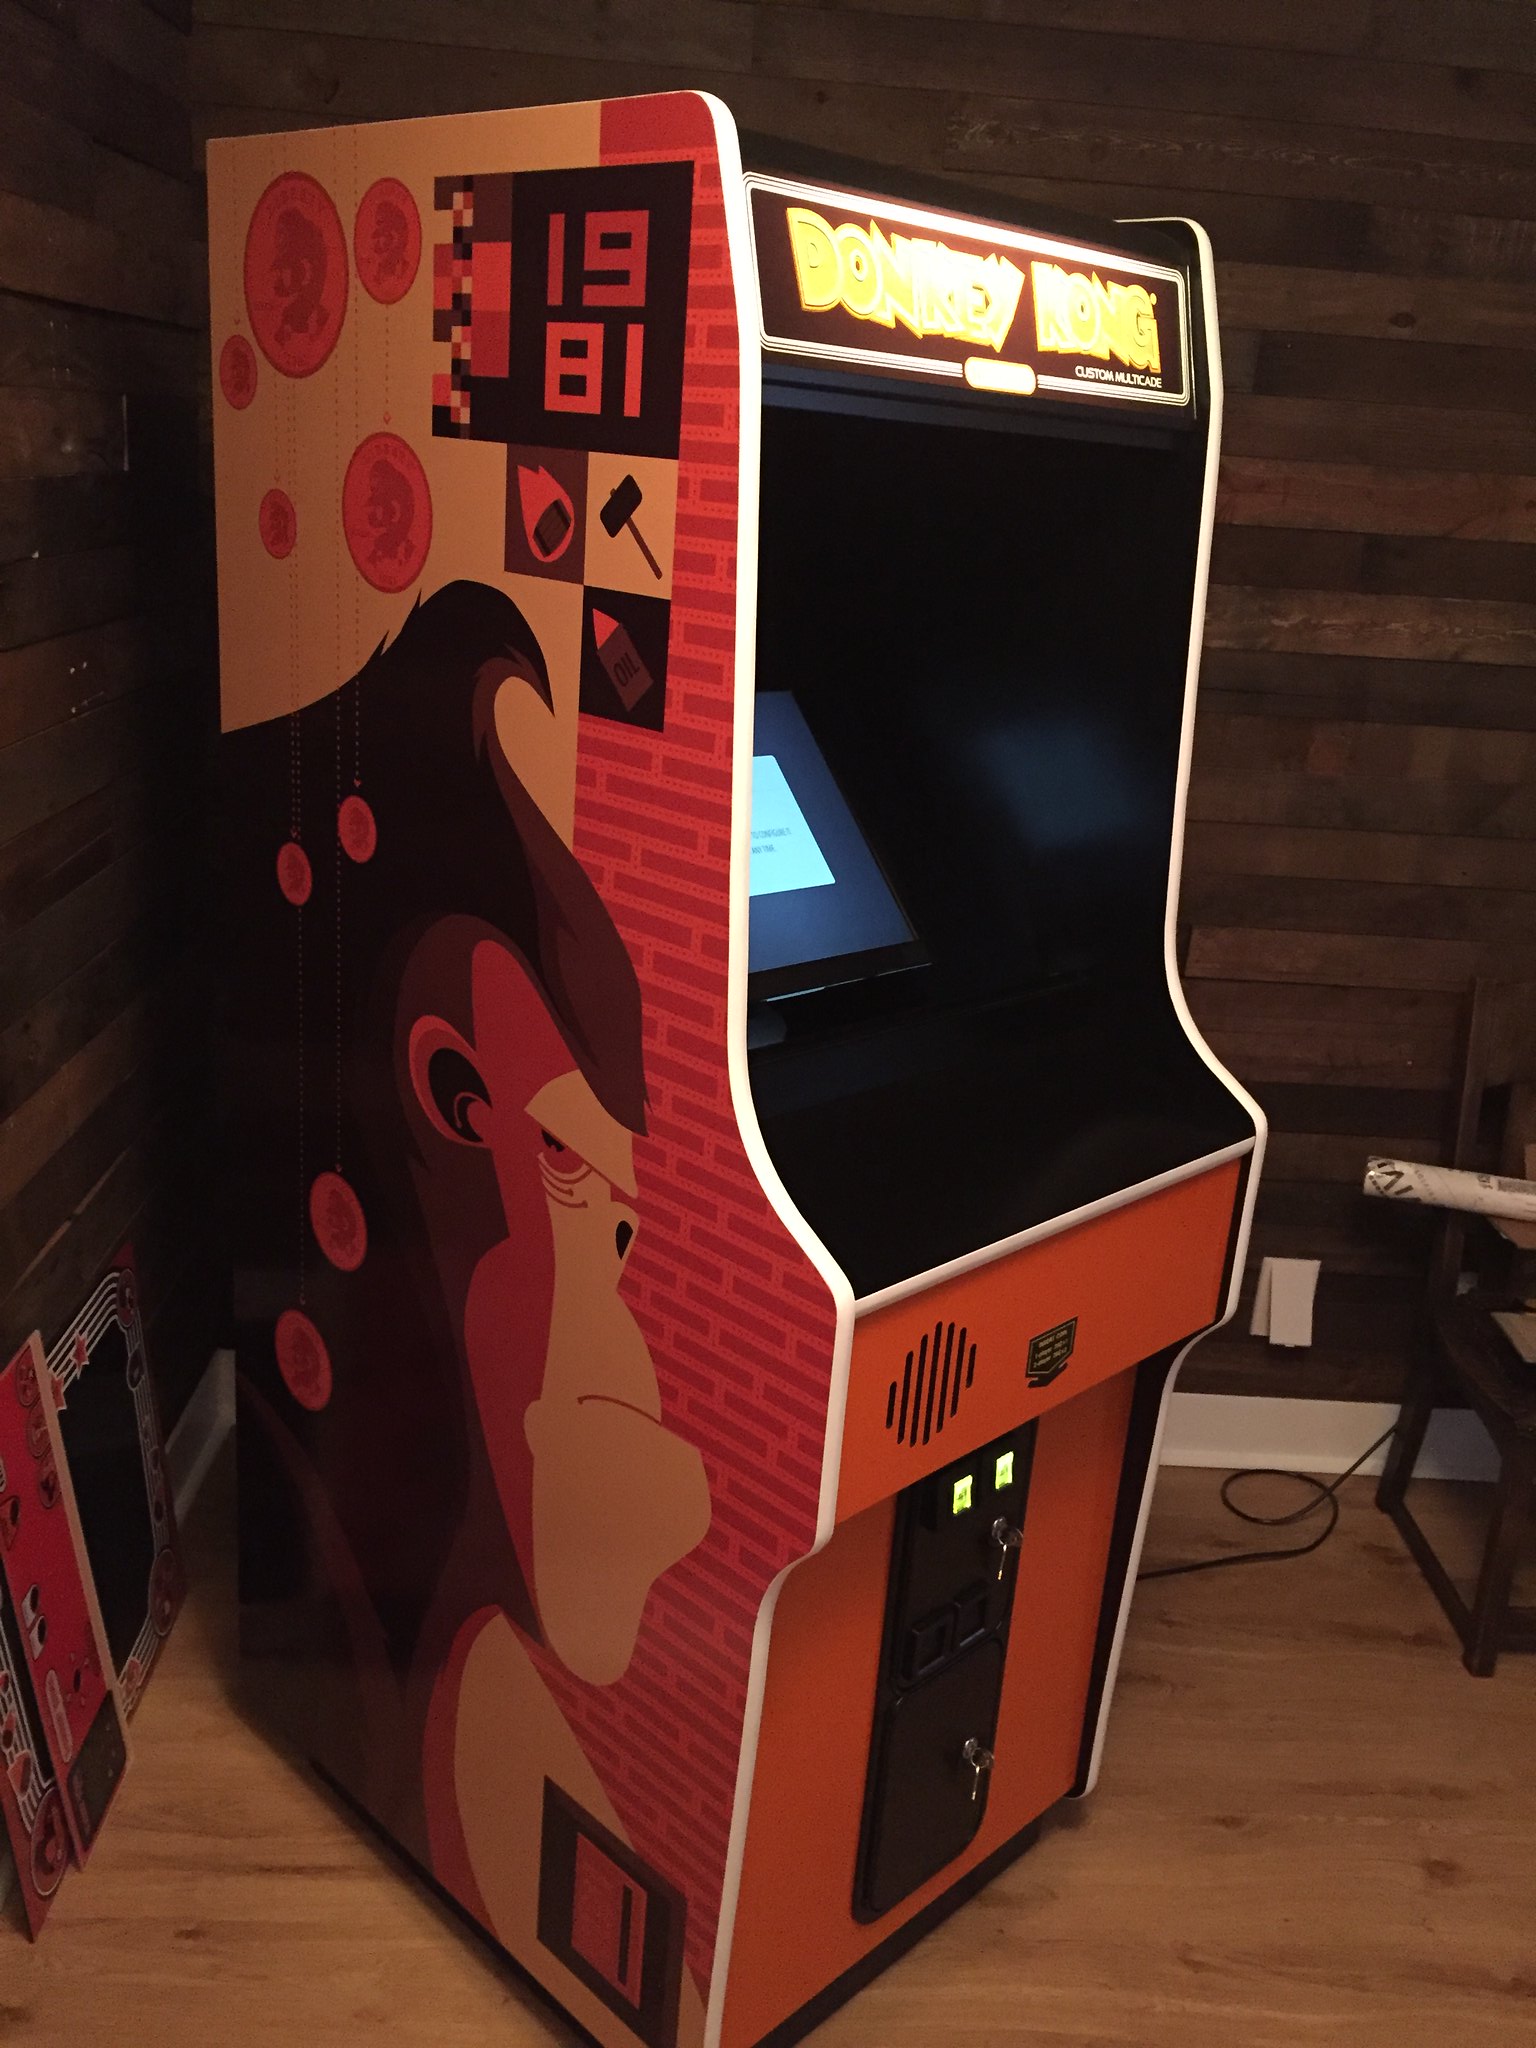


CP panel - I've been putting this part off as I'm a bit anxious about drilling out the plexi - just have to go at it when I have a good chunk of time. Another thing I've learned from past projects is not to put a timeframe on things, projects take about twice as long as you estimate, and do go into one phase of a project in a rush ;). For this part I have to set a good chunk of time aside and go slow!
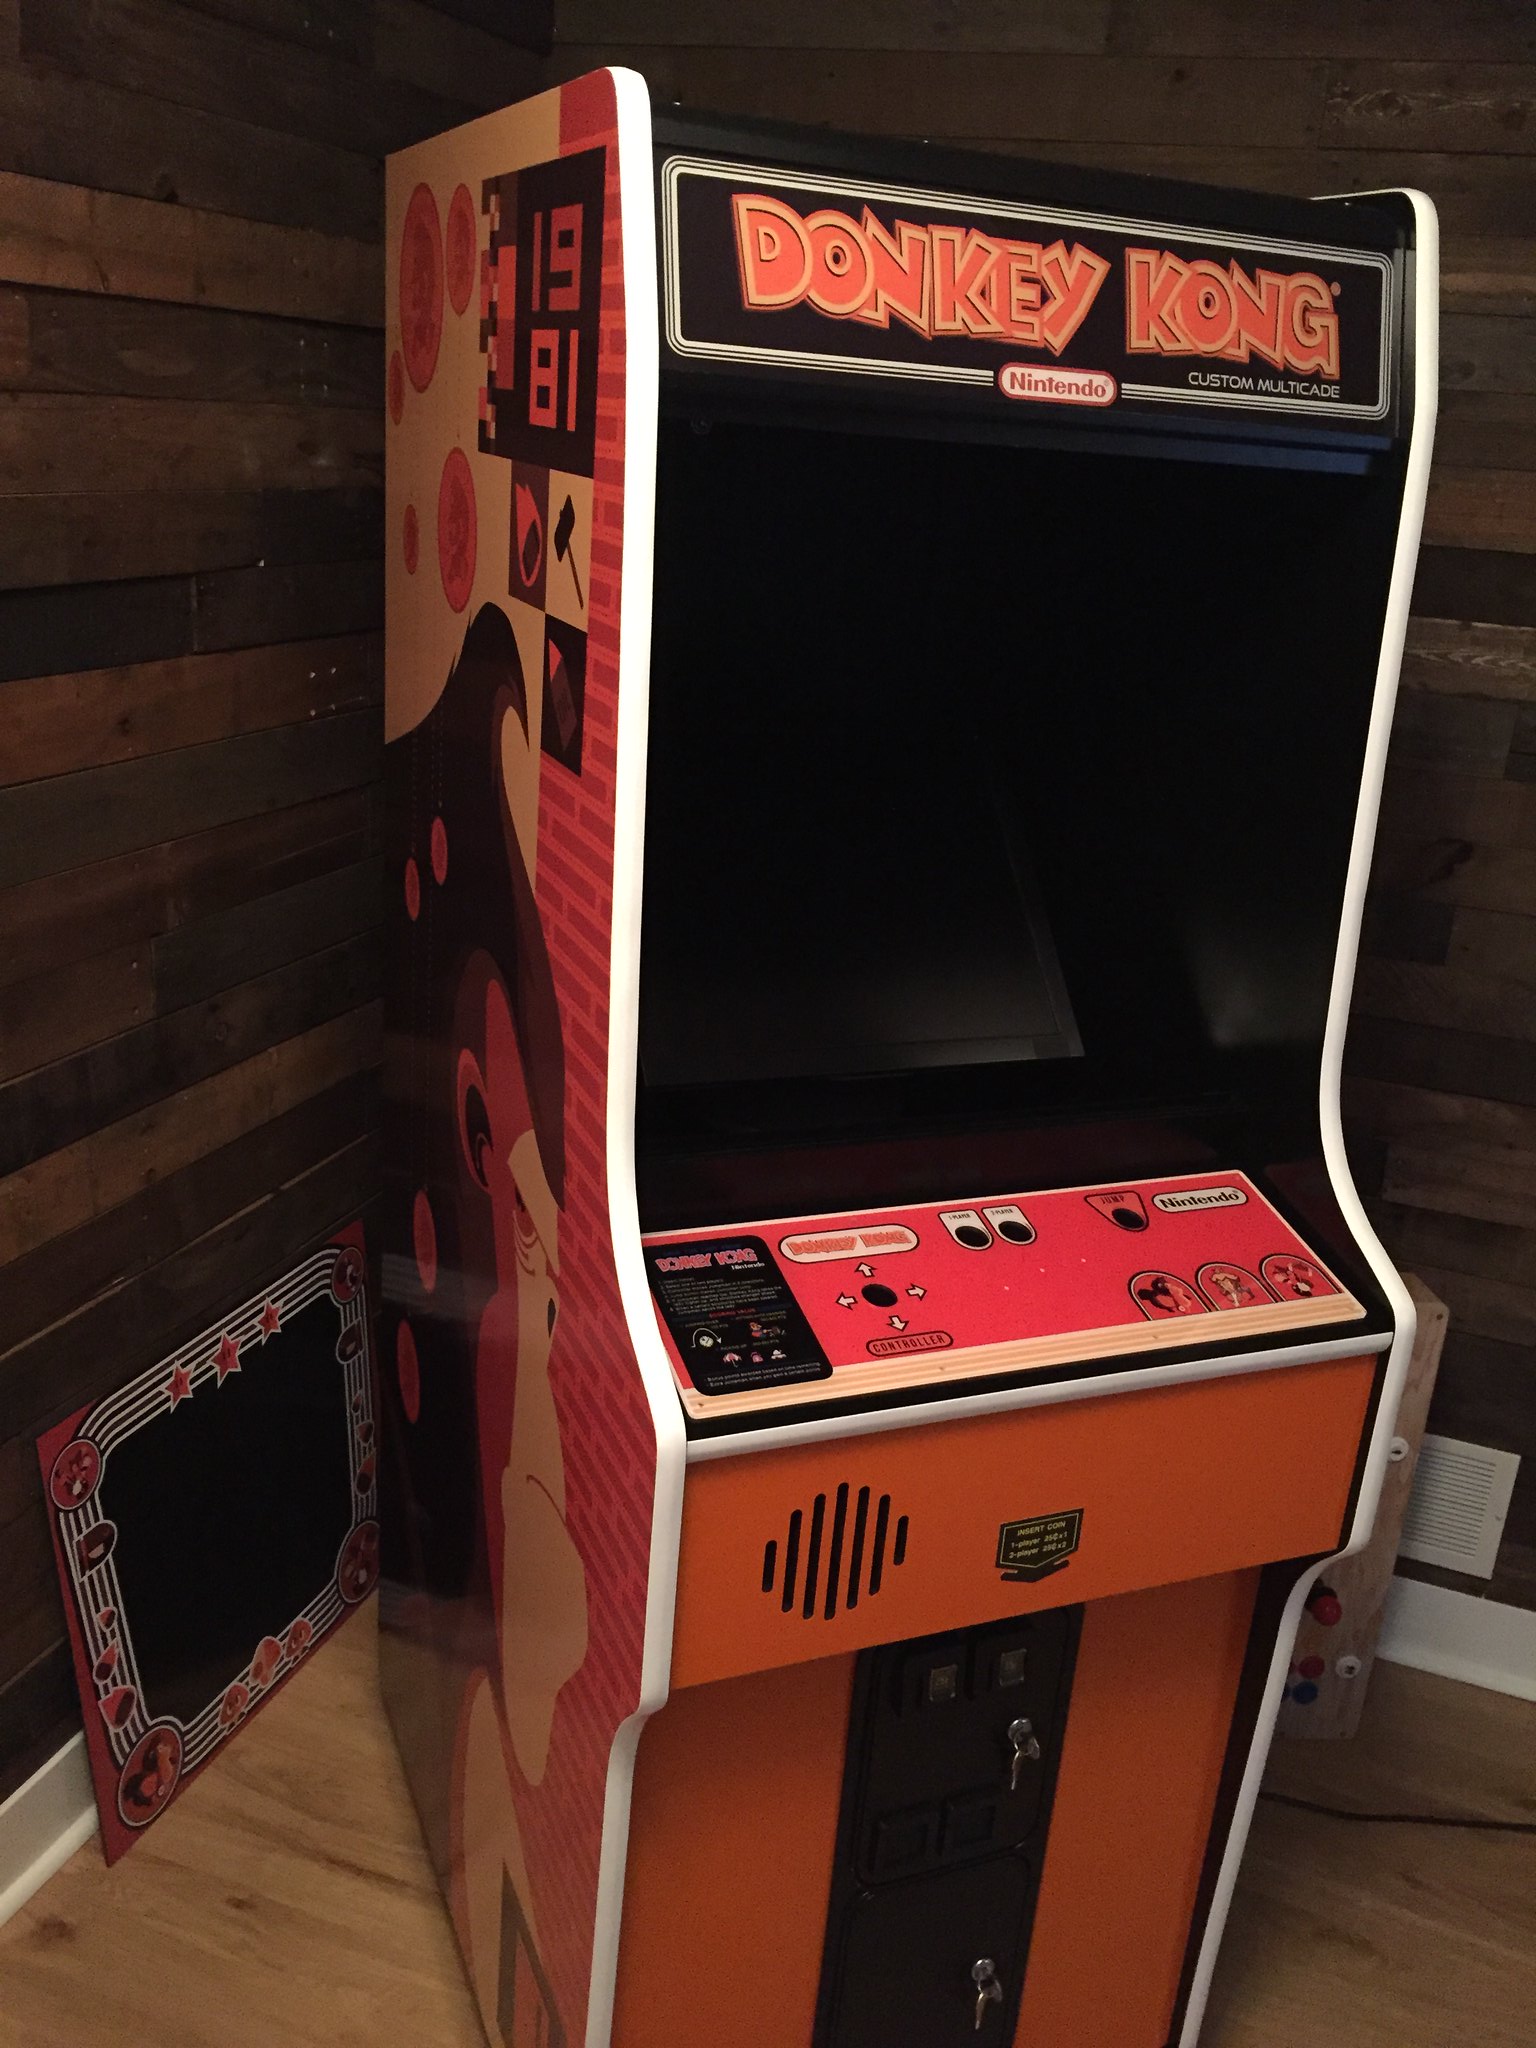


The dark orange on the CP looks off against the orange face but it actually matches the dark orange on the side 'bricks' very closely. I think this variation in orange ties the color palate together well.

« Last Edit: May 31, 2017, 03:54:45 pm by mwhitney »

ChanceKJ

  • Trade Count: (0)
  • Full Member
  • ***
  • Offline Offline
  • Posts: 3229
  • Last login:August 07, 2021, 02:52:06 pm
.
« Reply #187 on: May 31, 2017, 08:58:13 pm »
.
« Last Edit: March 19, 2021, 02:29:50 am by ChanceKJ »

Wyo

  • Trade Count: (0)
  • Full Member
  • ***
  • Offline Offline
  • Posts: 408
  • Last login:May 01, 2023, 09:22:42 pm
  • I want to build my own arcade controls!
Re: First DK Cabinet Build
« Reply #188 on: May 31, 2017, 09:08:45 pm »
Ok, thats pretty bad ass!

 :applaud:

Yeah, this cabinet is turning out pretty beautiful.  I love the color palette and design.  Very, very clean. Looks great in that room too. 

Wife should approve, aesthetically it enhances the space. :)

mwhitney

  • Trade Count: (0)
  • Full Member
  • ***
  • Offline Offline
  • Posts: 129
  • Last login:December 06, 2017, 10:30:20 pm
  • I want to build my own arcade controls!
    • Michael Whitney - Designer. Maker. Builder.
Re: First DK Cabinet Build
« Reply #189 on: May 31, 2017, 09:13:47 pm »
Ok, thats pretty bad ass!

 :applaud:

Yeah, this cabinet is turning out pretty beautiful.  I love the color palette and design.  Very, very clean. Looks great in that room too. 

Wife should approve, aesthetically it enhances the space. :)

Thanks guys! Yeah, my wife seems ok with it. I wasn't going to post anything to FB until the build was done but she gave me a shoutout when the artwork was on... I think she's warming up to the idea now.

I either need to build a big old-fashioned metal 'Arcade' sign with those cool analogue bulbs to go on the big blank wall or follow Chance's lead and build a row of arcades ;).  I kind of envision big metal arrow pointing to the unit with 'ARCADE' stacked vertically...

ChanceKJ

  • Trade Count: (0)
  • Full Member
  • ***
  • Offline Offline
  • Posts: 3229
  • Last login:August 07, 2021, 02:52:06 pm
.
« Reply #190 on: May 31, 2017, 09:26:21 pm »
.
« Last Edit: March 19, 2021, 02:29:16 am by ChanceKJ »

mwhitney

  • Trade Count: (0)
  • Full Member
  • ***
  • Offline Offline
  • Posts: 129
  • Last login:December 06, 2017, 10:30:20 pm
  • I want to build my own arcade controls!
    • Michael Whitney - Designer. Maker. Builder.
Re: First DK Cabinet Build
« Reply #191 on: May 31, 2017, 09:50:55 pm »
Yes! That's perfect... man for $77 bucks, I couldn't touch that as far as materials and time, plus I'd have to pick up a welder on sale at Canadian Tire.

Correction - Shipping is $65.42/ for a total of $142.84 US - still not bad.
« Last Edit: May 31, 2017, 10:15:29 pm by mwhitney »

ChanceKJ

  • Trade Count: (0)
  • Full Member
  • ***
  • Offline Offline
  • Posts: 3229
  • Last login:August 07, 2021, 02:52:06 pm
.
« Reply #192 on: June 01, 2017, 12:00:41 am »
.
« Last Edit: March 19, 2021, 02:29:04 am by ChanceKJ »

mwhitney

  • Trade Count: (0)
  • Full Member
  • ***
  • Offline Offline
  • Posts: 129
  • Last login:December 06, 2017, 10:30:20 pm
  • I want to build my own arcade controls!
    • Michael Whitney - Designer. Maker. Builder.
Re: First DK Cabinet Build
« Reply #193 on: June 01, 2017, 12:02:20 am »
That was just the first link i could find but this sign is all over ebay and amazon. There was a big thread on KLOV about it a few months ago.

I dug into it a bit more and found it's only 25" tall - kind of small (and battery powered). I may still hammer one out by hand in the winter...

ChanceKJ

  • Trade Count: (0)
  • Full Member
  • ***
  • Offline Offline
  • Posts: 3229
  • Last login:August 07, 2021, 02:52:06 pm
.
« Reply #194 on: June 01, 2017, 12:12:10 am »
.
« Last Edit: March 19, 2021, 02:28:54 am by ChanceKJ »

mwhitney

  • Trade Count: (0)
  • Full Member
  • ***
  • Offline Offline
  • Posts: 129
  • Last login:December 06, 2017, 10:30:20 pm
  • I want to build my own arcade controls!
    • Michael Whitney - Designer. Maker. Builder.
Re: First DK Cabinet Build
« Reply #195 on: June 01, 2017, 12:26:03 am »
Here, take a look at this thread of KLOV,a bunch of people picked them up and theres a few pictures of it in real life.

https://forums.arcade-museum.com/showthread.php?t=390155

Thanks Chance - it does look good for what it is. I pictured something bigger on the wall, but this may look more to scale next to the arcade. I'll keep this one in mind, for sure.

Wyo

  • Trade Count: (0)
  • Full Member
  • ***
  • Offline Offline
  • Posts: 408
  • Last login:May 01, 2023, 09:22:42 pm
  • I want to build my own arcade controls!
Re: First DK Cabinet Build
« Reply #196 on: June 02, 2017, 12:02:26 am »
Bigger Arcade sign?

Sounds like a new scratch build to me!

make it happen! :)

mwhitney

  • Trade Count: (0)
  • Full Member
  • ***
  • Offline Offline
  • Posts: 129
  • Last login:December 06, 2017, 10:30:20 pm
  • I want to build my own arcade controls!
    • Michael Whitney - Designer. Maker. Builder.
Re: First DK Cabinet Build
« Reply #197 on: June 02, 2017, 12:11:55 am »
Bigger Arcade sign?

Sounds like a new scratch build to me!

make it happen! :)

Ha! But not as fun as an arcade... so many games to build.

mwhitney

  • Trade Count: (0)
  • Full Member
  • ***
  • Offline Offline
  • Posts: 129
  • Last login:December 06, 2017, 10:30:20 pm
  • I want to build my own arcade controls!
    • Michael Whitney - Designer. Maker. Builder.
Re: First DK Cabinet Build
« Reply #198 on: June 02, 2017, 12:14:58 am »
ADVICE NEEDED:

1) Print shop sent vinyl attached to plexi with holes drilled
2) Went to pop a button in to see how it would look and realize the holes are drilled to 1" instead of 1 1/8"

There must be a woodworking 'trick' to enlarge a hole with no 'centre'.

Any ideas on this?

Cheers!

Wyo

  • Trade Count: (0)
  • Full Member
  • ***
  • Offline Offline
  • Posts: 408
  • Last login:May 01, 2023, 09:22:42 pm
  • I want to build my own arcade controls!

krangbrain

  • Trade Count: (0)
  • Full Member
  • ***
  • Offline Offline
  • Posts: 120
  • Last login:June 22, 2020, 05:36:57 pm
  • I want to build my own arcade controls!
Re: First DK Cabinet Build
« Reply #200 on: June 02, 2017, 02:42:52 pm »
I don't have experience with drilling or cutting plexi (yet), but could you drill a 1 1/8" hole in a piece of scrap wood, then center that over your 1" hole and open it up with a router using a trim flush bit?

ChanceKJ

  • Trade Count: (0)
  • Full Member
  • ***
  • Offline Offline
  • Posts: 3229
  • Last login:August 07, 2021, 02:52:06 pm
.
« Reply #201 on: June 02, 2017, 03:20:10 pm »
.
« Last Edit: March 19, 2021, 02:28:35 am by ChanceKJ »

mwhitney

  • Trade Count: (0)
  • Full Member
  • ***
  • Offline Offline
  • Posts: 129
  • Last login:December 06, 2017, 10:30:20 pm
  • I want to build my own arcade controls!
    • Michael Whitney - Designer. Maker. Builder.
Re: First DK Cabinet Build
« Reply #202 on: June 02, 2017, 08:25:29 pm »
Thanks guys - I actually ended up getting a step bit and I'm glad I did. Canadian Tire had one on for $17, regular $59 so I grabbed that as well as a 3-pack set of smaller ones to drill out the perimeter holes to accommodate the carriage bolts Wyo so graciously sent me.

The stepped bit made easy work of it and I just worked slowly, drilling one side and then the other to remove any material building up. As the vinyl was affixed already, it wanted to gum up if going to fast. I finished off by cleaning up the edge w/ an Xacto blade.


I had 3 fresh holes I had to make as well that the print ship didn't do. I guess they have a CNC template for these 'stock' CPs but I left some registration marks on the artwork so I'd know where to drill:


Wyo's bolts with the holes enlarged:


For the perimeter holes, I just used the plexi as a template and drilled through the MDF:


Traced the button holes out and went to town:


Fancy bits installed:


Yeah, I pretended to play it...


Now just to wire her up!
« Last Edit: June 02, 2017, 08:45:34 pm by mwhitney »

mwhitney

  • Trade Count: (0)
  • Full Member
  • ***
  • Offline Offline
  • Posts: 129
  • Last login:December 06, 2017, 10:30:20 pm
  • I want to build my own arcade controls!
    • Michael Whitney - Designer. Maker. Builder.
Re: First DK Cabinet Build
« Reply #203 on: June 02, 2017, 08:49:09 pm »
Damn it. I didn't read the instruction card until now:

"When a certain structures have been cleared...."

"Extra jumpman when you gain a certain points..."

WT?! Is this how Nintendo printed it or is this a bastardized version from the interwebs?

NIVO

  • Global Moderator
  • Trade Count: (+1)
  • Full Member
  • *****
  • Offline Offline
  • Posts: 1256
  • Last login:August 08, 2022, 12:32:13 pm
  • danny_galaga is my mail man.
    • N.A.M.E. - arcade cabinet project
Re: First DK Cabinet Build
« Reply #204 on: June 02, 2017, 08:57:07 pm »
as far as I know, that is how it was from the get go. So you have a gen-yoo-wine repro of the original :)

mwhitney

  • Trade Count: (0)
  • Full Member
  • ***
  • Offline Offline
  • Posts: 129
  • Last login:December 06, 2017, 10:30:20 pm
  • I want to build my own arcade controls!
    • Michael Whitney - Designer. Maker. Builder.
Re: First DK Cabinet Build
« Reply #205 on: June 03, 2017, 01:03:45 am »
as far as I know, that is how it was from the get go. So you have a gen-yoo-wine repro of the original :)

Good to know - it doesn't bother me so much now ;).

ChanceKJ

  • Trade Count: (0)
  • Full Member
  • ***
  • Offline Offline
  • Posts: 3229
  • Last login:August 07, 2021, 02:52:06 pm
.
« Reply #206 on: June 03, 2017, 01:12:51 am »
.
« Last Edit: March 19, 2021, 02:28:14 am by ChanceKJ »

mwhitney

  • Trade Count: (0)
  • Full Member
  • ***
  • Offline Offline
  • Posts: 129
  • Last login:December 06, 2017, 10:30:20 pm
  • I want to build my own arcade controls!
    • Michael Whitney - Designer. Maker. Builder.
Re: First DK Cabinet Build
« Reply #207 on: June 03, 2017, 01:35:46 am »
That explains why the button holes were too small. The shop CNCs acrylic using Nintendo CP dimensions.As such, I had to enlarge the three holes that came pre-drilled.

mwhitney

  • Trade Count: (0)
  • Full Member
  • ***
  • Offline Offline
  • Posts: 129
  • Last login:December 06, 2017, 10:30:20 pm
  • I want to build my own arcade controls!
    • Michael Whitney - Designer. Maker. Builder.
Re: First DK Cabinet Build
« Reply #208 on: June 09, 2017, 01:41:26 pm »
UPDATE & QUESTION RE CP

Hey guys. So, shortly after I finished high-5'ing myself for a job well-done on the CP, one of the perimeter carriage bolt holes in the acrylic started spider-legging. F^&k!

I've made arrangements for a new CP to be shipped but I'm now wondering if maybe I should have the artwork printed but NOT attached to the acrylic. This way, if it cracks again, I can just go get a new piece vs ruining the artwork along with it.

Can you see any reason why this is a bad idea? I'm assuming the artwork would be sandwiched tight between the painted MDF and acrylic and would look just as good as being 'stuck'...

'Luckily' I've yet to wire up the XinMo and buttons. I was tempted to try to heat-gun the artwork to try to remove but I think trying to preserve it and keep it from being distorted in the process would be futile.

The only thing I can think is that I may have tightened the bolt nut too much on this one.

Here's a pic of the crack:


ChanceKJ

  • Trade Count: (0)
  • Full Member
  • ***
  • Offline Offline
  • Posts: 3229
  • Last login:August 07, 2021, 02:52:06 pm
.
« Reply #209 on: June 09, 2017, 01:57:44 pm »
.
« Last Edit: March 19, 2021, 02:27:23 am by ChanceKJ »

mwhitney

  • Trade Count: (0)
  • Full Member
  • ***
  • Offline Offline
  • Posts: 129
  • Last login:December 06, 2017, 10:30:20 pm
  • I want to build my own arcade controls!
    • Michael Whitney - Designer. Maker. Builder.
Re: First DK Cabinet Build
« Reply #210 on: June 09, 2017, 08:41:47 pm »
sandwiching the art would be fine, just make sure the art is a matte finish or the glossiness of the art and the plexi will give you an unwanted rippling effect.

Thanks Chance.

PL1

  • Global Moderator
  • Trade Count: (+1)
  • Full Member
  • *****
  • Offline Offline
  • Posts: 9399
  • Last login:Today at 05:32:12 am
  • Designated spam hunter
Re: First DK Cabinet Build
« Reply #211 on: June 09, 2017, 09:08:05 pm »
sandwiching the art would be fine, just make sure the art is a matte finish or the glossiness of the art and the plexi will give you an unwanted rippling effect.

Related example/info:

What is the best material to print my marqee on if I am sandwiching it between to pieces of perspex? 
I am finding I get like moisture/damp stains when they are all hard pressed together, is there way to avid this?


Hit your marquee with a clear matte finish spray that you can get from any craft store. That's what I do, and it gets rid of that "wet" look.

You just need a light coat, BTW. Too heavy, and you'll get frosting. Just a light dusting so you know it's coated, let it dry, and you're golden.

I need one of you clearcoat guru's to start a thread on your favorite clearcoating products. There are some awesome products, and I too often end up buying the lame ducks.

This is what I use:

http://www.krylon.com/products/low-odor-clear-finish/


I do try to find the low odor version so I can spray it inside. NOTE: The cans are the same for regular and matte. The plastic cover on top will say MATTE in black letters...


Scott

mwhitney

  • Trade Count: (0)
  • Full Member
  • ***
  • Offline Offline
  • Posts: 129
  • Last login:December 06, 2017, 10:30:20 pm
  • I want to build my own arcade controls!
    • Michael Whitney - Designer. Maker. Builder.
Re: First DK Cabinet Build
« Reply #212 on: June 09, 2017, 09:16:03 pm »
Thanks for the tip, Scott.

mwhitney

  • Trade Count: (0)
  • Full Member
  • ***
  • Offline Offline
  • Posts: 129
  • Last login:December 06, 2017, 10:30:20 pm
  • I want to build my own arcade controls!
    • Michael Whitney - Designer. Maker. Builder.
Re: First DK Cabinet Build
« Reply #213 on: June 09, 2017, 09:17:16 pm »
Subwoofer question:

I have this micro amp from RetroActiveArcade.com: http://retroactivearcade.ca/mini-hi-fi-audio-amplifier-12v-for-raspberry-pi-1/

Is it possible to hook up a computer subwoofer to it? I'm thinking of putting a subwoofer inside the cabinet...

Thoughts on this? Possible? Overkill?

Cheers.

Wyo

  • Trade Count: (0)
  • Full Member
  • ***
  • Offline Offline
  • Posts: 408
  • Last login:May 01, 2023, 09:22:42 pm
  • I want to build my own arcade controls!
Re: First DK Cabinet Build
« Reply #214 on: June 09, 2017, 09:50:27 pm »
 :applaud: Beautiful!

Bummer about the spider web crack.  That definitely can happen from over tightening the bolts.  I've done it before myself....and even with my OCD, I've let it go.

However, I learned on the next builds just to snug them down...and not geT them crazy tight to avoid that...plus bowing the plex.

I would definitely reprint the art and make your own plex.  You have all the tools you need now, it's easy. If you need to you can attach the vinyl overlay to some thicker card stock to keep it from being wavy under your plex.

Also, your CP is so perfect, I had to go run and look at some of mine to see how it compares. Haha. Beautiful work.

mwhitney

  • Trade Count: (0)
  • Full Member
  • ***
  • Offline Offline
  • Posts: 129
  • Last login:December 06, 2017, 10:30:20 pm
  • I want to build my own arcade controls!
    • Michael Whitney - Designer. Maker. Builder.
Re: First DK Cabinet Build
« Reply #215 on: June 09, 2017, 10:10:47 pm »
:applaud: Beautiful!

Bummer about the spider web crack.  That definitely can happen from over tightening the bolts.  I've done it before myself....and even with my OCD, I've let it go.

However, I learned on the next builds just to snug them down...and not geT them crazy tight to avoid that...plus bowing the plex.

I would definitely reprint the art and make your own plex.  You have all the tools you need now, it's easy. If you need to you can attach the vinyl overlay to some thicker card stock to keep it from being wavy under your plex.

Also, your CP is so perfect, I had to go run and look at some of mine to see how it compares. Haha. Beautiful work.

Haha - thanks Wyo - I appreciate the compliment. Man, I go down and check it from time to time and think, "It's not that bad, I could probably let it go." but it's like a sliver...

It makes sense to have the CP printed and then just buy a piece of acrylic from a sign shop. Escape Pod cut my bezel to the wrong dimensions and are making good on sending out a new one. If I can get them to throw a new CP in the box, I'll do that. Otherwise, I'll just have it printed locally. I'm pretty eager to button this up and play the thing already!

mwhitney

  • Trade Count: (0)
  • Full Member
  • ***
  • Offline Offline
  • Posts: 129
  • Last login:December 06, 2017, 10:30:20 pm
  • I want to build my own arcade controls!
    • Michael Whitney - Designer. Maker. Builder.
Re: First DK Cabinet Build
« Reply #216 on: June 29, 2017, 01:53:51 am »
Well, it's taken approximately 3 weeks for the replacement bezel to arrive. Escape Pod cut the first one to the wrong size, made good on a replacement, and shipped at N/C.

Since the artwork was attached to the plexi, that was ruined as well. I had them include new CP artwork and upon opening the box yesterday, the artwork was just put in the box, free to float around. It's beyond me as to why greater care wasn't taken as it would have been 5 extra minutes to sandwich the artwork between some cardboard or rolled into a shipping tube. :banghead: We'll see if Escape Pod makes good on it - I've requested that they send it via express post so there's no more unnecessary delays.

Anyway - sounds like a rant and I guess it is. Escape Pod, if you're reading through these forums, hopefully you'll redeem yourself. I'm tempted to just have the artwork printed locally at this point and swallow the extra cost.

On a positive, the bezel looks great. It was about 1/16" too wide, so I ran it through the bandsaw after taping off the front. Tomorrow I'll throw in the side and top support / retainers and that will button up things up. I had this printed on smoked acrylic and the monitor looks pretty slick all lit up.

On the to-do list: Complete the control panel, wire up the Xin Mo, wire up the coin mech to the Xin-Mo and then finally map the buttons! Playing this thing is long overdue...

Here are some photos of the arcade and of the crushed artwork. I tried to gently warm it with an iron between some thick paper but it didn't remove the creases. You can see in the photos where the vinyl is torn on the edge as well.


ChanceKJ

  • Trade Count: (0)
  • Full Member
  • ***
  • Offline Offline
  • Posts: 3229
  • Last login:August 07, 2021, 02:52:06 pm
.
« Reply #217 on: June 29, 2017, 02:34:13 am »
.
« Last Edit: March 19, 2021, 02:27:08 am by ChanceKJ »

mwhitney

  • Trade Count: (0)
  • Full Member
  • ***
  • Offline Offline
  • Posts: 129
  • Last login:December 06, 2017, 10:30:20 pm
  • I want to build my own arcade controls!
    • Michael Whitney - Designer. Maker. Builder.
Re: First DK Cabinet Build
« Reply #218 on: November 30, 2017, 02:50:22 pm »
UPDATE -

Hey gents - it's been a while since I've posted as I've been caught up with other projects.

I finally got around to detailing my DK Arcade build. For anyone interested, you can read it here: https://www.michaelwhitney.ca/donkey-kong-arcade-machine/


Hope everyone is having fun!

TheShaner

  • Trade Count: (0)
  • Full Member
  • ***
  • Offline Offline
  • Posts: 451
  • Last login:December 23, 2017, 10:42:25 pm
  • Shut your noise tube filthy Taco Human!
Re: First DK Cabinet Build
« Reply #219 on: December 01, 2017, 12:06:12 am »
Beautiful Cab, excellent thread.  I think I might need to build another.

TheGreatRedDragon

  • Trade Count: (0)
  • Full Member
  • ***
  • Offline Offline
  • Posts: 76
  • Last login:December 23, 2023, 12:40:53 pm
  • I want to build my own arcade controls!
Re: First DK Cabinet Build
« Reply #220 on: December 01, 2017, 04:03:07 am »
This cabinet is a work of art and a huge inspiration. The colors are coordinated perfectly.

barrymossel

  • Trade Count: (0)
  • Full Member
  • ***
  • Offline Offline
  • Posts: 498
  • Last login:October 29, 2021, 11:25:52 am
  • Spectrum
    • forum.arcadecontrols.com/index.php/topic,157647.0.html
Re: First DK Cabinet Build
« Reply #221 on: December 01, 2017, 04:41:13 am »
Really, really nice.

mwhitney

  • Trade Count: (0)
  • Full Member
  • ***
  • Offline Offline
  • Posts: 129
  • Last login:December 06, 2017, 10:30:20 pm
  • I want to build my own arcade controls!
    • Michael Whitney - Designer. Maker. Builder.
Re: First DK Cabinet Build
« Reply #222 on: December 01, 2017, 12:08:05 pm »
Beautiful Cab, excellent thread.  I think I might need to build another.

Thanks Shane! Really appreciate it.

mwhitney

  • Trade Count: (0)
  • Full Member
  • ***
  • Offline Offline
  • Posts: 129
  • Last login:December 06, 2017, 10:30:20 pm
  • I want to build my own arcade controls!
    • Michael Whitney - Designer. Maker. Builder.
Re: First DK Cabinet Build
« Reply #223 on: December 01, 2017, 12:10:06 pm »
Thank you, Barry and Great Red - the only thing lingering is getting the coin door operational... a minor detail and good Sunday project this winter.

zinger

  • Trade Count: (0)
  • Full Member
  • ***
  • Offline Offline
  • Posts: 136
  • Last login:February 25, 2019, 05:09:31 pm
  • There's a Donkey Kong Kill Screen coming up!
Re: First DK Cabinet Build
« Reply #224 on: December 02, 2017, 12:32:50 am »
This turned out really nice!  :applaud: The overall postmodern theme turned out great.

mwhitney

  • Trade Count: (0)
  • Full Member
  • ***
  • Offline Offline
  • Posts: 129
  • Last login:December 06, 2017, 10:30:20 pm
  • I want to build my own arcade controls!
    • Michael Whitney - Designer. Maker. Builder.
Re: First DK Cabinet Build
« Reply #225 on: December 04, 2017, 01:15:45 pm »
Thanks Zinger!