I came across the idea of a Build Your Own Arcade Cabinet idea while visiting the AVSForum.com when one guy that built a theater,
shared his MAME arcade cabinet build project. I guess the profile of a Home Theater enthusiast has the same interests as a 'build
your own arcade' cabinet enthusiast because both I and John St. Clair (
http://www.projectarcade.com/ both have a Home Theater
that we built ourselves. Lol!
I am in no rush to finish this build! I am going to enjoy the process of this build (the slow cooking method). It will take time to build this cabinet because I have a lot of other projects that I need to work on in between the steps of this build, such as building storage shelves in my garage, building storage shelves for junk in the basement, designing a wall unit for my entertainment center in the basement, tearing up the carpet in the basement and installing wood flooring, painting the basement, covering and framing the lolly columns in the basement, but I would image that the cabinet build will be complete waaaaaaaaaayyyyyyy before these other things are complete. To be honest all of the above projects listed above may take a decade or more but I would guess that the arcade cabinet will be complete by summer of 2017.
I already have most of the tools I need because I purchased them about 1.5 years ago when I started my Home Theater build in my basement.
(table saw, jig saw, circular saw, router, miter saw, pneumatic air compressor and a bunch of pneumatic tools such as a framer, nailer etc).
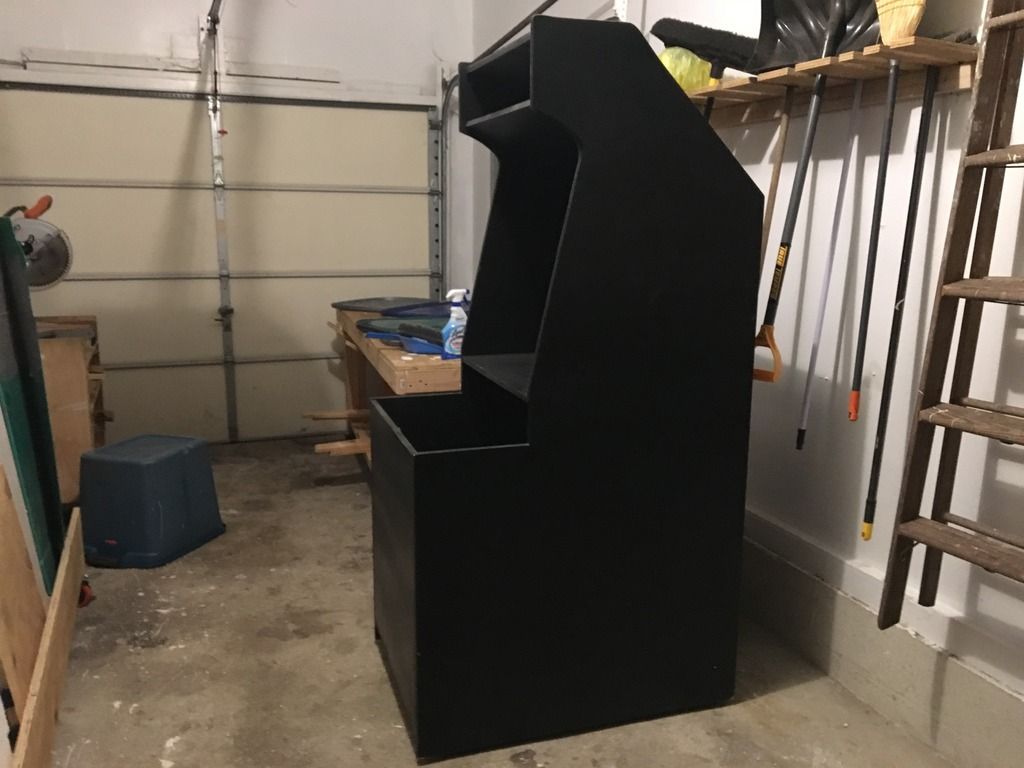
I found a great deal on Craigslist (after searching the word "arcade" or "Hyperspin") where a guy was selling an authentic John St. Clair projectarcade.com build that a friend of his had started and finished but had not been given any love for years. Based on documentation that was left with the cabinet, the cabinet was built circa April 2007!!! The guy that was selling this didn't build it, but his friend did and he left it when he moved to Florida. He listed it on Craigslist for only $150.00 and I knew it would be gone in days so I immediately setup to see it. The seller took my offer of $75.00. I had to borrow my sisters mini-van to get it and my neighbor Mike, who since has moved away, helped me put it in my garage. I knew that this cabinet on Craigslist would be sold instantly so I grabbed it and I got it for half the price of the original offer! Even if the seller was not negotiable, I still would have been happy with the original $175 asking price!
Here is the list of the breakdown of what was included in the cost:
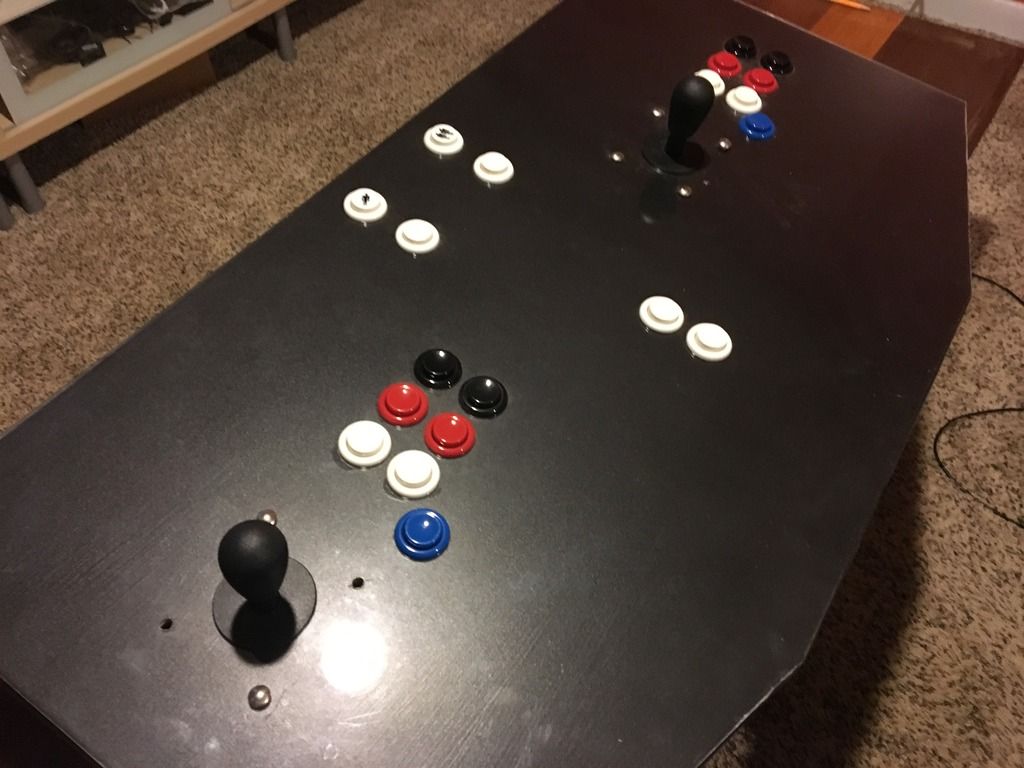
1. Completed control panel (some loose wires underneath - powered by an Ultrimarc I-Pac) detable and secure via velcro. The control
panel as a plexi-glass over lay and I plan on designing a overlay and have it printed in vinyl and attaching it/gluing it underneath
the plexi-glass
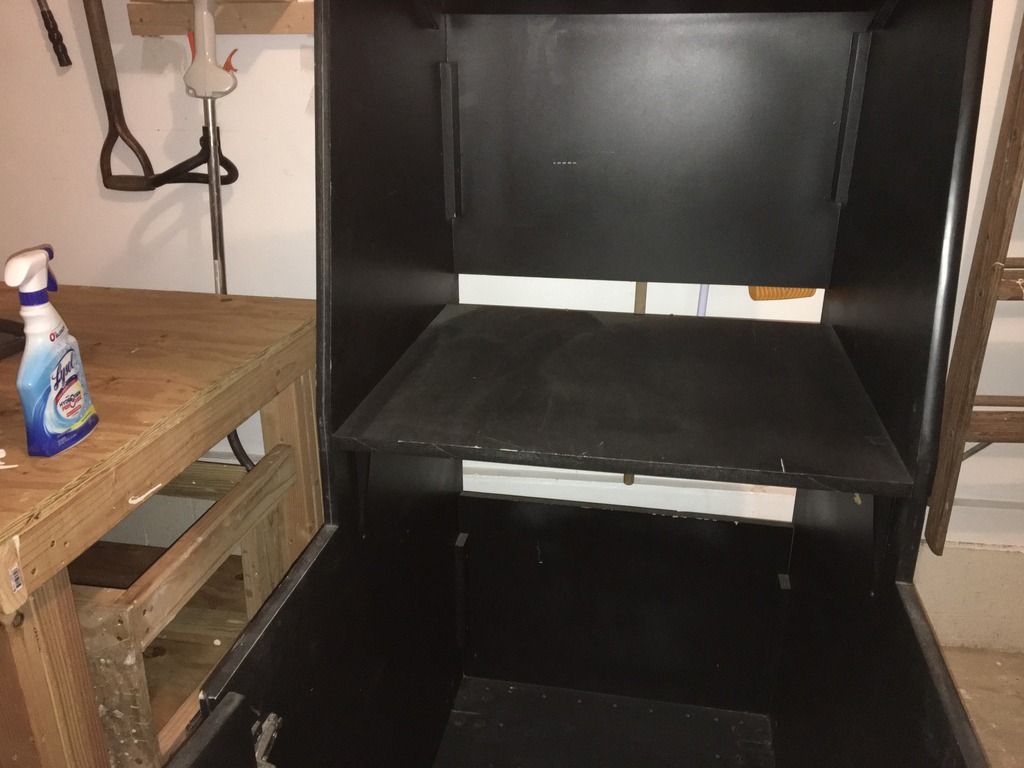
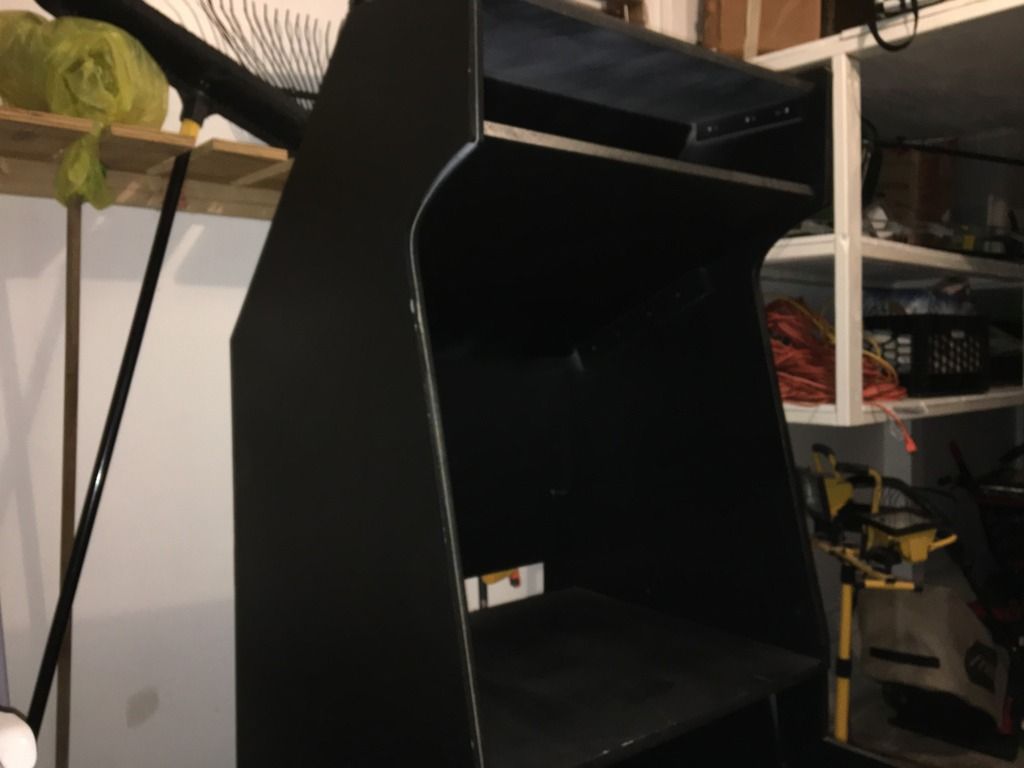
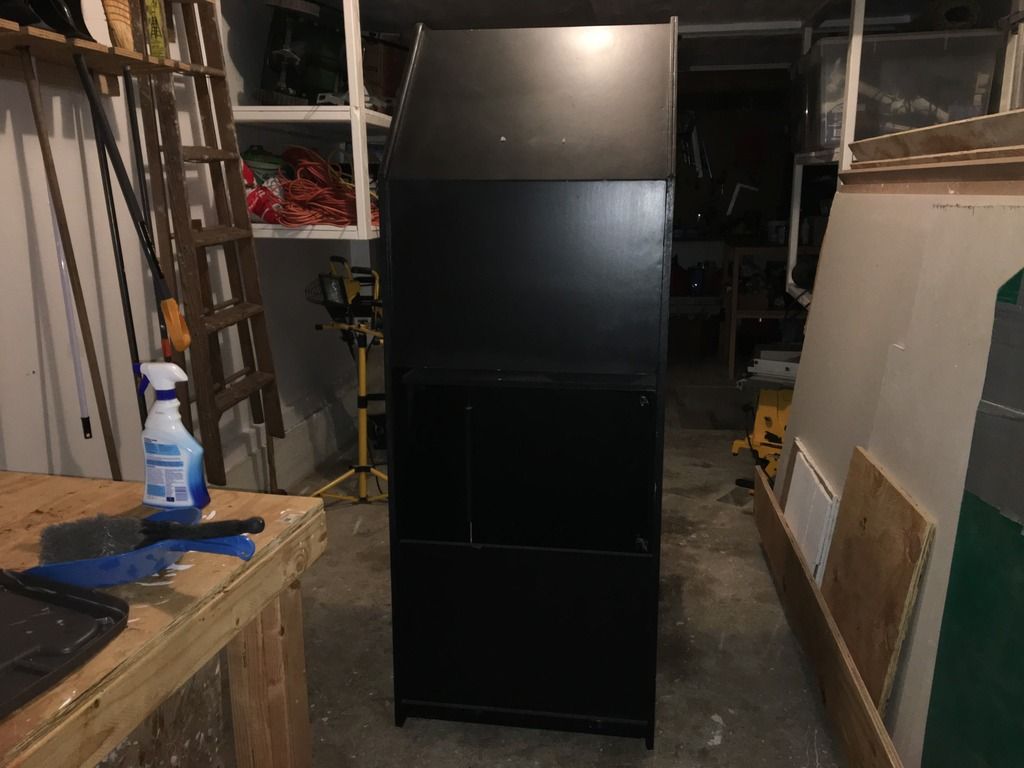
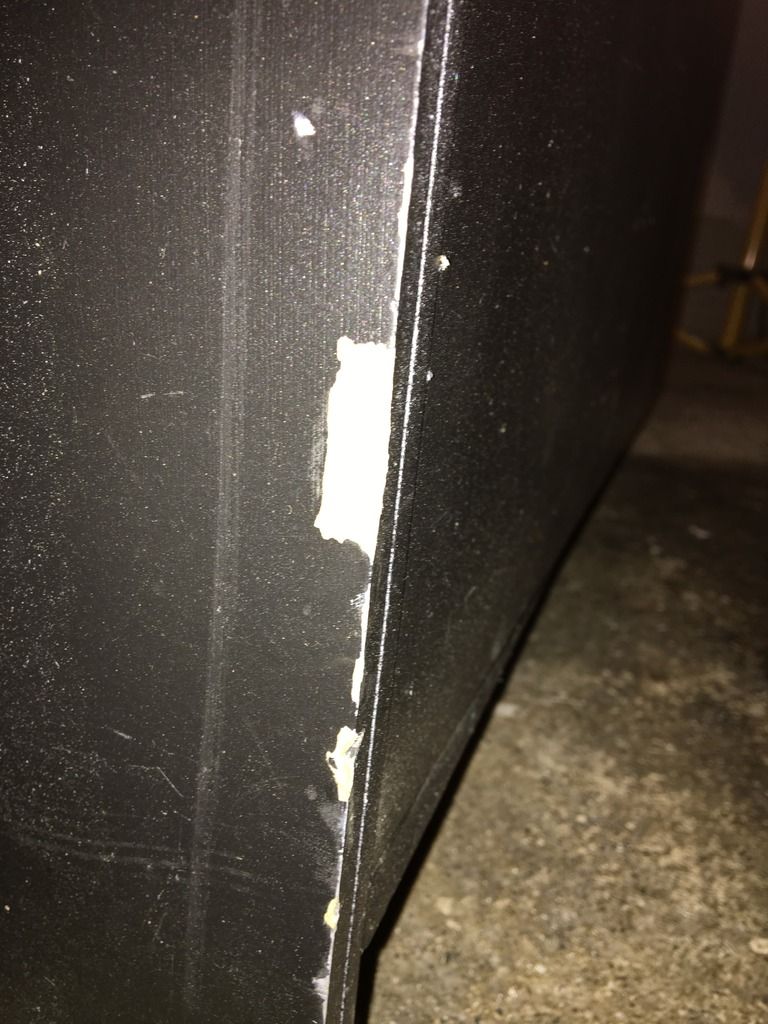
2. Cabinet: Overall in great shape except for a few dents on some edges that can be taken care of with the wood filler and some
paint or spray paint. I have 4 casters for this cabinet that came with it but only 3 are attached right now (but they are all cheap and in sa
d shape ie they are all banged up and not smooth, like someone dragged the cabinet along a dry river rock bed for 10 miles).
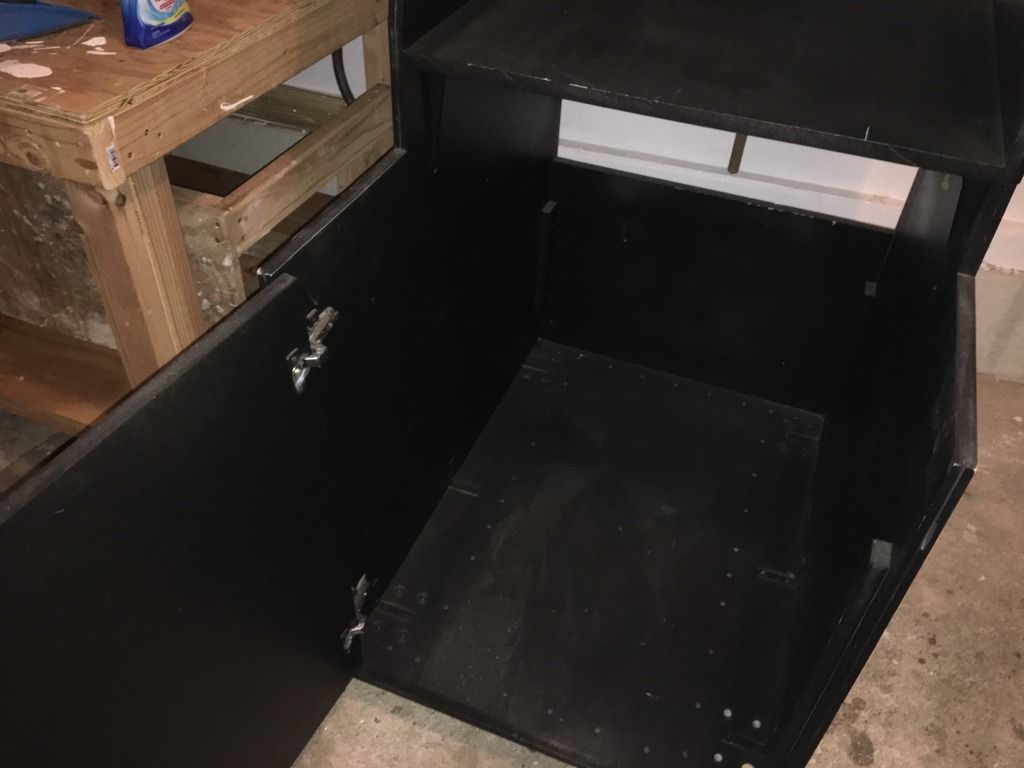
The cabinet also had a hinged door for the front that swings out but the hinges need to be adjusted and tightened a little.
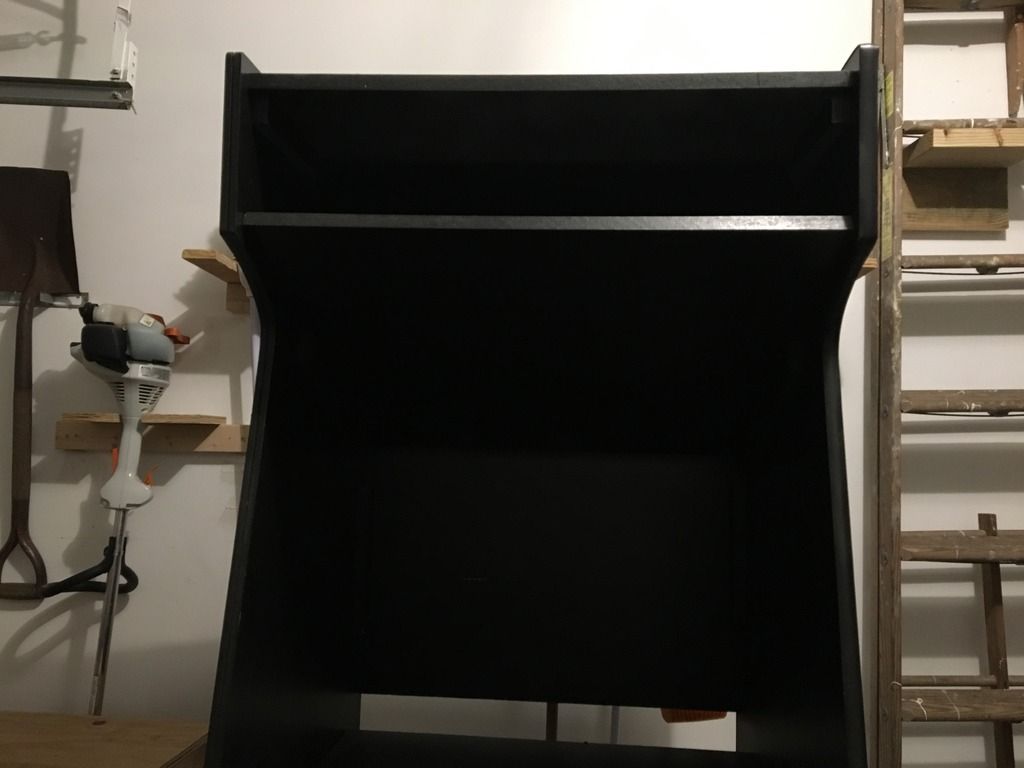
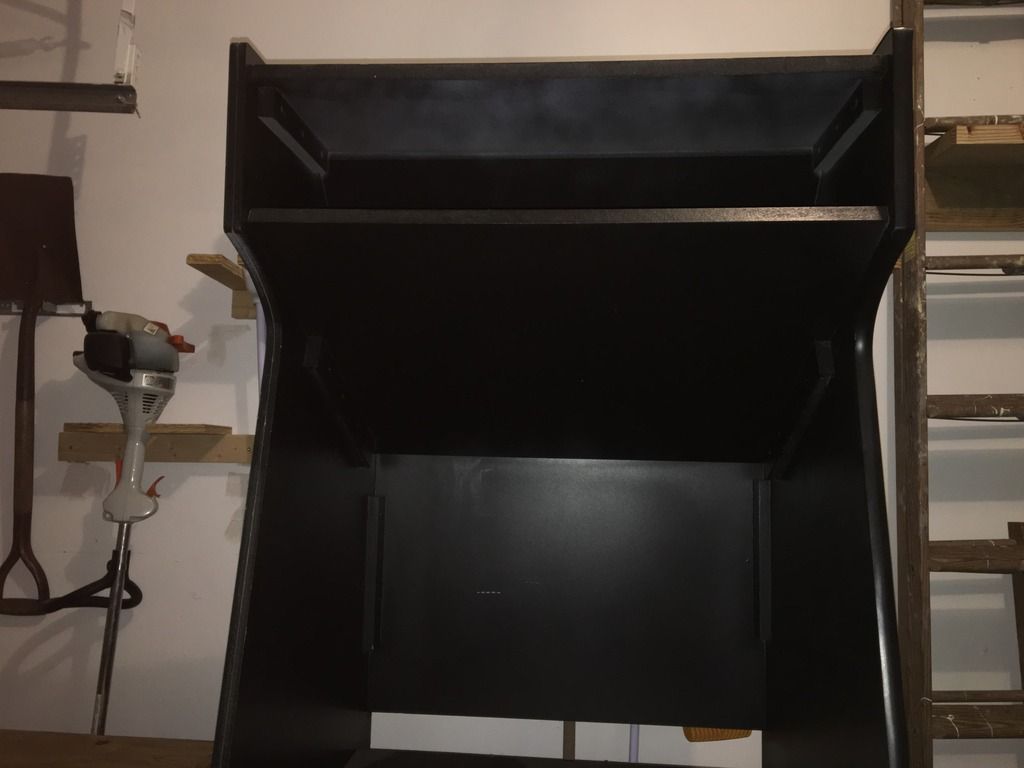
The cabinet needs to fixed up by adding a back panel for the marquee and maybe a shelf for the computer. It also need to cut a hole out
with a hole saw for the cooling fan that came with the cabinet as well.
3. The cabinet came with a bunch of games on an old PC with Windows XP (with some kind of emulator but I forget what kind it is). I played with it for a few minutes but it was so slow and the control panel disconnected wires make it intolerable to play/use so I just disconnected it. The PC is definitely going in the garbage some day or I may sell it for a few bucks.
4. The deal also came with speakers and a subwoofer (4 speakers that are RCA wired) but the subwoofer was missing the main "volume control wire" and I tested out the subwoofer and it didn't work, so I threw it out, but I kept the 4 speakers and put them in storage. I have to buy a new 2.1 system on Craigslist.
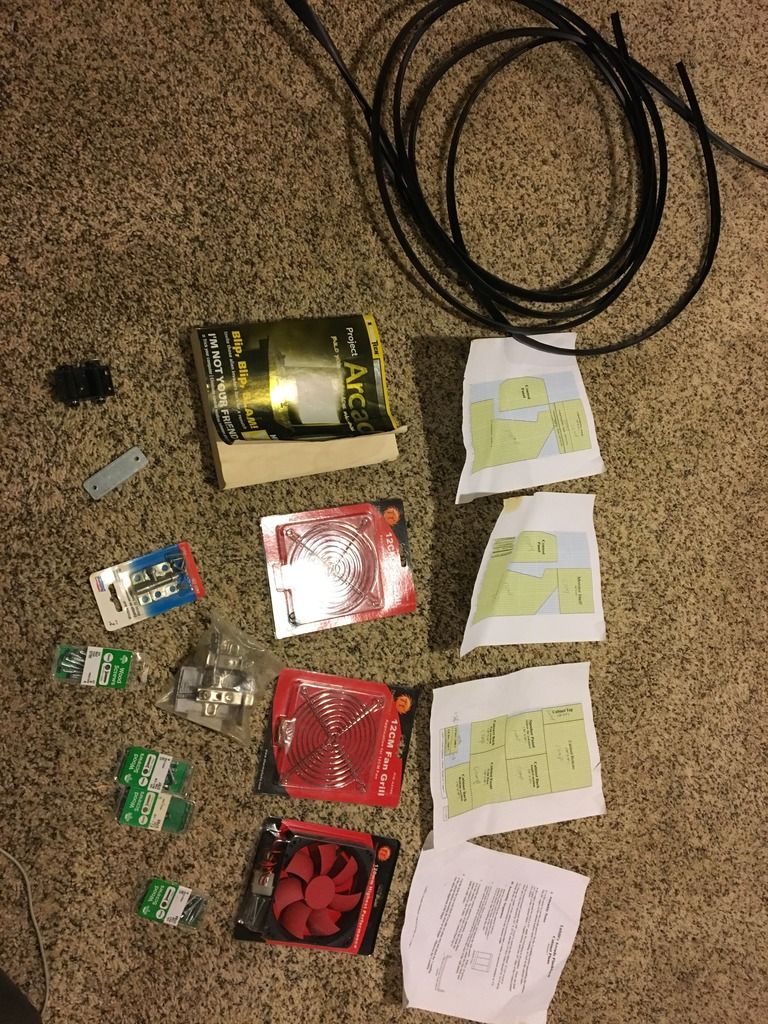
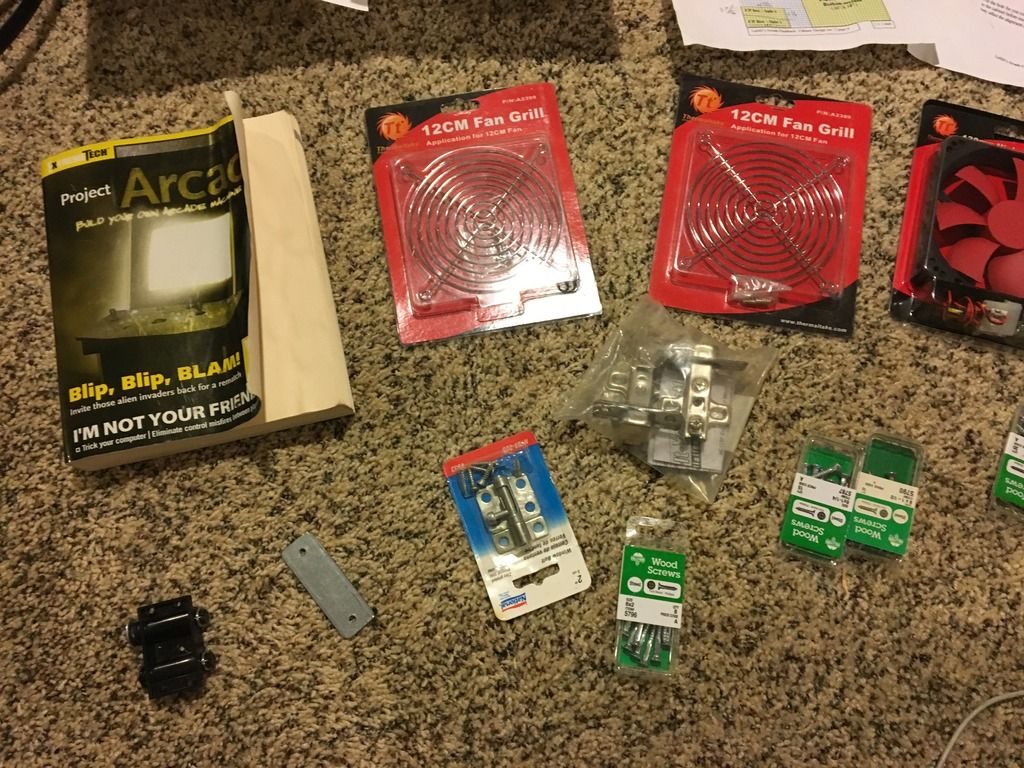
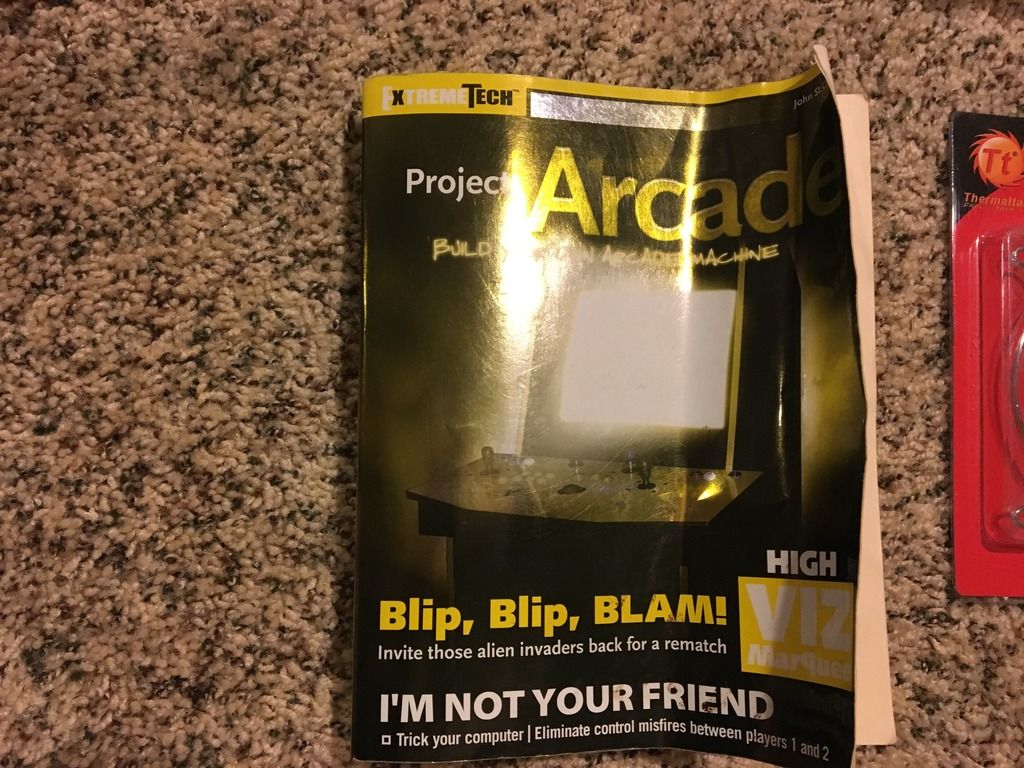
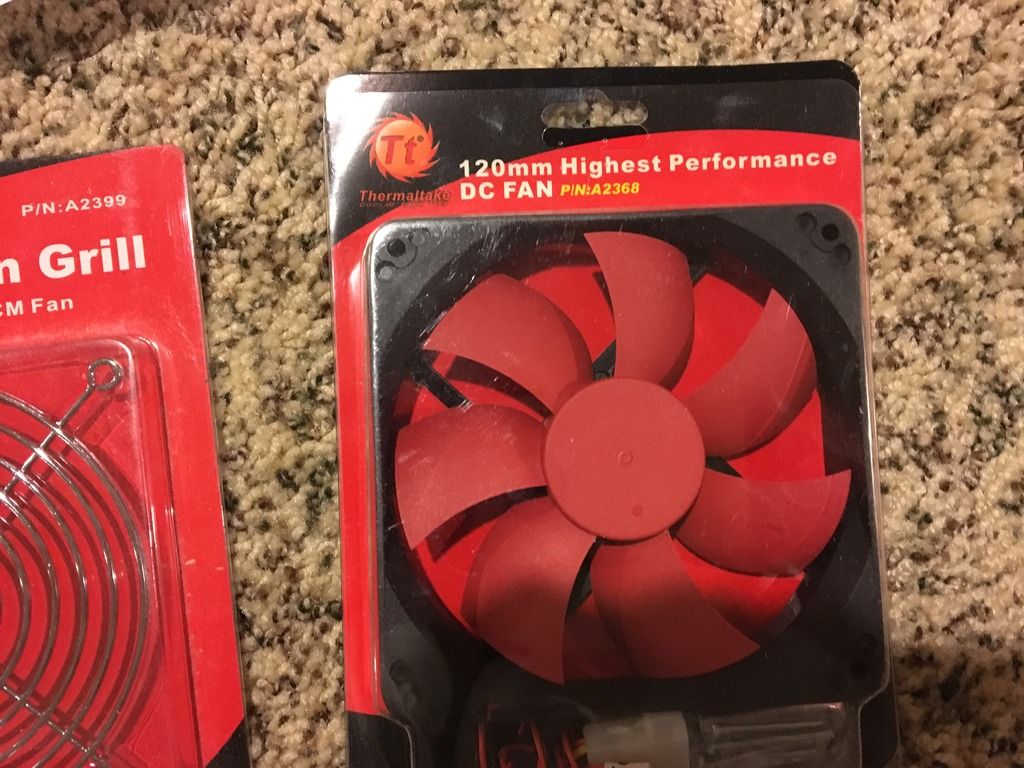
5. The deal also included (see photos below) a ProjectArcade.com printed book (CD was not anywhere unfortunately) T molding for one side
of the cabinet, 1 cooling fan, extra door hinges, a metal cabinet door lock, the original plans that the owner use to build the cabinet (LuSiD's arcade cabinet designs). I already read the Projectarcade.com book once but I plan on reading it a few more times.
A few months ago, I started reading dedicated arcade cabinet project anouncement builds and archiving and categorizing information from each build and I will continue to do this until the project is complete. I have learned so much information from other peoples step by step builds here at arcadecontrols.com. There is no way this cabinet would happen without the power of the internet, sharing and openness of information, and arcadecontrols.com. Thanks John St. Claire for your hard work and enthusiasm for this subject!!!!!!
Here is the plan:
1. LED lit marquee
2. Vinyl Side Art (a personal design I am going to build in Adobe Illustrator that will be a "collage" of 80s arcade game icons/characters, plus the big game developers names on the cabinet sides such as Bally, Capcom, Midway etc.
3. Touch of up the corners and dents with wood filler and paint.
4. I brought a 27" 16:9 Samsung LED display 1080p and it fits perfectly (I tested it). I brought it on Craigslist for $118 from a guy local to me in New Jersey. SAMSUNG SE360 Series HDMI LED-Lit Computer Monitor
Model: S27E360H
5. So far I have spent money on the cabinet and the the LED display for a total of $193.
6. In order to help identify which wires are loose and where they need to be connected, I wrote up a layout wiring diagram of what is going on underneath the control panel. The original builder of this cabinet used some sort of "screw terminal" board to connect the wires together.
I have no idea why he did this but I have no choice but to work with it.
List of things to do:
1. Measure the entire dimensions of the cabinet and create a google Sketchup layout drawing of the cabinet (for reasons such as when I design the side art and control panel art, it will be easier to get the side art designed and printed).
2. Build the Marquee "backing board". I already have plenty of aluminum "tape" to "spread out" and diffuse the LED lights behind the Marquee.
3. Build the display "holder/cabinet" to hold the display.
4. Purchase a Plexi-glass cover for the display and tape off the areas where the screen display is, and spray painting those uncovered areas black. Therefore the entire display will be covered with Plexi-glass.
5. Take off the display "chassis/framing" cover. I may leave it on but if I do, I need to spray paint it black. I may have to spray paint the entire front end of the display frame/cover the color black. The display frame/cover is colored white right now.
6. I need to replace the caster with new better ones.
7. Need to use Adobe Illustrator and design side art and control panel overlay art. I read Frostillicus's Vector Tutorial on how to use Adobe Illustrator, while at work, but I never read it while I had Adobe Illustrator in front of me on the screen to play with it while I read the tutorial. I have yet to purchase Adobe Illustrator and do this which is another reason that this build is going to take a while.
8. I may add a shelf inside the cabinet to divide the space up.
9. I spent a few hours trying to follow simplyaustin's Hyperspin tutorials plus a few others tutorials on the subject but the problem is that these tutorials are outdated since Hyperspin is constantly being updated with new changes. I found it beyond my capabilities to conquer the
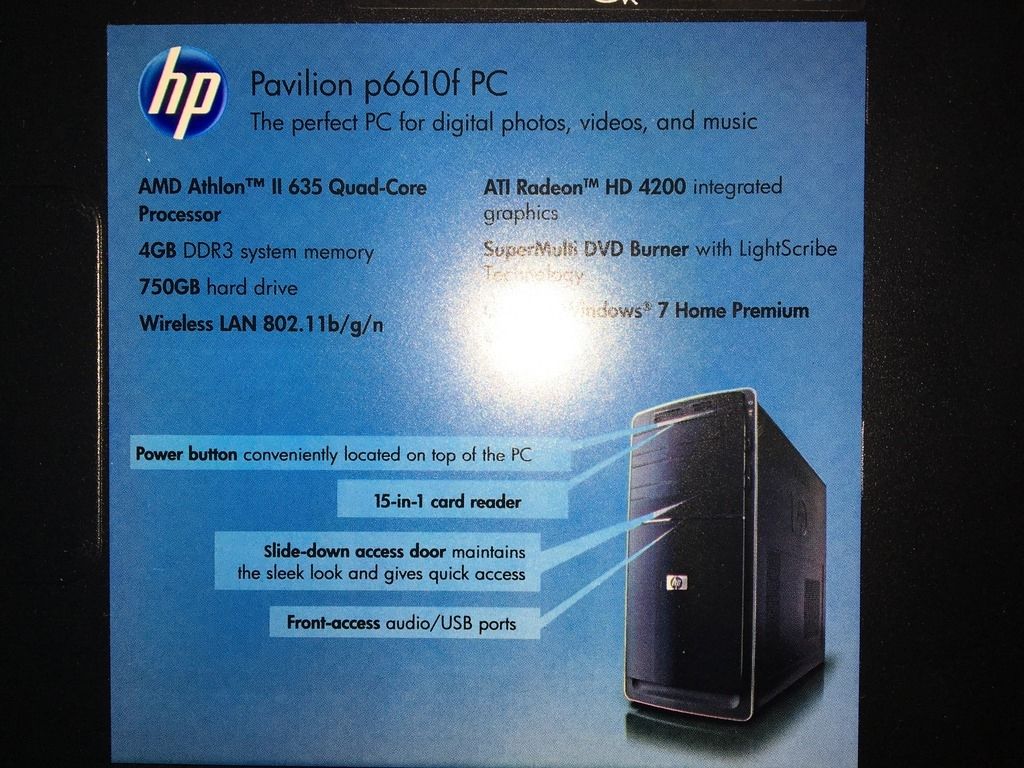
Hyperspin behemoth, so I am going to use a local guys services to install it on a PC that I got for free from my sister-in-law. Here
are the specs for it (note: the Hyperspin installer is going to be purchasing a new hard drive and loading Hyperspin on it and include 30k of games on it as well)
http://support.hp.com/ca-en/document/c02479651The guy going to be adding a new 2TB hard drive and adding this video card to it for a total of $345.00.
This is the video card he installs. He charges you only $70 for the video card which is what the retail price is.
https://www.amazon.com/EVGA-GeForce-Profile-Graphics-02G-P3-3733-KR/dp/B00L5GZG5CI know the Hyperspin world preaches that the number one rule is to never ever buy a Hyperspin service because of the high expectancy of it
breaking and the work of updating it, I thought long and hard about it, even after thinking of using a different type of front end program and getting my own ROMSc etc, I decided that considering a 2TB hard drive (
https://www.amazon.com/Seagate-BarraCuda-3-5-Inch-Internal-ST2000DM006/dp/B01IEKG402/ref=sr_1_1?s=pc&ie=UTF8&qid=1480175000&sr=1-1&keywords=2tb+internal+hard+drive) which is $70 and the cost of the video card ($70), he is only charging
me $205 dollars.
I asked him if he would help me if anything "broke" with the Hyperspin software after I received it and he confirmed that he would fix it.
For the $345, he will also program the the control panel buttons into the Windows/Hyperspin if I bring my control panel to him.
I know, I know it is against the culture of the community and considered the most lazy approach, but this is my decision at this point. I have
not purchase his services yet, so maybe I will try a different front end FIRST, and see how far I can go myself before I give up again...
10. T Molding: I also have to install the T molding onto the one side. The one side that does not have T molding will be using the T molding that came with the package/purchase from Craigslist. To be honest with you, I hate black T molding. I always dreamed of having red or yellow, or orange T molding to make the cabinet more flashy but alas, this is a budget build.
11. I want to enclose the rear of the cabinet.
12. I may install a keyboard/mouse drawer slide that can be accessed when you open up the front door.
I think that's it for now.
If anyone could help me by point out which wires go where in the control panel wiring diagram below, please share, but otherwise I eventually will figure it out by myself. You can see the red arrows in the one diagram below which indicates which connects are "loose" and don't have a "home". I know that all of the grounds just have to be sure they are connected together??? Is that right?
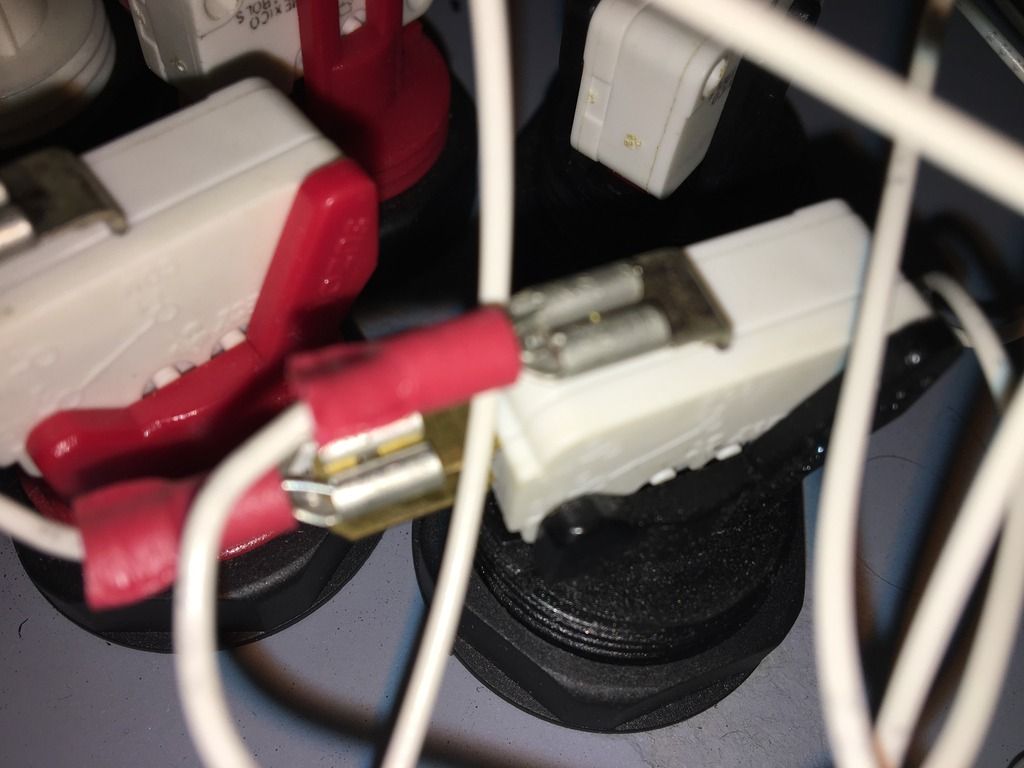
Also, there is a close up photo of the "disconnect" connections to the buttons. I show this because I need to know what type of "crimping" tool will crimp these wires. Some of the wires are "loose" inside the Disconnects and I need to re-attach them. If you pull them lightly some come out!
Here is another example of some edges where the wood chipped (ie need to be filled will wood filler and painted)

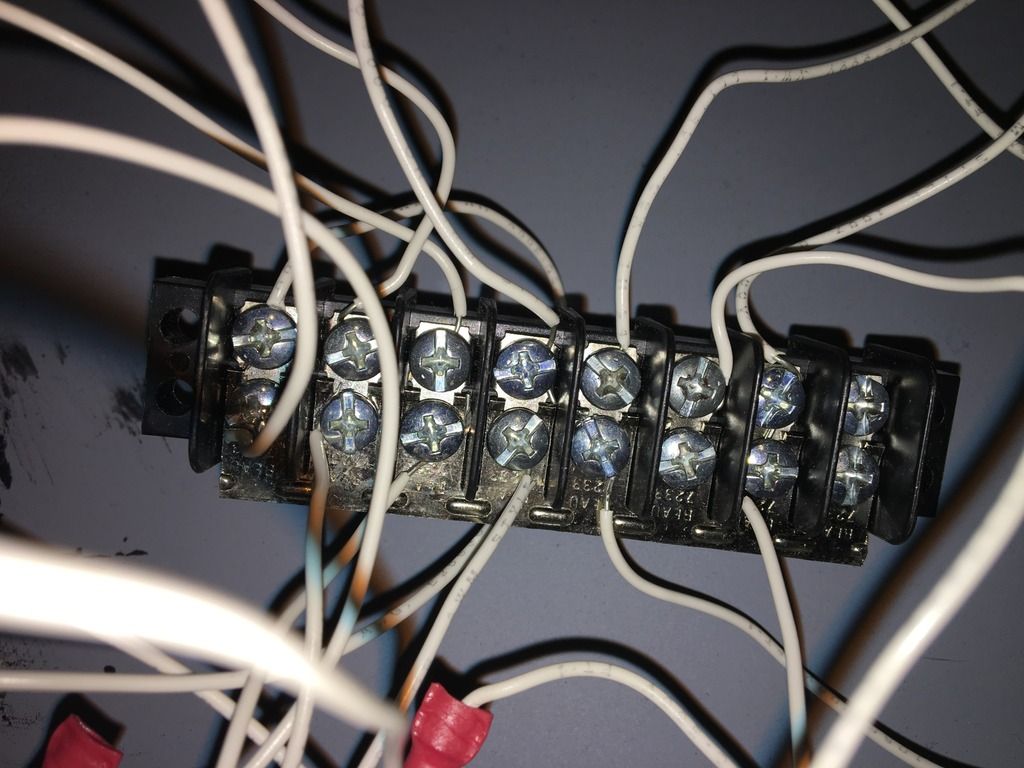
Here is that "connector board" that (there are two of them) underneath the control panel. I did not include these two devices in the wiring diagram for simplification purposes. ie I bypassed it in the wiring diagram because there was just not enough room on the diagram.
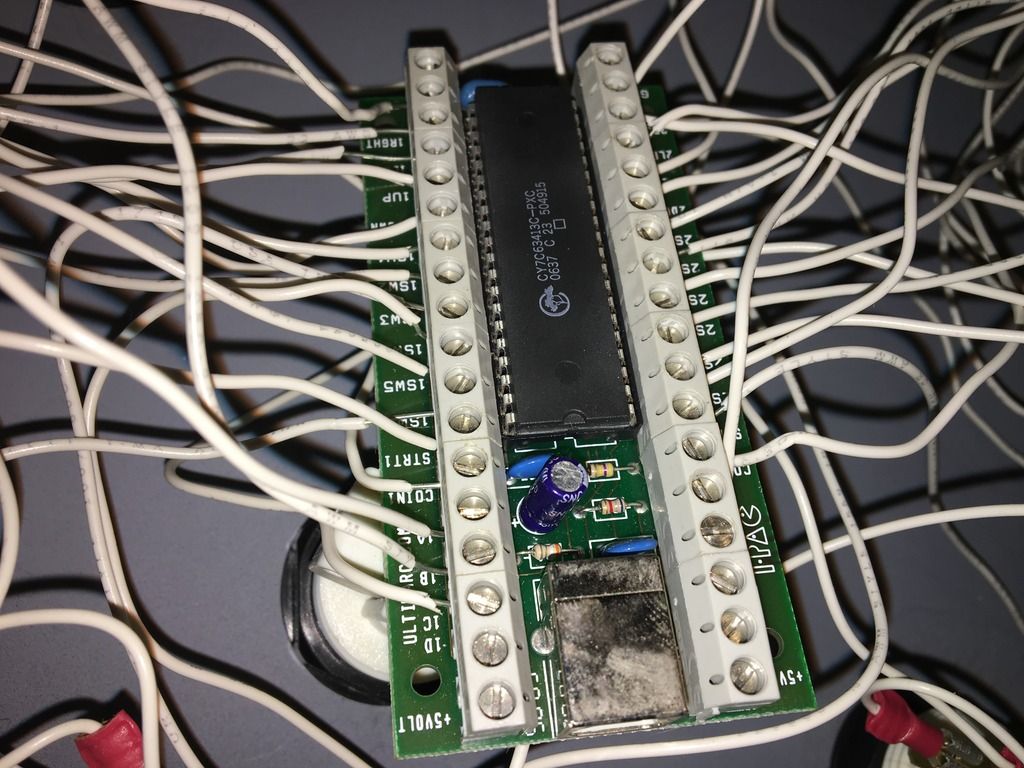
Ultrimarc I-pac!!
The white wires are coming out on some of them and need to be "crimped" into the disconnects. Is there a crimping tool for this?
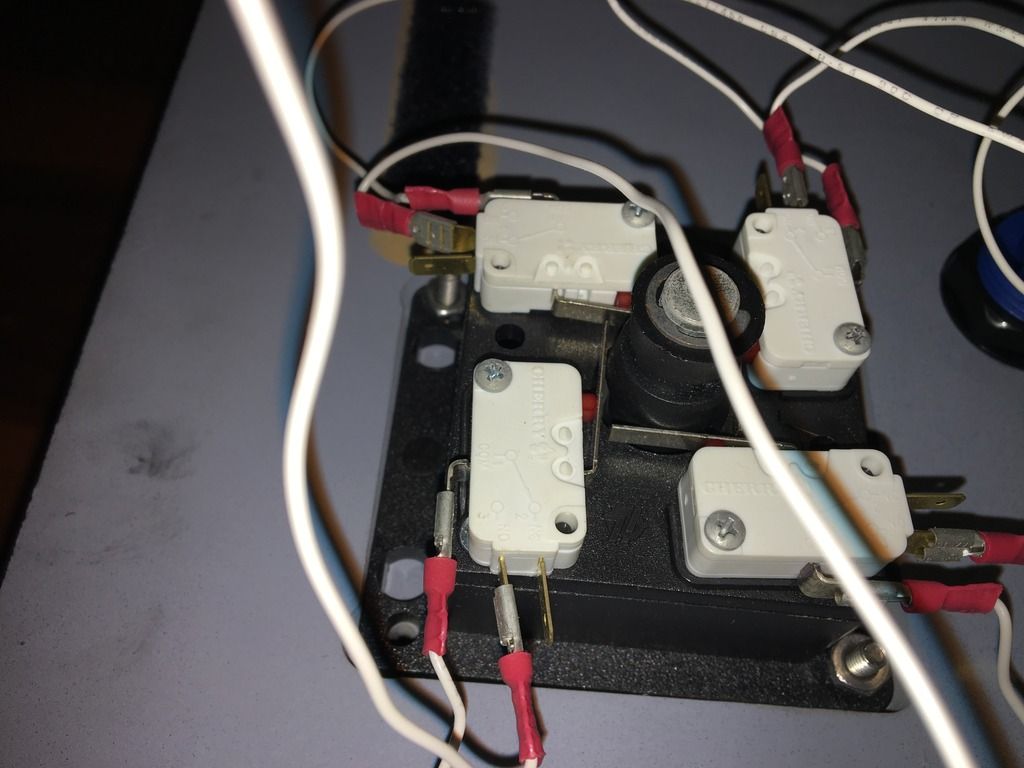
Joystick:

The PC that will be the brain of Hyperspin. The hard drive will be replaced with a 2TB (*current hard drive is dead, I got this PC for free)
Here is the wiring layout underneath the control panel. I did this the best that I could and tried to use different thickness lines and colors
in order to make it more understandable.
As a reminder, I did not include the two "connect boards" for simplicity.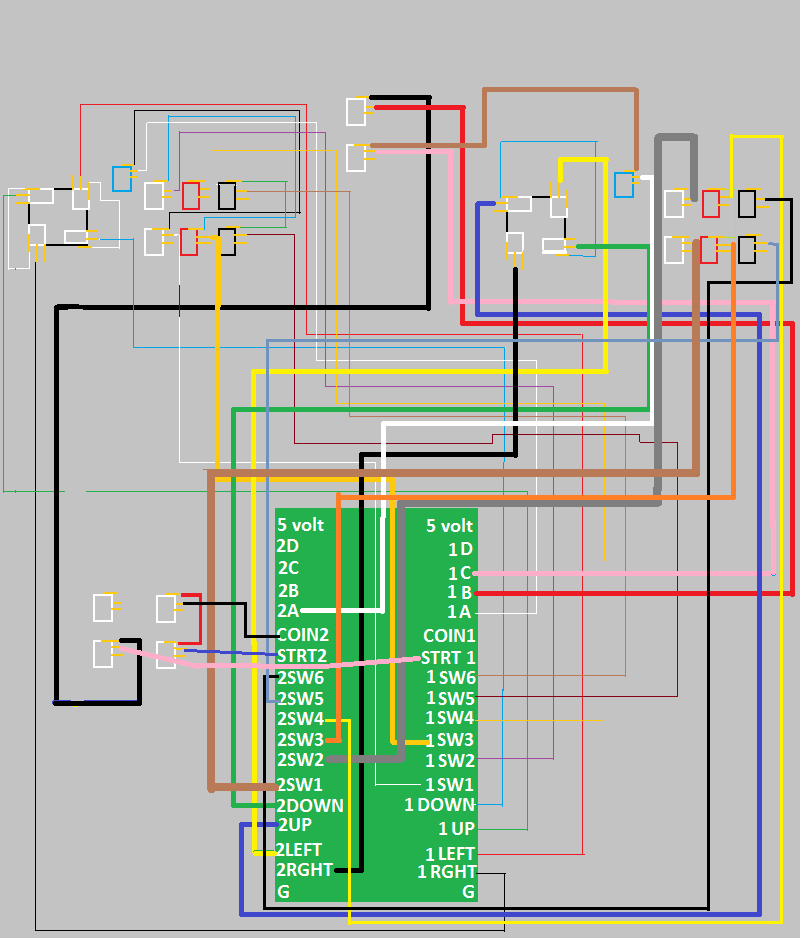
Here is the same wiring layout with the red arrows showing which connects have wires that are loose (ie they don't have a home and I need to figure out where they should go).
Any ideas of where they should go?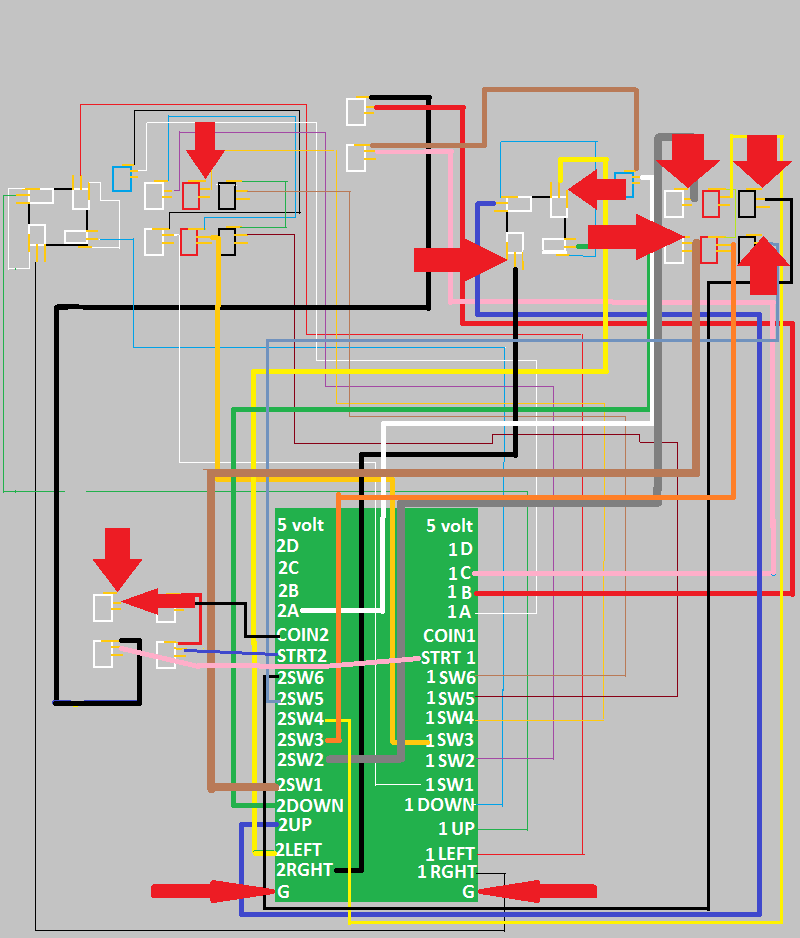


 Home
Home Help
Help Search
 Login
Login Register

 Send this topic
 Print
Print Topic: My "Taking my sweet time to build it" Multi-cade side art arcade cabinet build! (Read 16715 times)


