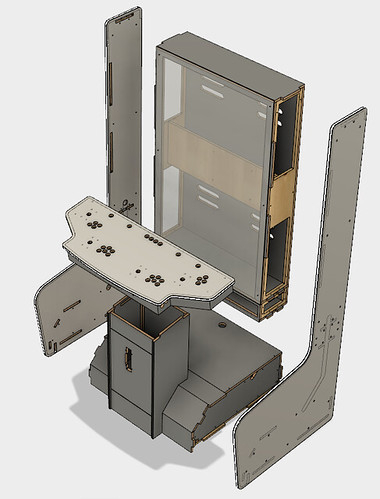
Build UpdateAwesome weekend! very productive. We had so many dramas assembling this and yes this build is super over engineered. One of the biggest issues I caused for my self is that I didn't give the Tee joints enough clearance so we had to sand most of them and fix some holes with a router. There were a few things that when I was designing this build I wasn't sure how I was going to solve, but thanks to my mate we solved them all and it came out great. Also, there was a lot of assembling things just for the fit and screwing things in place and then unassembling so we could do another section
So the build is designed to break into 5 sections. This is so its easier to transport, get through doors etc. All 5 sections will be assembled on location.
the 5 sections are
- control panel
- base and tower
- left side
- right side
- Tv cabinet
 The base
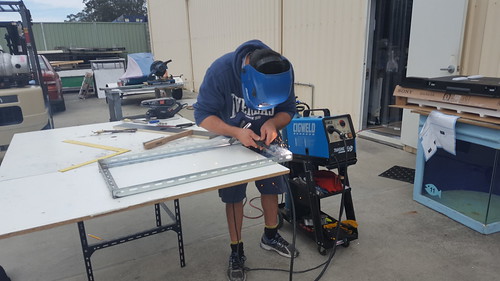
So starting from where I left off last time, The first section I tackled was the base. The tower part was starting to take shape, I glued and reinforced the ply wood and back panel for the tower. Then I added other pieces for the base as a kind of dry fit checking angles and general fit
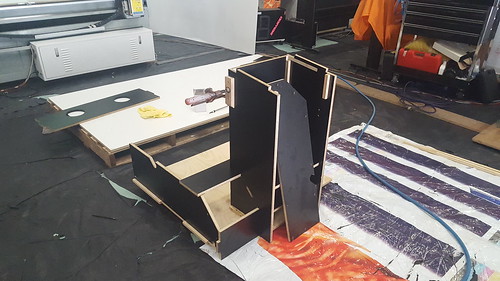
We then lay one of the side sections down and bolted in the part that connects the base section to the side section. We used it as a template to line up the base and all the Tee joints. There was a lot fiddling around trying to get all the Tee joints lined up with their holes and fit. We had to fix some of the joints as mentioned above. This took a lot of time. But eventually, all the parts were in their correct places and played nice with the other parts. When I was happy we then locked them in place using screws and an aluminium angle we customised to be the inside shape of the base.
Once we finished this first side we unbolted the base from the side panel, flipped it over and repeated the process for the other side. before you knew it we had spent all day on just the base section!
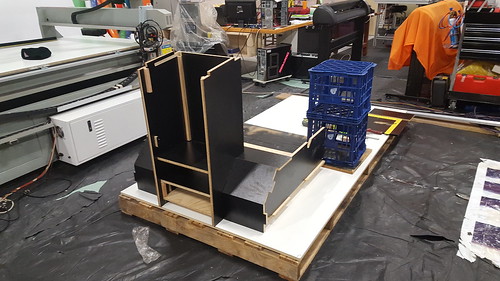
the next day I went to the hardware store and bought a sheet of propeller plate which we then cut and shaped to add as the kick plates for the base
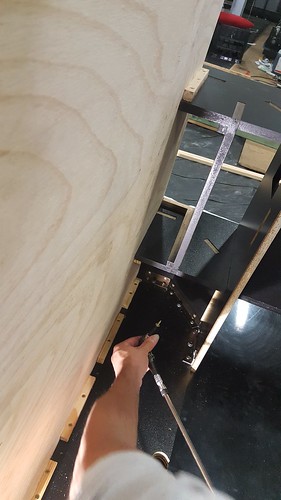
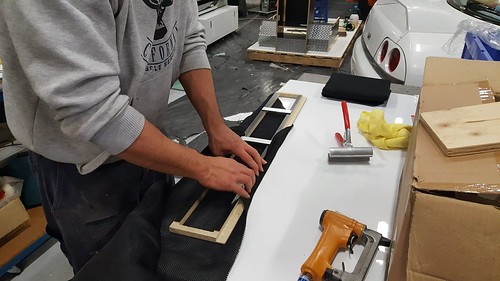
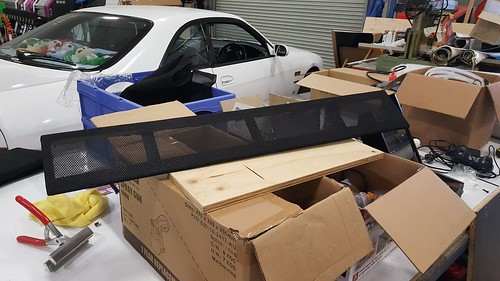
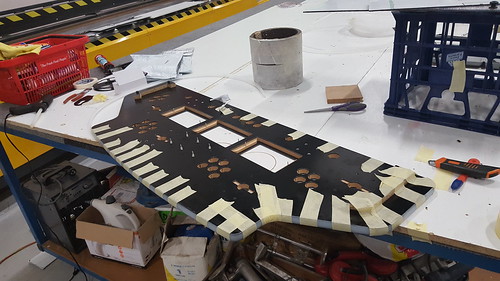
 Speaker grille
So while the glue was drying on the kick plates, we moved on to the Grill that will cover the speakers. I ordered a nice textured speaker cloth just for this. I've added canvases to a frame before but my mate had way more exp at it so I let him do it having done it hundreds of times, even had the special tools for it. We later attached the grill to Tv cabinet section with some screws and pieces of aluminium angle.

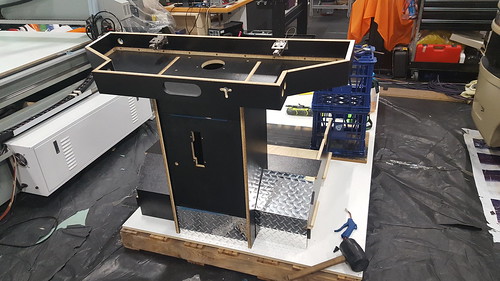
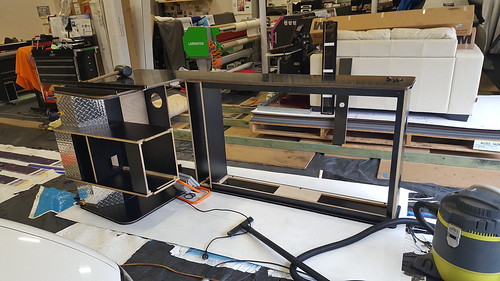
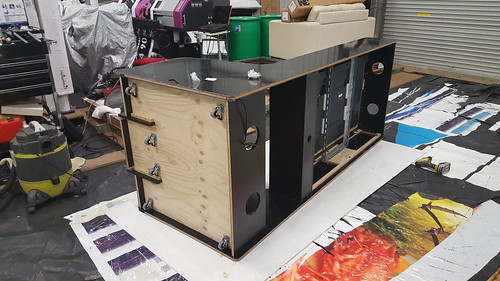
 TV cabinet
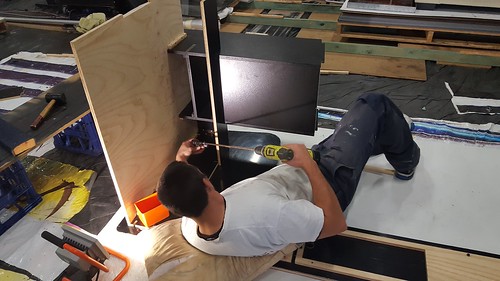
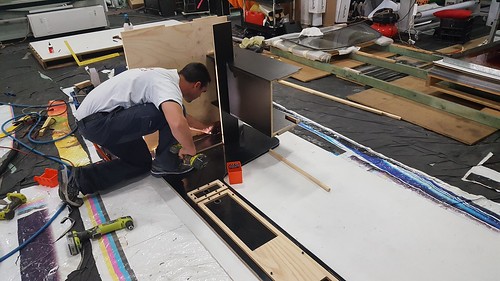
We finished off the base section by adding the power cable, back panel and lid. To do so we had to put it back into the side sections and line it up. Again once the pieces played nice, it was secured the other panels and the base with screws and an aluminium angle.
So while everything is on its side we got to work on the TV cabinet section. We used the same process as the base section. The ply frames were already bolted in and so the pieces of the TV cabinet were placed into their holes and once they played nice with each other. We screwed them in place and to the ply wood frame using screws and lots of aluminium angle pieces
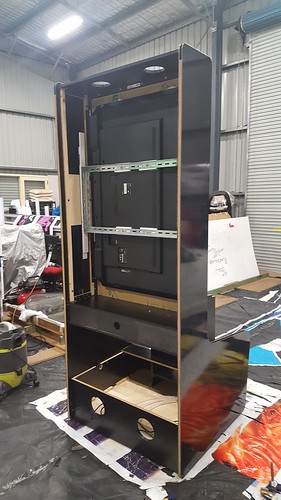
it was finally starting to take shape! end of day 2. It looks like ill be able to get the arcade done this weekend finally! or at least not need to drive the 4hrs each way to my mate's place to work on it.
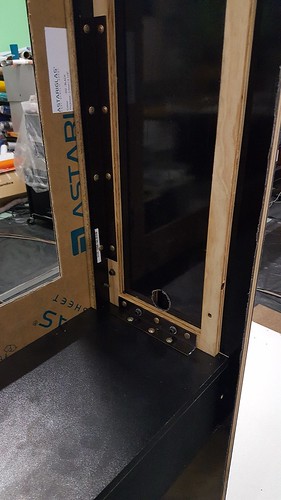
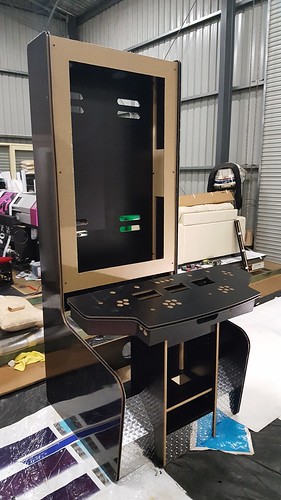 TV
TVSo one of the biggest challenges I knew this build was going to have was how we were going to mount and align the TV. I had a few ideas in my head and I designed it so we could play with a few options. I had 2 TV brackets ready to go, but in the end, we custom made one from galvanised heavy duty slotted steel.
We then placed the arcade on its side to mount the new frame. we first aligned it horizontally and screwed the frame to the ply. We then aligned it vertically by moving the TV in the slots and tightening when we were happy. Once we finished mounting the TV we added the wheels to the base.
this was another issue I was debating on how to solve. Originally I wanted castor wheels and leg levellers as most cabinets have. But I couldn't find good ones, at least not when I was designing this arcade. One of my original ideas was to use mini dollys that would be screwed the base and leg levellers. In the end, I went for some small caster wheels that I could spread the load over and had brakes.
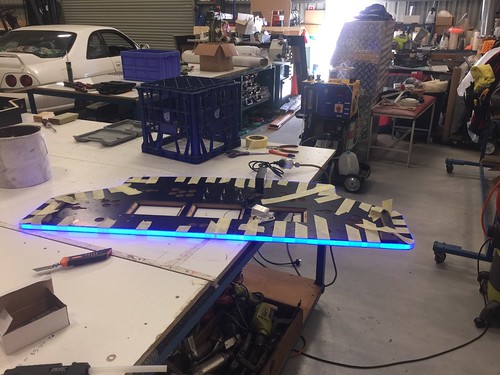
 Let there be light
And with the Cabient build is done! well almost. Decided to have some fun with it

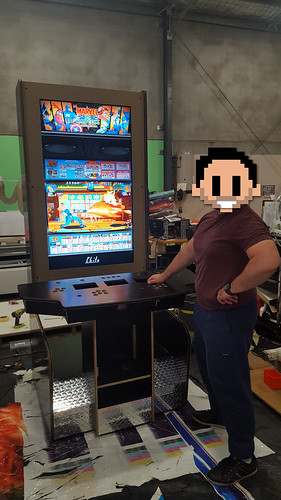
Once that photo op was over, my time was coming to a close. I need to drive home it was going to get home by midnight. SO we cleaned up and packed up but before I left we decided to tackle the last remaining items, the thing that stands out the most about this build... the LED t-moulding.
So we had a plan of attack.
- Insert the LED strips
- pour in the silicone in sections
- add the t-moulding to cover that section
- Use tape to hold the t-moulding in place while the silicone sets
and that's what we did. But it's never that easy, turns out the adhesive on the back of the LED strip was rubbish so we ended up hot glueing it down.
I also have vid but ill have to upload it and add later
So with that, I was done and had to leave. The side sections need the LEDs to be done but my mate said he would take care of it. He also has to print out and apply the artwork. When everything is ready I will then drive up there the last time to collect it and bring it home! I will add the electronics at home. No point doing it there and risking something breaking in transportation.
ParadiseArcade orderin other news, I'm still having the worst time with ParadiseArcade. it will be 3 weeks since they last replied to my ticket and order. The last thing said was "sorry for the delay, this should go out tomorrow" and then they disappeared, they are not replying to anything. They do it so often, my whole support ticket conversation is them disappearing for days and weeks. takes forever to get an answer. It's so pretty frustrating. My order was ready 3 weeks ago and it's probably sitting on a shelve somewhere. I shouldn't need to chase them up about my order. I even had to chase them up to get the invoice so I could pay for it


 Home
Home Help
Help Search
 Login
Login Register

 Send this topic
 Print
Print Topic: Monolith - 55inch vertical screen - project name "go for broke" (Read 129224 times)


