Main Restorations Software Audio/Jukebox/MP3 Everything Else Buy/Sell/Trade
Project Announcements Monitor/Video GroovyMAME Merit/JVL Touchscreen Meet Up Retail Vendors
Driving & Racing Woodworking Software Support Forums Consoles Project Arcade Reviews
Automated Projects Artwork Frontend Support Forums Pinball Forum Discussion Old Boards
Raspberry Pi & Dev Board controls.dat Linux Miscellaneous Arcade Wiki Discussion Old Archives
Lightguns Arcade1Up Try the site in https mode Site News

Unread posts | New Replies | Recent posts | Rules | Chatroom | Wiki | File Repository | RSS | Submit news


Author Topic: •• Final Frontier •• My 1st build -- Lots and lots of photos!  (Read 6885 times)

0 Members and 1 Guest are viewing this topic.

X-fact0r

  • Trade Count: (0)
  • Full Member
  • ***
  • Offline Offline
  • Posts: 19
  • Last login:July 21, 2019, 03:04:59 pm
  • Cabinet build in progress!


  • Type of project: Restoration / Modification
  • Cabinet type: Full-size upright
  • Screen orientation: Horizontal
  • Custom mods: Control Panel, Monitor, Artwork
  • Build status: Initiated

 
Introduction:
My first contact with arcades was somewhere in the beginning of the 80’s, I was around 10 and my first game was Space Invaders Deluxe, the one with a monochrome monitor under an overlay of color stripes. From there Kangaroo and Borderline were the next passions… I grew up with some arcade venues in my city so I had the opportunity to check and play lots of different games. My all-time favorites are Shinobi, R-Type, Double Dragon and Golden Axe to name a few. I then got into Spectrum, Amiga, PC and Consoles, but nothing like the golden years of arcade.
Around 15 years or so I got the bug to build this project when a friend of mine got his cabinet and we researched together how to hookup the JAMMA interface with the keyboard, controls and monitor.
 
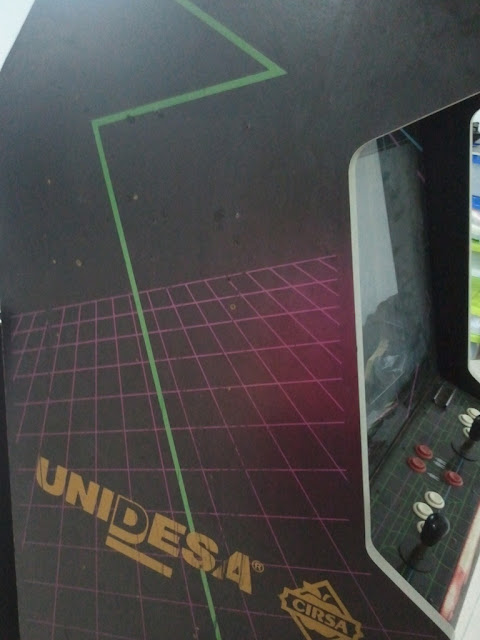
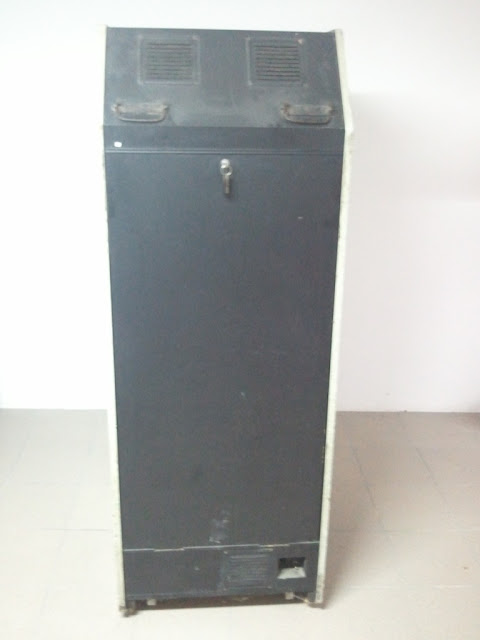
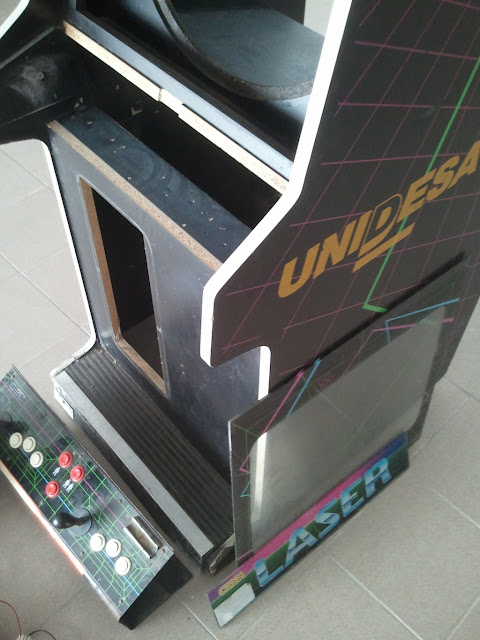
After all these years I finally decided that it was time to get to work, I bought a generic Spanish make cab (Cirsa Laser, Unidesa) from a local arcade retailer with no monitor that served its last days as a NeoGeo MVS system. It’s in pretty good shape but has some water ingress damage on the bottom.
It’s the perfect starting point for what I have in mind, since my wood skills are far from perfect to embrace a build from scratch project.
 
After getting the cab I had to move to another house forcing me to delay this project. After 3 years I finally have the chance to get things moving so I started trimming the parts-list and ordering some stuff (the part/expense list will be included in the end).
 
 
Concept:
The cab has an ugly generic artwork with some grid lines and maker logo on the sides and CP that will be fully removed. I have already decided that the art concept/idea will be based on a space theme with orange as the main color for art and t-molding.
I will be doing the marquee, bezel, control panel and kick plate but still haven’t decided on the side art if any.


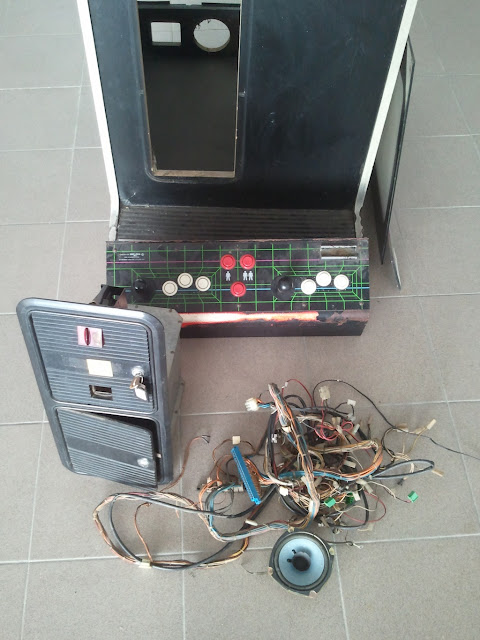
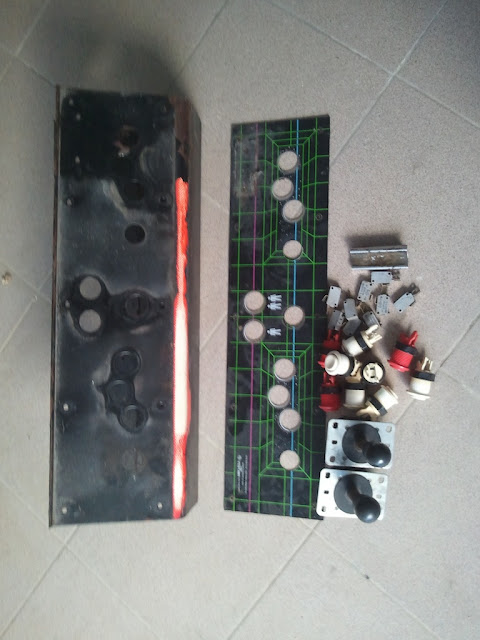
I have thought initially to keep the metal control panel and make a 6 button per player layout but since I want to include a trackball and a secondary  4way controller, I have decided to incorporate a full size MDF cp with some light-gun action as well. This will involve some cutting on the sides but let's see how it turns out.
I have acquired a real cheap 21” CRT computer monitor that will be decased and hooked up via VGA.
 
 
Cleaning up:
The first stage was to strip the JAMMA and power cables, glasses, accessories, brackets, etc. and giving it a good clean job.


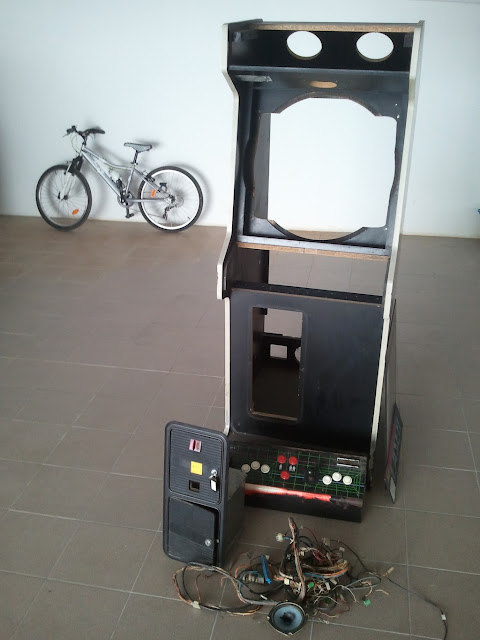
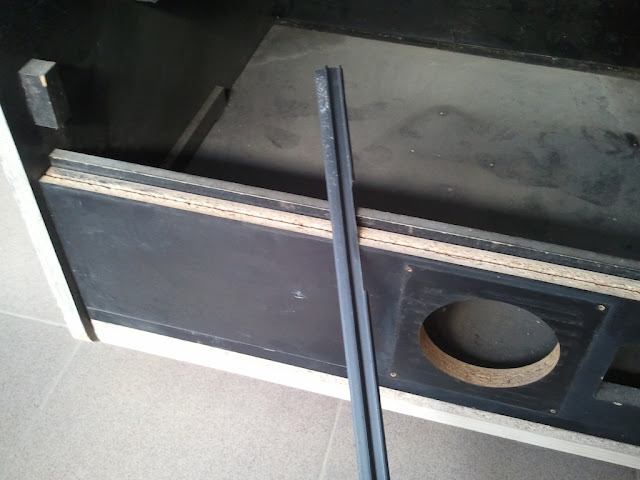
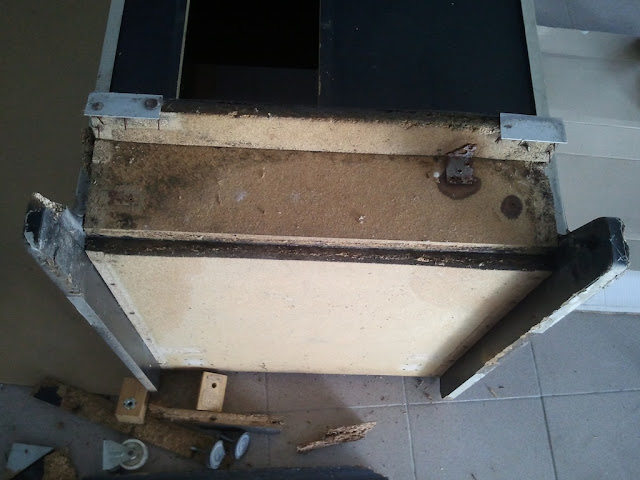
I soon realized that I had to repair the bottom panel and the foot rest area on the front side… 
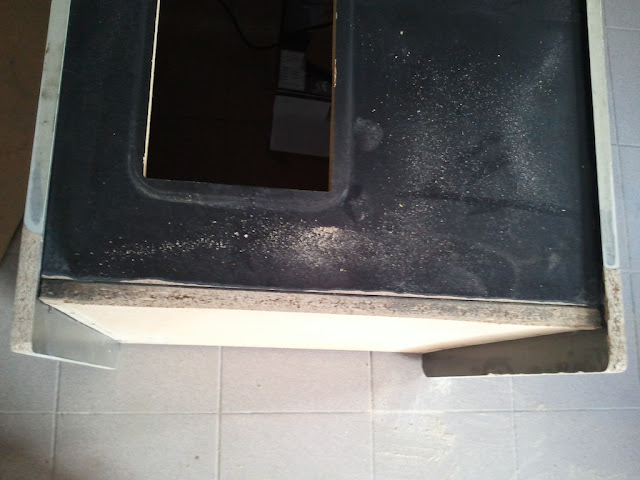
Nothing better than giving the cab a new shape to end the water ingress issues  ;)
The lower area of the kick plate will be covered with aluminum diamond plate and the sides with t-molding so no harm done, I guess...


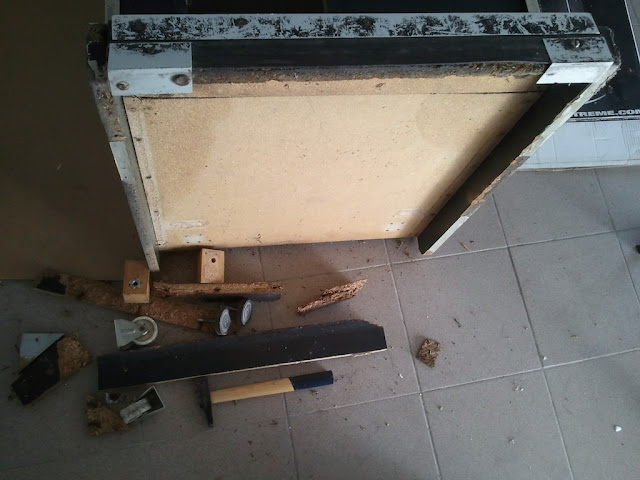
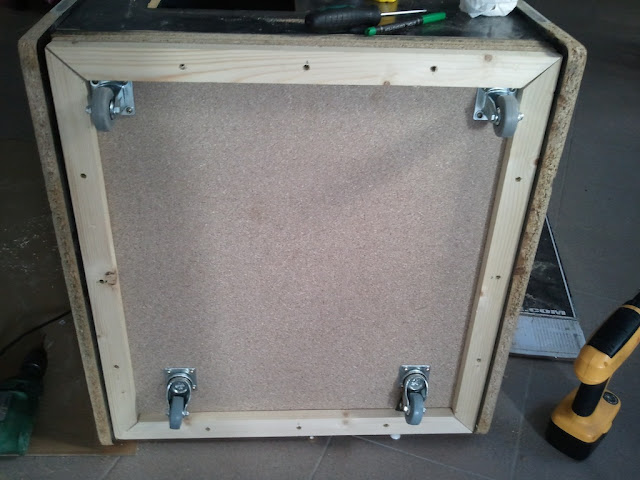
The casters are in place so it's time to move on and repair the sides.
« Last Edit: May 03, 2013, 05:30:10 am by X-fact0r »

                           ** Build thread | Art thread **

X-fact0r

  • Trade Count: (0)
  • Full Member
  • ***
  • Offline Offline
  • Posts: 19
  • Last login:July 21, 2019, 03:04:59 pm
  • Cabinet build in progress!
The progress has been slow but still kicking!

Side panels:
The cab has gone through a major sanding clearing all traces of the original side art. There were also a lot of holes that had to be filled with wood putty.


Speaker hole:
The cab had a large central speaker hole that had to be covered since I am using a 2.1 sound system.
The wood in this cab is all laminated and since I had a piece of white laminated scrap wood laying around I cut a sized circle to cover the hole. I then applied some wood putty and sanded it down for a smooth finish..


Marquee slot:
The marquee slot had some damage and the wood was starting to fall in, I applied some wood glue and let it rest for some hours.


« Last Edit: May 03, 2013, 05:31:21 am by X-fact0r »

                           ** Build thread | Art thread **

X-fact0r

  • Trade Count: (0)
  • Full Member
  • ***
  • Offline Offline
  • Posts: 19
  • Last login:July 21, 2019, 03:04:59 pm
  • Cabinet build in progress!
Coin mechanism:
The coin mechanism was taken out and disassembled for a complete cleaning job, clearing lots of dust, some rust and a good polish on the doors and frame which are made of plastic (?).
I guess this was not a very popular arcade from the number of credits in the coin counter...


After some degreasing and cleaning this was the result. I still need to go out and buy the key locks since the original ones are very rusty.


Speaker installation:
After covering that large hole in the middle I thought on making two smaller holes and cover them with a metallic grid mesh from some older fan guard but I then recalled seeing some projects in which other fellow BYOAC'ers drilled some holes to make a circular pattern ;)
That's the route i took after googling for some stencils. Found one that I liked, measured the diameter of the speaker against it and drill away!


Marquee light:
The marquee light concept was plain simple: two L brackets and a 8W fluorescent tube.
The brackets were bent to hold the lamp pointing to the marquee and fixed by one screw each.


« Last Edit: May 03, 2013, 05:32:45 am by X-fact0r »

                           ** Build thread | Art thread **

DaOld Man

  • Trade Count: (+4)
  • Full Member
  • ***
  • Offline Offline
  • Posts: 5139
  • Last login:December 13, 2023, 12:03:14 am
  • Wheres my coffee?
    • Skenny's Outpost
Re: •• Final Frontier •• My 1st build -- Lots and lots of photos!
« Reply #3 on: February 12, 2013, 10:00:01 am »
Good work. You have some good skills there.
Like what you did with the speaker grills. I think drilling holes look better than the ordinary speaker grills or covers. I may try that next time.
Coin door turned out good, but that last picture doesnt look right. Looks like the coin box is blocked from sliding out of front of cab? Is the frame upside down? Maybe Im looking at it wrong.

X-fact0r

  • Trade Count: (0)
  • Full Member
  • ***
  • Offline Offline
  • Posts: 19
  • Last login:July 21, 2019, 03:04:59 pm
  • Cabinet build in progress!
Re: •• Final Frontier •• My 1st build -- Lots and lots of photos!
« Reply #4 on: February 12, 2013, 06:22:01 pm »
Thank you OldMan!

No the frame is in it's correct position. The coin box has a plastic black drawer that fits inside the metallic housing.

                           ** Build thread | Art thread **

X-fact0r

  • Trade Count: (0)
  • Full Member
  • ***
  • Offline Offline
  • Posts: 19
  • Last login:July 21, 2019, 03:04:59 pm
  • Cabinet build in progress!
Re: •• Final Frontier •• My 1st build -- Lots and lots of photos!
« Reply #5 on: March 09, 2013, 04:15:31 am »
Slow progress in these last weeks...

Trackball:
I got a very cheap Happ 3" Trackball from ebay and after a failed attempt in making a PS2 mouse hack I purchased a OptiWiz interface from GroovyGameGear. The service from RandyT was top notch.
I cut the wiring from an old PSX power supply stripping all the terminals from a Molex connector. The individual wires were then finished with some shrink tube and soldered to the OptiWiz pcb. Fast and easy job ;)


« Last Edit: May 03, 2013, 05:33:18 am by X-fact0r »

                           ** Build thread | Art thread **

Acids

  • Trade Count: (0)
  • Full Member
  • ***
  • Offline Offline
  • Posts: 184
  • Last login:March 13, 2023, 05:50:45 am
  • Bring It.. Smart arse!
Re: •• Final Frontier •• My 1st build -- Lots and lots of photos!
« Reply #6 on: March 09, 2013, 01:58:48 pm »
Its comming along nicely.  Keep up the great wor  :cheers:

X-fact0r

  • Trade Count: (0)
  • Full Member
  • ***
  • Offline Offline
  • Posts: 19
  • Last login:July 21, 2019, 03:04:59 pm
  • Cabinet build in progress!
Re: •• Final Frontier •• My 1st build -- Lots and lots of photos!
« Reply #7 on: March 10, 2013, 06:59:02 pm »
Thanks Acids.
I now came to the most time consuming task which is usually the one that also involves more planning, the...


Control Panel:
In the beginning of the project thread I mentioned that I would build from scratch a CP that would accommodate two 6 button player controls (8 way), an additional two button set (4 way) and a trackball. I also don't want to change the original shape of the cabinet side panels which leaves me with a total of 60cm wide..

With this in mind I carefully started my measurements and sketched a layout in Visio using the component objects shared by other members.
My initial goal was to cut the wood for the base and sides of the CP, and then shaping the top where everything is going to happen.


Good thing I spotted on time a good way to hold the new case to the original CP stand on the cabinet.
There were already some nuts in place so it was just a matter of buying the right screws for the job.


The top panel has started giving me some head-hakes... first trying to fit everything in this given space and second getting everything to look pleasing to the eye and simultaneously functional and ergonomic (jees!)  :dizzy:


I would like to have your help commenting the best location/layout to put the two service buttons in the layout.
Thank you.
« Last Edit: May 03, 2013, 05:35:20 am by X-fact0r »

                           ** Build thread | Art thread **

X-fact0r

  • Trade Count: (0)
  • Full Member
  • ***
  • Offline Offline
  • Posts: 19
  • Last login:July 21, 2019, 03:04:59 pm
  • Cabinet build in progress!
Re: •• Final Frontier •• My 1st build -- Lots and lots of photos!
« Reply #8 on: April 17, 2013, 02:50:00 pm »
Very slow progress in these last weeks due to real life issues...
I managed to complete the routing for t-molding and dusted every bit of saw dust to prep it for a complete paint job.
In the meanwhile I received all my CP parts from Ultimarc and the t-molding from GremlinSolutions. Jees!! ;D

T-molding routing
Got a cheap ROCKLER 3 wing slot cutter 3/32" from ebay but the result was a wider cut than expected... I'll spray some paint inside in the next step to see it I can narrow the slot a little more.


                           ** Build thread | Art thread **

Drnick

  • Trade Count: (+2)
  • Full Member
  • ***
  • Offline Offline
  • Posts: 1641
  • Last login:May 06, 2023, 01:19:48 pm
  • Plodding Through Life
Re: •• Final Frontier •• My 1st build -- Lots and lots of photos!
« Reply #9 on: April 17, 2013, 03:15:25 pm »
Thanks Acids.
I now came to the most time consuming task which is usually the one that also involves more planning, the...


Control Panel:
The top panel has started giving me some head-hakes... first trying to fit everything in this given space and second getting everything to look pleasing to the eye and simultaneously functional and ergonomic (jees!)  :dizzy:


I would like to have your help commenting the best location/layout to put the two service buttons in the layout.
Thank you.


I would move the coin buttons and Admin buttons to the front of the panel and then move the Dedicated 4 way left so that it is up above the P1 Buttons,  It needs to be well out of the way of the Trackball. Alternatively you could lose the Coin buttons entirely and configure up some switches so when you press the coin reject you coin up.

X-fact0r

  • Trade Count: (0)
  • Full Member
  • ***
  • Offline Offline
  • Posts: 19
  • Last login:July 21, 2019, 03:04:59 pm
  • Cabinet build in progress!
Re: •• Final Frontier •• My 1st build -- Lots and lots of photos!
« Reply #10 on: May 12, 2013, 02:48:37 am »
In the meanwhile I received my parts from Ultimarc and made a quick mockup for the CP layout.
You are right Drnick, the 4way joystick gets in the way when you use the trackball and 4/5 times the hand would hit the controller... I will probably replace it by a spineer along the way. I have been thinking lately of moving it to a different location to see if I could use it with a steering wheel insert.


                           ** Build thread | Art thread **

Brian74

  • Trade Count: (0)
  • Full Member
  • ***
  • Offline Offline
  • Posts: 1089
  • Last login:March 10, 2024, 01:55:58 pm
  • Yep... I built that!!
Re: •• Final Frontier •• My 1st build -- Lots and lots of photos!
« Reply #11 on: May 12, 2013, 09:30:57 pm »
Looks like my old cp :D

Sent from my SGH-T989 using Tapatalk 2